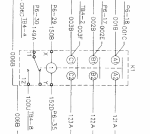
Bought myself an 831A as an occasional small backup generator, and because winter sucks & I wanted a project to dink on. Power hasn't gone out yet (and I don't have a transfer setup installed yet anyway) but it's definitely fulfilling its role as a project very well so far! One of what I figured would be an easy issues was the circuit interrupter indicator a) had a burnt out bulb and b) the lens snapped off the housing when I tried twisting it to make sure someone didn't just have it twisted to blackout. I found a 1/2", 24V LED indicator on Amazon for like $8, and figured that's plenty good enough, I don't need to spend another $50 so I can push it to test.
After consulting the panel wiring diagram in the TM for a good 10 minutes trying to figure out why the old one had 3 wires for a simple light bulb (ohhhhhhhhh, the 3rd wire is the power for when you push to test... duh!) I got reasonably familiar with what was going on there electrically. And between that & checking continuity and voltage on several wires to make sure I had the right ones (further confounded by my current lack of fuel gauge, which is also the indicator's ground point, which I removed as the rocket scientist previous owner had installed a chinesium gauge that wasn't even compatible with the sender) I'm pretty certain I got it wired correctly.
Except... it works... literally backwards. It comes on with the ignition switch, just like the oil pressure light. It stays on once running. It goes out as soon as I close the contactor, and it comes back on if I open it. I even went so far as to be confused at first & thought maybe that was how it was intended to work (it actually makes sense from a light discipline point of view, if you figure that 99.9% of the time you had it running in the field it would have the contactor closed) and started prodding around S5 with my meter, and was unable to find a terminal that had constant +24V with the contactor closed, but no power when the contactor was open. And while I can't swear S5 is working perfectly or wired 100% correctly, I can say I did the troubleshooting steps on the switch earlier (though my contactor wasn't closing at first, long story but it was) and the set does produce power on the lugs.
So I'm really confused by both how exactly that happened, and how to fix it? Unless I rear the wiring diagram screwy, and the wire from S5 is actually what provided power for the push to test feature... in which case I'm really confused since one of the other 2 wires is just a ground (which I'm pretty sure I have wired correctly, since it's an LED and it does illuminate) and the other one runs to the fuel gauge, and I just couldn't imagine why any wires on the fuel gauge would've been dependent on the contactor position?


