• Steel Soldiers now has a few new forums, read more about it at: New Munitions Forums!

  • Microsoft MSN, Live, Hotmail, Outlook email users may not be receiving emails. We are working to resolve this issue. Please add support@steelsoldiers.com to your trusted contacts.

MEP Emergency Jump Starting

smokem joe

Active member
499
68
28
Location
Green OH
I've done this. Real easy to do with a relay. You can even use an extra one from a MEP803 if you have them on hand. 24v DC coil and carries 120V AC through it
 

Light in the Dark

Well-known member
Steel Soldiers Supporter
3,861
6,084
113
Location
MA
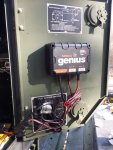
OK, so not reinventing the wheel here... but I got my 802 squared away today. I have some more work to do (I only had 3/4" SS machine screws for mounting, I'll probably get some 1" at the store at some point... and I will probably add a little bit of wire management into the mix to get the bundle away from the lower closing edge), but its at least operational.

Heres what I used:

Charger - https://www.amazon.com/gp/product/B00CBTRMZ4/ref=oh_aui_search_detailpage?ie=UTF8&psc=1

Power Input accessory - https://www.amazon.com/gp/product/B009ANV81S/ref=oh_aui_search_detailpage?ie=UTF8&psc=1


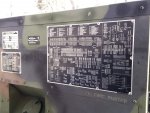
Pretty straight forward. I thought I might be able to tuck the charger up on the wall where the CT is mounted (I think it would have fit dimensionally), but with nuts from the CT mounting brackets made more work than I wanted (making standoffs, etc). So I chose the right operator door, near the dead crank switch. Relocated the schematic to the front of the machine (will add some more sheet metal screws later to utilize all mounting positions).
20181208_122827.jpg 20181208_125526.jpg

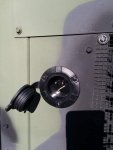
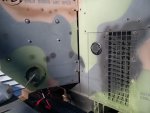
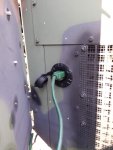
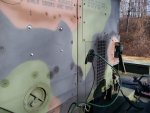
With that room opened up, drill 4 holes and have at it. Used a 2" hole saw to cut the opening for the power entry unit. Wire it all up, and plug in the female side of an extension cord, and we are in business. I always keep my dead crank turned to off, so I won't miss the extension cord hanging out.

Probably not an original idea, but seems to work well here.
20181208_123712.jpg20181208_123701.jpg20181208_130005.jpg20181208_130242.jpg
 

Daybreak

2 Star Admiral
Steel Soldiers Supporter
1,522
771
113
Location
Va
Howdy,

For the schematic mounting... I would suggest you go ahead and drill the holes and use aluminum rivets.
 

Light in the Dark

Well-known member
Steel Soldiers Supporter
3,861
6,084
113
Location
MA
If I replace the sheet metal screws, it will be with SS nut and bolt. I dont own a rivet tool, nor am I looking to. Thanks though.
 

Farmitall

Well-known member
Steel Soldiers Supporter
544
276
63
Location
Eubank, KY
Nice job!!

Have you thought of coating the schematic with something that might protect it from fading/weathering? Something with UV resistance?
 

Light in the Dark

Well-known member
Steel Soldiers Supporter
3,861
6,084
113
Location
MA
Thanks. Hopefully it sparks an idea in others about ways to add devices to their machines in 'unconventional' ways. Maybe down the line I will look into additional protection. Where mine is positioned, the fuel tank end is close to a building, so direct UV is minimized. It had only been in place three minutes when I took the shot :)
 

Farmitall

Well-known member
Steel Soldiers Supporter
544
276
63
Location
Eubank, KY
Thanks. Hopefully it sparks an idea in others about ways to add devices to their machines in 'unconventional' ways. Maybe down the line I will look into additional protection. Where mine is positioned, the fuel tank end is close to a building, so direct UV is minimized. It had only been in place three minutes when I took the shot :)
Good deal. It is however made of aluminum and now that its outside the door its exposed more to the weather, A coat of clear enamel might help preserve the surface. The writing is small and the detail is fine. It couldn't hurt to coat it.
I've used clear enamel on aluminum antennas and it helped keep them clean and shiny for years, particulalry when they were near a salt air environment.
 

Bmxenbrett

Member
602
30
18
Location
NY
Light. That charger allows you to charge the batterys in two banks of 12v each? That looks like a smaller unit to find a place for over the ProMariner.
 

Light in the Dark

Well-known member
Steel Soldiers Supporter
3,861
6,084
113
Location
MA
Good deal. It is however made of aluminum and now that its outside the door its exposed more to the weather, A coat of clear enamel might help preserve the surface. The writing is small and the detail is fine. It couldn't hurt to coat it.
I've used clear enamel on aluminum antennas and it helped keep them clean and shiny for years, particulalry when they were near a salt air environment.
I may look into something for it. Thanks
 

Light in the Dark

Well-known member
Steel Soldiers Supporter
3,861
6,084
113
Location
MA
Light. That charger allows you to charge the batterys in two banks of 12v each? That looks like a smaller unit to find a place for over the ProMariner.
Correct. This company makes models that will provide 12V for up to 4 batteries simultaneously. So this unit supplies up to 4A to each unit, which is fine for standby use. The power entry cord is rated for 13A, so we are under the safe level on it too. And amazon has the **** charger for $85, when I paid $99 on the same page not even 5 days ago!
 

Light in the Dark

Well-known member
Steel Soldiers Supporter
3,861
6,084
113
Location
MA
And the leads for each battery are advertised at 6'L, so plenty of room to run the wires as you want. Each 12V strand has a 15A inline fuse too.
 
Last edited:

m32825

Active member
224
171
43
Location
Central Florida
LITD,

I like your maintenance charging set up. Looks like there are LEDs on the charger, do you leave the door open to check them, or do they need any monitoring? How does the charger handle vibration? Have you done an extended run with one of those chargers mounted?

-- Carl
 

Demoh

Member
217
26
18
Location
St Pete, FL
I have a few of those exact chargers (they have some high order minimums as a reseller) and I like them. I got tired of burning up battery minders of similar size.

Once I get around to getting my primary gen back from my brother's in Panama City Ill be mounting my noco inside very similar to yours.

Although I like Zed's idea better. rofl
 

Light in the Dark

Well-known member
Steel Soldiers Supporter
3,861
6,084
113
Location
MA
LITD,

I like your maintenance charging set up. Looks like there are LEDs on the charger, do you leave the door open to check them, or do they need any monitoring? How does the charger handle vibration? Have you done an extended run with one of those chargers mounted?

-- Carl
I only mounted it up over this weekend. I am probably going to reinforce the backside with some flat stock, to spread the load even more. I hate plastic things, especially when they are for mounting. Might also put a couple L brackets under the bottom of this device, bolted through the door, just to help shoulder the load. It fits nicely in the void above the RH battery and oil filter area.

I have my set closed up, with only the extension cord on the side present. If I want to check it, Ill just open the door (enough slack in the battery leads and the line back to power to open the door to full lock). I am not sure about vibration, but I think products of these kinds are made for marine operations, so they should be built to last. They are IP67 or 68 to boot too.
 

Light in the Dark

Well-known member
Steel Soldiers Supporter
3,861
6,084
113
Location
MA
Absolutely. I just wanted to get something in place before another winter fully had me by the balls.
 
Top
AdBlock Detected

We get it, advertisements are annoying!

Sure, ad-blocking software does a great job at blocking ads, but it also blocks useful features of our website like our supporting vendors. Their ads help keep Steel Soldiers going. Please consider disabling your ad blockers for the site. Thanks!

I've Disabled AdBlock
No Thanks