Haoleb
Member
- 197
- 11
- 18
- Location
- Raymond, Maine
So let me start out by saying that the objective here was a small heater I can plug in to keep the engine in my 803 warm(ish) when I know it is going to be cold and a good likely hood of power outage. I feel pretty comfortable knowing that the genset will start in cold weather but I do not want to start it when it is very cold if I don't have to. So the options for this are... any number of stick on or magnetic block/oil pan heaters.. but those things all seem pretty cheap and risk of a fire. So I wanted to come up with a better option.
Here is what I came up with. I purchased a 350watt strip heater that comes with the optional finned heat sink. Cost was about $35. I chose this because I believe that 350 watts is about right for an enclosure this size in 0 degree weather and I did not want to have any higher of a wattage than I need because energy is not free!
I originally planned to mount the strip under the engine or somewhere else that is away from anything that might melt or be flammable... but after closer inspection I did not really find any option I liked. But then there- right in a spot away from anything that might burn was the document box on the door. Perfect! I can mount the heater inside of this and it will be completely enclosed in a metal box (fire hazard reasons) and there will be no chance of melting battery cables or hoses... etc. Of course a heater by itself in this box would not do much and it would still get very hot so.. simple.. Just add a fan and make it forced air heater! Because of my job where I repair and sometimes take apart and scrap all kinds of machines I have collected all sorts of spare parts I brought home to use again someday so a lot of them came in to use for this project. The only piece I had to buy was the heater.
Lets begin... First step was I removed the document box off the door so it could be modified.
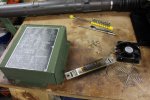
Next step was I removed the schematic diagram by drilling out the rivets. Have not found a place to reattach this yet but for now it sits in my binder with the TM
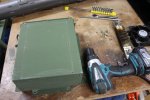
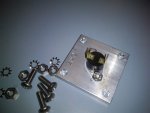
Next issue is the heater. I wanted to put it inside of the box but it was just a little too big.. Well the angle grinder made pretty quick work of that and still left me fully functional mounting holes.
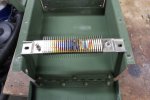
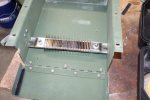
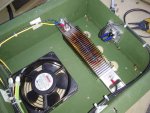
So now I proceed to cut a hole for the fan, mount the fan and fan grill with 3/16" rivets. Then I mounted the heater strip with 1/4-20 bolts so that it sits right about in the middle of the box. I also drilled 3 holes in the top to allow air to exhaust out of the box. The fan sucks air into the box where it passes over the heater and out the holes toward the engine. I kind of forgot to take pictures through this part but I also added in a small switch that is actually a circuit breaker rated for 3A (trip around 4.25) with the 350 watt heater and the 15 watt fan this is perfect for circuit protection.
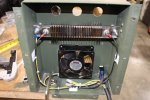
I used about a 6 foot piece of 14AWG SJ cord for the power cord. I have attached it and wired it up in the picture here. The plan is to pass it right through the door and put a plug on it.
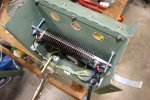
Now its got real. I just drilled a hole right into the door. No going back now!
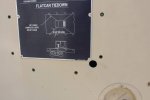
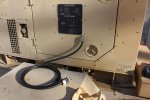
Heater fully installed and wired up! I installed a 90 degree cord grip through the door and put a plug on the other end so I can just plug it in when needed.
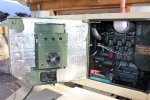
You will notice I have also added some sound insulation to the doors as well. The insulation had a metal mylar type surface on it but I added aluminum tape to the surface to help it reflect additional heat. No issues with this foam and the heat even running 12 hours straight.
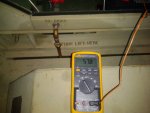
So I plugged it in to see how it would work! Outside temp is about 10 degrees but in the sun. I have the thermocouple attached to the wiring harness right above the fuel cutoff solenoid. This is the starting internal air temp. I also put some tape over the air intake vents on the front and a blanket over the radiator vent on the top for this experiment.
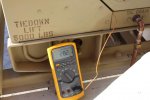
1 hour after turning on the heater. Inside air temp up to over 50 degrees. The heater box is barely warm to the touch. The fan definitely keeps that heater compartment at a cool temperature.
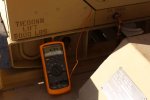
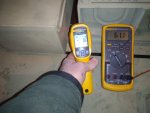
After around 2.5 hours up to just over 60 degrees. The other thermometer is measuring the surface temperature of the outside of the generator.
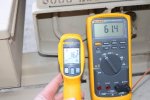
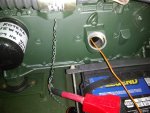
I still have it plugged in. I am going to let it run overnight as we are supposed to get below zero tonight and then I will measure the inside air temp in the morning. I would assume by then that the engine will be at the same temperature but I am also going to dip the thermo couple wire into the oil and measure that temperature to see what it is reading. Obviously this is not as efficient as something like a true block heater installed into the coolant jacket but so far it looks pretty promising for my intended uses.
I have calculated at my energy cost of $0.07/KWH it will cost me only about 60 cents to run it for a 24 hour period. Granted that is more than I want to spend to just let it run for 3 months straight when we get our coldest temps but certainly do-able for keeping this running on the days I know it will be very cold.
For those who are interested, The heater strip is a Tempco CSF00519. The fan is a Mechatronics UF12A12-BTHR 120mm fan. Will report back tomorrow with my findings in the morning.
Here is what I came up with. I purchased a 350watt strip heater that comes with the optional finned heat sink. Cost was about $35. I chose this because I believe that 350 watts is about right for an enclosure this size in 0 degree weather and I did not want to have any higher of a wattage than I need because energy is not free!
I originally planned to mount the strip under the engine or somewhere else that is away from anything that might melt or be flammable... but after closer inspection I did not really find any option I liked. But then there- right in a spot away from anything that might burn was the document box on the door. Perfect! I can mount the heater inside of this and it will be completely enclosed in a metal box (fire hazard reasons) and there will be no chance of melting battery cables or hoses... etc. Of course a heater by itself in this box would not do much and it would still get very hot so.. simple.. Just add a fan and make it forced air heater! Because of my job where I repair and sometimes take apart and scrap all kinds of machines I have collected all sorts of spare parts I brought home to use again someday so a lot of them came in to use for this project. The only piece I had to buy was the heater.
Lets begin... First step was I removed the document box off the door so it could be modified.

Next step was I removed the schematic diagram by drilling out the rivets. Have not found a place to reattach this yet but for now it sits in my binder with the TM

Next issue is the heater. I wanted to put it inside of the box but it was just a little too big.. Well the angle grinder made pretty quick work of that and still left me fully functional mounting holes.


So now I proceed to cut a hole for the fan, mount the fan and fan grill with 3/16" rivets. Then I mounted the heater strip with 1/4-20 bolts so that it sits right about in the middle of the box. I also drilled 3 holes in the top to allow air to exhaust out of the box. The fan sucks air into the box where it passes over the heater and out the holes toward the engine. I kind of forgot to take pictures through this part but I also added in a small switch that is actually a circuit breaker rated for 3A (trip around 4.25) with the 350 watt heater and the 15 watt fan this is perfect for circuit protection.

I used about a 6 foot piece of 14AWG SJ cord for the power cord. I have attached it and wired it up in the picture here. The plan is to pass it right through the door and put a plug on it.

Now its got real. I just drilled a hole right into the door. No going back now!

Heater fully installed and wired up! I installed a 90 degree cord grip through the door and put a plug on the other end so I can just plug it in when needed.

You will notice I have also added some sound insulation to the doors as well. The insulation had a metal mylar type surface on it but I added aluminum tape to the surface to help it reflect additional heat. No issues with this foam and the heat even running 12 hours straight.

So I plugged it in to see how it would work! Outside temp is about 10 degrees but in the sun. I have the thermocouple attached to the wiring harness right above the fuel cutoff solenoid. This is the starting internal air temp. I also put some tape over the air intake vents on the front and a blanket over the radiator vent on the top for this experiment.

1 hour after turning on the heater. Inside air temp up to over 50 degrees. The heater box is barely warm to the touch. The fan definitely keeps that heater compartment at a cool temperature.

After around 2.5 hours up to just over 60 degrees. The other thermometer is measuring the surface temperature of the outside of the generator.

I still have it plugged in. I am going to let it run overnight as we are supposed to get below zero tonight and then I will measure the inside air temp in the morning. I would assume by then that the engine will be at the same temperature but I am also going to dip the thermo couple wire into the oil and measure that temperature to see what it is reading. Obviously this is not as efficient as something like a true block heater installed into the coolant jacket but so far it looks pretty promising for my intended uses.
I have calculated at my energy cost of $0.07/KWH it will cost me only about 60 cents to run it for a 24 hour period. Granted that is more than I want to spend to just let it run for 3 months straight when we get our coldest temps but certainly do-able for keeping this running on the days I know it will be very cold.
For those who are interested, The heater strip is a Tempco CSF00519. The fan is a Mechatronics UF12A12-BTHR 120mm fan. Will report back tomorrow with my findings in the morning.
Last edited:


