• Steel Soldiers now has a few new forums, read more about it at: New Munitions Forums!

  • Microsoft MSN, Live, Hotmail, Outlook email users may not be receiving emails. We are working to resolve this issue. Please add support@steelsoldiers.com to your trusted contacts.

My M715 'rework' project

M813rc

Well-known member
Steel Soldiers Supporter
4,235
3,317
113
Location
Near Austin, Texas
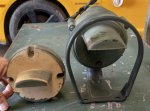
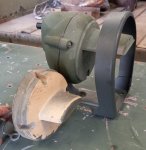
On the topic of LEDs, the answer to why I used an LED blackout light also came down to size, but in this case, the size of the fixture itself.

A previous owner had done away with the original blackout light and the holes in the hood where it had been mounted.
Early on, I had intended to put an original style light on the bumper or in the grill guard, but when it came to figuring out how/where, the light and it's guard were just too big to fit without looking really Mickey Mouse. Even the light without the guard was rather big.

I had a couple of LED lights I'd picked up somewhere, and these are quite compact. And, as it turned out, bright enough to actually be used.
I had an NOS black one and a rather scruffy green one with flaky tan paint. The green/tan one had a sturdier base, the shroud didn't stick out as far forward, and it was the brightest, so it got the nod.

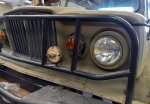
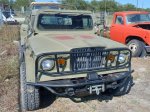
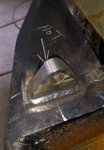
I welded a tab to the grill guard and tucked the light back where branches, etc., wouldn't catch on it. It is wired to it's own switch on the dash.
Do I really need a working blackout light? No, but I figured if it was there (which it needed to be since almost all MVs have them), it might as well get wired up.
The row of green dots on the brush guard are camera reflections of the six LEDs in the blackout light.

Cheers
107.jpg 108.jpg 109.jpg 110.jpg 117.jpg
 
Last edited:
M813rc

Well-known member
Steel Soldiers Supporter
4,235
3,317
113
Location
Near Austin, Texas
Work today was mostly on the brakes, since the truck was consistently pulling left on braking. Adjusting really didn't help much, so we finally decided that there must be a restriction in the right front brake line. Both the steel line and the flexible line to the wheel were replaced.
We also realized that the master cylinder that came on the truck was for front disc brakes, and the M715 has drums all around, so it was sending the wrong amount of fluid forward. It was replaced with one for drum brakes (Wagoneer part, I think).
After that, with a little testing and adjusting, the truck stops in a straight line like its supposed to.
We probably took 5,000 miles off the life of the tires skidding them during those tests! :rolleyes:

Two things you just can't scrimp on with an MV - brakes and tires.

I also added the slave port today. Somewhere, I have seen the MWO that gives exact measurements to locate the port, but I couldn't find that so I looked at a bunch of pictures and just put it where I thought was right.
While the port is a stock item for many M715s, it sure was hard for me to take a 2" hole saw to that right fender! But I did it, and the receptacle was mounted and wired up.

I always wondered at the port being on the right fender when the stock batteries were between the seats in the cab, but since both my batteries are in the engine compartment, that location was actually ideal. I wanted to use it as a power port as well as for jump starting, so it needed to be wired directly to the batteries.
Perhaps on the stock trucks, the slave went straight to the starter rather than the batteries, that location would make more sense then. I'll have to look into that in the manuals.

In the second picture, that is the ground cable peeking over the fender. I cleaned up a body bolt that is right under where it is, and attached it there. Nothing in the area where the cables are moves, the hinge action is all either well ahead or above them.
The hot wire is attached to the positive terminal on the rear battery, but since the two batteries are directly connected, it effectively goes to both.

Cheers

111.jpg 112.jpg 113.jpg 115.jpg 116.jpg
 
Last edited:

M813rc

Well-known member
Steel Soldiers Supporter
4,235
3,317
113
Location
Near Austin, Texas
I added some more pictures and a little text to posts 41 and 42 above.

Meanwhile, I have been mostly dabbling with cleaning up wiring. Time consuming, but not much to show picture-wise.

My major "to do" pictures are now mostly annotated with "done". On the grill guard, I found that the civilian radiator grill added by a previous owner is actually quite heavy and stout and doesn't need any further protection there, so no extra bars needed. Makes me wonder why they didn't put them on M715s to start with. The grill picture is from early on, still has the pie pans and hood ornament on there.
Still need to add the winch.

Cheers

118.jpg 119.jpg 120.jpg
 

Mullaney

Well-known member
Steel Soldiers Supporter
Supporting Vendor
7,771
19,879
113
Location
Charlotte NC
I added some more pictures and a little text to posts 41 and 42 above.

Meanwhile, I have been mostly dabbling with cleaning up wiring. Time consuming, but not much to show picture-wise.

My major "to do" pictures are now mostly annotated with "done". On the grill guard, I found that the civilian radiator grill added by a previous owner is actually quite heavy and stout and doesn't need any further protection there, so no extra bars needed. Makes me wonder why they didn't put them on M715s to start with. The grill picture is from early on, still has the pie pans and hood ornament on there.
Still need to add the winch.

Cheers

View attachment 904861 View attachment 904862 View attachment 904864
.
You are looking good!
Maybe a couple more pictures with your updates would be nice to see...

.
 

M813rc

Well-known member
Steel Soldiers Supporter
4,235
3,317
113
Location
Near Austin, Texas
.
You are looking good!
Maybe a couple more pictures with your updates would be nice to see...
Thanks!

More pictures?? I've attached 120 so far... :p

Actually, I have been trying NOT to overload the posts with too many pictures, I will gladly add more. If there is anything specific you'd like to see, I probably already took pictures of it, or I can do so, and I'd be glad to post them.
I tend to take a lot of photos as I go along to help me keep track of where I am, since I have a short-term memory like a sieve. But some I miss when I am elbow deep in grease, or brake fluid, or... Sometimes I'm just too hot and forget to do so.

Lately I've just been tracing wires, fixing some and eliminating others. There apparently was a lot of electrical stuff in the truck at some point, and when it was removed a lot of wire got cut and stuffed behind the dash. Quite a few I've found were still hot! I probably should have just ripped all of it out in the beginning and started over, might have taken less time.

I tend to work intensely for a day or two here and there, then get nothing done for a day or three; it all depends on when I can impose on Jason's shop space between his paying customers. He is very generous in letting me do so, and allowing use of all his cool specialized tools.

Cheers
 

67Beast

Well-known member
983
500
93
Location
Silver Lake Sand Dunes MI.
Work today was mostly on the brakes, since the truck was consistently pulling left on braking. Adjusting really didn't help much, so we finally decided that there must be a restriction in the right front brake line. Both the steel line and the flexible line to the wheel were replaced.
We also realized that the master cylinder that came on the truck was for front disc brakes, and the M715 has drums all around, so it was sending the wrong amount of fluid forward. It was replaced with one for drum brakes (Wagoneer part, I think).
After that, with a little testing and adjusting, the truck stops in a straight line like its supposed to.
We probably took 5,000 miles off the life of the tires skidding them during those tests! :rolleyes:

Two things you just can't scrimp on with an MV - brakes and tires.

I also added the slave port today. Somewhere, I have seen the MWO that gives exact measurements to locate the port, but I couldn't find that so I looked at a bunch of pictures and just put it where I thought was right.
While the port is a stock item for many M715s, it sure was hard for me to take a 2" hole saw to that right fender! But I did it, and the receptacle was mounted and wired up.

I always wondered at the port being on the right fender when the stock batteries were between the seats in the cab, but since both my batteries are in the engine compartment, that location was actually ideal. I wanted to use it as a power port as well as for jump starting, so it needed to be wired directly to the batteries.
Perhaps on the stock trucks, the slave went straight to the starter rather than the batteries, that location would make more sense then. I'll have to look into that in the manuals.

In the second picture, that is the ground cable peeking over the fender. I cleaned up a body bolt that is right under where it is, and attached it there. Nothing in the area where the cables are moves, the hinge action is all either well ahead or above them.
The hot wire is attached to the positive terminal on the rear battery, but since the two batteries are directly connected, it effectively goes to both.

Cheers

View attachment 904330 View attachment 904331 View attachment 904332 View attachment 904858 View attachment 904859

Yes, on the stock setup, the power goes to the start switch on the trans hump. So that location works well and doesn't need a ton of cable to reach it. I also felt that pain when cutting into a perfectly good fender to add them to all my M715 and M725's. Here was a video from when I did the last one on the most recent M725 restoration.
 

M813rc

Well-known member
Steel Soldiers Supporter
4,235
3,317
113
Location
Near Austin, Texas
Great video, thanks. :beer:
And looks like a lovely M725.

I'll have to measure mine to see how close I got to the proper location. ;-) (Edit - I measured, I put it just under 1/2" further forward than the book says to).

That first grinding squeal when your hole saw tears into the fender is what made me grimace doing mine. I doubt it will be any easier when I do the other trucks.

My slave port was an NOS one for an M151A2 (I think), so the cables were much shorter than proper M715 ones. (I looked up the NSN on the package, but it was a while back and may have been a different one, I have several in my stash).
The ground cable was only about 8-9" long, so that body bolt was my best option for a good ground. This M715 doesn't have the floor starter anymore as it had been done away with by previous owner and replaced with a simple dash ignition switch, so connecting there wasn't an option. I also wanted to use the port as a power source for some lights and such that I have that have slave plugs on them, so I went straight to the batteries with the positive cable.

67Beast, when you got to the part of dropping the second nut in the video, I literally laughed out loud, and that inspired me to tell the real story of my installation.

What I wrote in post #42 was a nice simple " I also added the slave port today ". It happened more like this -

(To set the mood, it is about 105* in the shop, and several large fans are roaring as they try to push the air around. The fan noise tends to grate on my nerves after a while)

After me putting off cutting the hole repeatedly, Jason finally grinned and said "You'll have to do it sometime!" and thrust a drill with the hole saw already installed into my hand.
I measured and marked for my holes, dinked them with the spring punch, and then just attacked. The sound of the hole saw's initial tear into the fender was pretty awful to hear, but it was now gashed, so...onward. The big hole was drilled and cleaned up, then the bolt holes were drilled, all good so far, no drama.

That's when the real fun started. The fender sheet metal at that location goes up, curls over, and then back down, making an inner lip that goes a couple of inches down. The outer fender is sloped, so the bolts going through are slanted down.
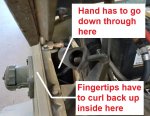
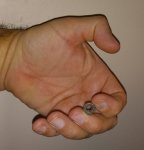
The top two bolts come through behind that lip, and you have to get the nuts and washers on back there in the blind, and with little room to work, that hood spring mechanism seriously restricting how you can get your hand in there. It can only be done by curling your fingers in from above, while trying to hold the small washer or nut between your fingertips. Your thumb can't be brought into play because of the angle.
I was using lock-nuts (nylocks) on this, which further complicate things, they can only be properly put on one way.
This entails getting a washer on with your finger tips, getting the %$## thing to stay on the downward slanted bolt while you try to hold the nut the right way around in your sweaty fingertips and maneuver it onto the bolt, which they seemed to be quite unwilling to cooperate with.
And you have to remember, the whole time you are doing this, the slave cables are doing their best to shove the port back out of that hole in the fender, it's like trying to stuff a spring, or a python, into a small box.
Of course in short order, I hear the "tink" of the washer as it drops into the murky depths of the fender. I had optimistically brought over four bolts, nuts, and washers to do this installation, I was waaay off the mark.
So I finally manage to trap the washer, and almost get the nut started, then "tink", there goes the nut. Naughty words ensue.
Repeat the process until several washers and all four nuts are down in the fender, and none are yet started. Many naughty words. Loudly.
So, over again to the bolt bin, and back I come with a whole handful of the needed items.
About this time, Jason comes over and (with a little eye roll) paternally says "Here, let me try". Shortly thereafter, I hear "tink", a quiet naughty word, then "tink" followed by a whole string of invective as Jason strides off, hands in the air, back to what he was doing previously.
With a half dozen washers, and maybe twice that many nuts, down in the fender, I eventually got four onto the slave port.
An extendable magnet probe fished out all (as far as I know) of the dropped hardware from the fender well, with the added benefit of getting the drill shavings too.

So, some hours later but still remembering all of the above, sitting in my quiet air-conditioned home office, I pull up Steel Soldiers on the computer and write " I also added the slave port today ".

Cheers

PS - I have yet again modified my meme for this situation.
- and I added pictures to give a better idea of where the nuts and washers have to go, and how they have to be held to get them in there

121.jpg 122.jpg 123 How you have to hold the nut.jpg
 
Last edited:
67Beast

Well-known member
983
500
93
Location
Silver Lake Sand Dunes MI.
Great video, thanks. :beer:
And looks like a lovely M725.

I'll have to measure mine to see how close I got to the proper location. ;-)
That first grinding squeal when your hole saw tears into the fender is what made me grimace doing mine. I doubt it will be any easier when I do the other trucks.

My slave port was an NOS one for, I believe, an M151, so the cables were much shorter (I looked up the NSN on the package, but it was a while back and may have been a different one, I have several in my stash). The ground was only about 8-9" long, so that body bolt was my best option for a good ground. This M715 doesn't have the floor starter anymore as it had been done away with by previous owner and replaced with a simple dash ignition switch, so connecting there wasn't an option. I also wanted to use the port as a power source for some lights and such that I have that have slave plugs on them, so straight to the batteries with the positive cable.

When you got to the part of dropping the second nut in the video, I literally laughed out loud, and that inspired me to tell the real story of my installation.

What I wrote in post #42 was a nice simple " I also added the slave port today ". It happened more like this -

(To set the mood, it is about 105* in the shop, and several large fans are roaring as they try to push the air around. The fan noise tends to grate on my nerves after a while)

After me putting off cutting the hole repeatedly, Jason finally grinned and said "You'll have to do it sometime!" and thrust a drill with the hole saw already installed into my hand.
I measured and marked for my holes, dinked them with the spring punch, and then just attacked. The sound of the hole saw's initial tear into the fender was pretty awful to hear, but it was now gashed, so...onward. The big hole was drilled and cleaned up, then the bolt holes were drilled, all good so far, no drama.

That's when the real fun started. The fender sheet metal at that location goes up, curls over, and then back down, making an inner lip that goes a couple of inches down. The outer fender is slanted, so the bolts going through are slanted down.
The top two bolts come through behind that lip, and you have to get the nuts and washers on back there in the blind, and with little room to work, that hood spring mechanism seriously restricting how you can get your hand in there.
I was using lock-nuts (nylocks) on this, so to further complicate things, they can only be properly put on one way.
So, it entails getting a washer on with your finger tips, getting the %$## thing to stay on the downward slanted bolt while you try to hold the nut the right way around in your sweaty fingertips and maneuver it onto the bolt, which they seemed to be quite unwilling to cooperate with.
And you have to remember, the whole time you are doing this, the slave cables are doing their best to shove the port back out of that hole in the fender, it's like trying to stuff a spring, or a python, into a small box.
Of course in short order, I hear the "tink" of the washer as it drops into the murky depths of the fender. I had optimistically brought over four bolts, nuts, and washers to do this installation, I was waaay off the mark.
So I finally manage to trap the washer, and almost get the nut started, then "tink", there goes the nut. Naughty words ensue.
Repeat the process until several washers and all four nuts are down in the fender, and none are yet started. Many naughty words. Loudly.
So, over again to the bolt bin, and back I come with a whole handful of the needed items.
About this time, Jason comes over and (with a little eye roll) paternally says "Here, let me try". Shortly thereafter, I hear "tink", a quiet naughty word, then "tink" followed by a whole string of invective as Jason strides off, hands in the air, back to what he was doing previously.
With a half dozen washers, and maybe twice that many nuts, down in the fender, I eventually got four onto the slave port.
An extendable magnet probe fished out all (as far as I know) of the dropped hardware from the fender well, with the added benefit of getting the drill shavings too.

So, some hours later but still remembering all of the above, sitting in my quiet air-conditioned home office, I pull up Steel Soldiers on the computer and write " I also added the slave port today ".

Cheers

PS - I have yet again modified my meme for this situation

View attachment 905001
Yes the joy of getting your fingers just right to get the nut started on the threads. It was even more complicated by trying to not trip over the tripod while filming or blocking everything with your back as you try and do a limbo to fit your hand and arms into the small space. Your story is spot on!
 

M813rc

Well-known member
Steel Soldiers Supporter
4,235
3,317
113
Location
Near Austin, Texas
Slow progress lately on the M715, as I've been away quite a bit in the last couple of weeks.

I did make a run to the "big city" of Marble Falls because they have a Harbor Freight store. They were offering the $379 12,000 lb electric winch I was interested in for $120 off if you were a club member, and membership was $29. Pretty easy to do that math and realize club membership was not a bad idea at all! Like everything in Harbor Freight, it would have eventually come up for sale to the great unwashed masses at that price anyway, but I wanted to get this done sooner rather than later.
Since it is on an MV, I removed all the brand logos, etc. from the winch. They were stickers or glued on with double sided tape, so an easy task.

So, the winch was the last item on my original "things I want to do" diagram. :D

The original power steering pump had started leaking significantly, so it was replaced. That was a job that would generate a video with a soundtrack consisting of mostly beeps, so the less said the better.

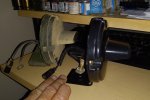
My M715 came with a non-standard light (at least I haven't seen evidence of one on any other M715) above the instrument cluster.
It has a certain archaic attractiveness to it with its little rotating shroud, and eliminating it and its hole from the dash panel would entail a lot of work, so I decided to keep it.
There didn't seem to be any way of turning it on, and I had tested the bulb and found it good. During my delving into the colour-blind drunken-spider-wanderings wiring behind the dash, I traced the wire for the light through the maze and out through a hole in the firewall and found the end just dangling, connected to nothing. That explains why it didn't work!
So I connected the wire to a switch on the dash and now it does work.

I had also traced the wires to the backup spotlight on the back of the truck, replaced the cheap rubbish plastic switch for it on the dash with a good metal one, and had power all the way to the light and found the bulb for that one was bad. The rubber housing had also become very hard, so even with my usual trick of sitting it out in the sun to get really hot, thus usually soft, getting the bulb out without damaging the rubber housing was going to be unlikely.
While at HF buying the winch, I looked for a replacement bulb and found they were $11, however an entire new light was $9! So the truck got a new light, which works nicely.
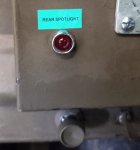
There was a nice red warning light mounted in the dash for some purpose long forgotten, and since it wasn't connected to anything, I hooked it to the backup light circuit so it is on when the rear light is on. Hopefully that will help me not drive around negligently shining white light to the rear.
I hadn't zip-tied the wiring back out of the way when the picture was taken, it wasn't left hanging out like that. ;)

I don't think I mentioned it previously, but I moved the mudflaps for all four wheels out a bit to cover the tread of the Humvee tires when I put them on.
I was told by the manufacturer that the backspacing for those rims would have all the Humvee tire tread inside the wheel well, however that proved to be untrue, they protrude just under an inch. Annoying, but not enough to really worry about, it's more obvious in pictures than it is to the eye.
I really need to wash the tire mounting soap off the wheels, after the rain it looks very grotty!

Cheers

124.jpg 125.jpg 126.jpg 127.jpg 128.jpg 129.jpg 130.jpg
 
Last edited:

M813rc

Well-known member
Steel Soldiers Supporter
4,235
3,317
113
Location
Near Austin, Texas
..........
I'll have to measure mine [slave port] to see how close I got to the proper location. ;-)
I measured, I was off the official MWO location by 1/2", so a tad further forward.
I can live with that, and as my dad used to say "No one would notice that from a trotting horse". :D

Cheers
 

M813rc

Well-known member
Steel Soldiers Supporter
4,235
3,317
113
Location
Near Austin, Texas
One thing I should have mentioned earlier in the front bumper remount post-
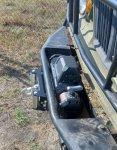
In an early post I had noted that the winch well in the bumper held water when it rained. Turned out this was because the bumper itself was tilted back a bit. Once we pulled the bumper off and remounted it 3/4" forward and level (and no longer loose) the winch well bottom was also now level and water runs right off the front like it should, no more pooling.

Cheers
 

Mullaney

Well-known member
Steel Soldiers Supporter
Supporting Vendor
7,771
19,879
113
Location
Charlotte NC
One thing I should have mentioned earlier in the front bumper remount post-
In an early post I had noted that the winch well in the bumper held water when it rained. Turned out this was because the bumper itself was tilted back a bit. Once we pulled the bumper off and remounted it 3/4" forward and level (and no longer loose) the winch well bottom was also now level and water runs right off the front like it should, no more pooling.

Cheers
.
Wonder if that "tilted back" was when somebody bumped or pushed a tree or a truck...?
Definitely good that you were able to get it level.

Do you think a couple of small holes drilled in the pan would be useful - just in case?
 

M813rc

Well-known member
Steel Soldiers Supporter
4,235
3,317
113
Location
Near Austin, Texas
It was because of the lousy way it was mounted, with five bolts smaller than the six holes. If you pushed the truck back by hand using the grill guard, it would move. When it had no engine, it got pushed a lot!
The bumper was also mounted so far back that it was hung up in the bodywork, which is why we moved it forward 3/4".
Bolted back down with eight larger Grade 8 bolts, including two on top of the frame, it doesn't move now!

I'll check it again and see if it's holding any water, if so, I can drill a couple of drain holes at the back.

Take a look at post #23, there are some pictures and more detail there. ;)

Cheers
 

M813rc

Well-known member
Steel Soldiers Supporter
4,235
3,317
113
Location
Near Austin, Texas
I added a comparison picture to the post where I talked about the 24v versus omnivolt clearance lights. For those who are long past that post, I'll add it again here.

The pictures also demonstrates well why you can't trust digital pictures to judge colour accurately. Is that truck OD green, or OD brown? Both, apparently! ;)

Cheers

131 Clearance Lights comparison.jpg
 

Mullaney

Well-known member
Steel Soldiers Supporter
Supporting Vendor
7,771
19,879
113
Location
Charlotte NC
I added a comparison picture to the post where I talked about the 24v versus omnivolt clearance lights. For those who are long past that post, I'll add it again here.

The pictures also demonstrates well why you can't trust digital pictures to judge colour accurately. Is that truck OD green, or OD brown? Both, apparently! ;)

Cheers

View attachment 907003
.
Big difference in how your phone's camera saw the light.
These phones are great, but they don't hesitate to adjust what it is seeing...
 

M813rc

Well-known member
Steel Soldiers Supporter
4,235
3,317
113
Location
Near Austin, Texas
I wanted to add tow-bar points to the front of the M715, either for breakdowns or when I want to take more vehicles to an event than I have drivers for.

Having tried out various stock bolt-on parts from M35, M813, and other MVs, I found that none of them would fit properly on the M715 bumper. We decided that welding something on was the only viable option. The flat plate on the bumper is all 3/8" steel, so plenty strong for the task.
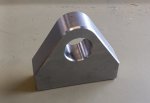
Jason came up with a set of weld-on brackets that matched the dimensions of the M35 mounts perfectly in thickness and pin hole diameter.

My initial thought was to cut off the D-rings from the front on either side of the winch and put the brackets there, but on looking closer at these spots, the plate is actually angled out a bit toward the sides. While the tow bar feet can swivel to accommodate that, I felt that the angle would put an unnecessary side load on everything. Probably not enough to ever break them, but why take a chance?
I decided that on top, directly over the frame rails, was the best place to put them, even if not the most aesthetically pleasing.

That spot was duly cleaned of all paint and Jason welded the brackets on. He is very experienced at welding, and his work is pretty and strong.
Anything I weld looks like I stuck stuff together with chewed bubblegum... :?

Once everything had cooled off, I gave them a good coat of primer, since, wonder of wonders, we have actually been getting some rain.

Speaking of rain - my parking spot for the M715 behind Jason's shop is clay soil, so after it being dry here so long, that area had a good layer of dusty stuff that turns into slick slime when it gets wet, and the truck sitting on it sinks in a bit. Enough that when I tried to pull out to take the truck into the shop, it just spun the rear tires. So, lock the Selectro hubs and test the 4-wheel drive! It idled out with no problem. :)

Next big step will be to get her over to Larry the Sandblaster to clean up the bed. Then, paint!

Cheers

132.jpg 133.jpg 134.jpg 135.jpg 136.jpg 137.jpg
 
Last edited:
Top
AdBlock Detected

We get it, advertisements are annoying!

Sure, ad-blocking software does a great job at blocking ads, but it also blocks useful features of our website like our supporting vendors. Their ads help keep Steel Soldiers going. Please consider disabling your ad blockers for the site. Thanks!

I've Disabled AdBlock
No Thanks