• Steel Soldiers now has a few new forums, read more about it at: New Munitions Forums!

  • Microsoft MSN, Live, Hotmail, Outlook email users may not be receiving emails. We are working to resolve this issue. Please add support@steelsoldiers.com to your trusted contacts.

My new M1009

00888

Member
40
1
8
Location
Town of Niagara NY
I wanted to get a truck to drive while I painted My M109a3 in the spring. I bought this M1009 3 weeks ago from a nice couple in Michigan and started working on it right away. The body of the truck is almost perfect with just a couple little blips here and there. Here is the truck when I bought it on 12/13/2015.
M1009 001.jpgM1009 003.jpgM1009 004.jpgM1009 009.jpgM1009 005.jpg
The first order of business was to get her home. The weather couldn't have been any better for the trip so I decided to swing through Indiana and get an M105a2 trailer from a fellow SS member. The Trip to the DMV in Michigan put us way behind but it was worth it.
20151212_155411.jpg12359893_1026432450728271_1758491597768724345_n.jpg
I know the truck is a little light to be pulling the M105 but it made it without any problems. I was way under powered!
 
Last edited:

00888

Member
40
1
8
Location
Town of Niagara NY
Tony, a friend of mine that has an M1009 supplied a ton of parts for the truck. Again it was in great shape but a 30 year old truck needs little things. This is the EBay radio tray Tony ordered for me before I even made the deal for the truck along with the spare wheel from Kublos and misc other parts I ordered.
20151213_200721.jpg20151213_200744.jpg20151215_121143.jpg20151219_010253.jpg
 

00888

Member
40
1
8
Location
Town of Niagara NY
I wanted to go with an MP theme on the truck but didn't want to put a red and blue bar on it. I did settle for an amber rotator bar to fit the period. Since it sits on top of the truck I also decided to put the Solargizer on top to keep it out in the sun as much as possible. The truck came with an antenna in the middle of the roof that I didn't want so that was a great place to run all the cables in to the cab.
20151218_220507.jpg20151219_183234.jpg20151224_224434.jpg
 

00888

Member
40
1
8
Location
Town of Niagara NY
The rear plate was attached using a standard GM full size plate bracket that went over the fuel filler. It allows me to flip the plate up during parades or car shows.
20151218_220525.jpg20151219_191411.jpg20151219_191423.jpg
 

00888

Member
40
1
8
Location
Town of Niagara NY
This is just some of the parts I got for the project. I have spent a lot of time sandblasting and painting. The sandblaster booth was one of the best items I got and has made these projects so much easier. The rear got a nice M13 Decon kit, The antennas are both MX-6707 bases. The stock jack and tools have all been restored to new.
20151220_202819.jpg20151222_072303.jpg20151222_072724.jpg20151222_072649.jpg20151222_075443.jpg
 

00888

Member
40
1
8
Location
Town of Niagara NY
The fun now begins. I used a DA sander with 180 grit to prep the surface of the truck and take off all the stencils. Some of the spots needed a little courser paper but I finished completely with 180. All the door windows were removed so I could paint the entire door. I also did the door jams while I was at it. I didn't replace all the seals as the weather was starting to get bad so I had to get moving on the paint.
20151222_163854.jpg20151222_174956.jpg20151225_123504.jpg20151225_123519.jpg
 

NovacaineFix

Member
662
1
18
Location
San Diego, California
Nice find, good luck on the paint job/bodywork.
FYI, even though the truck is good condition, check the upper corners of the tailgate, they always seem to crack the sheet metal around there. I only mention this since you are prepping it for paint.

Keep us updated
 

00888

Member
40
1
8
Location
Town of Niagara NY
The truck is now in the tent. I have washed it and let it air dry. While it was out I put the tarp down on the ground to keep the moisture coming up into the tent. I masked off the areas I would rather not paint and then did a wipe down with paint thinner and then a tack cloth to get it ready. This is December 26th in Niagara Falls NY and what a blessing the weather was for this project. I did use a small propane heater that kept the tent warm enough for the project.
20151226_115143.jpg20151226_115153.jpg20151226_115201.jpg
 

00888

Member
40
1
8
Location
Town of Niagara NY
I got the second coat of primer on the truck. After the first coat I reinstalled the mirrors so they had primer where they mount and the color would be the same on the final coating. The paint is all the Gillespie coating I bought from Rapco. I used the standard mix of 4 to 1 with Zylene and it coated nicely! I used 2 20" box fans to draw the air out of the tent to keep dry paint from falling on the finish to prevent the rough surface.
20151226_132131.jpg20151226_132137.jpg20151226_132144.jpg20151226_132221.jpg20151226_132201 002.jpg
 

00888

Member
40
1
8
Location
Town of Niagara NY
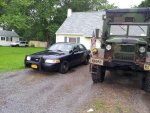
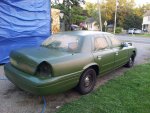
here is a quick run down of the chase vehicle. It started as a normal used police car and I got sick of people doing 20MPH when they seen me in the rear view so I figured I'd paint it and here it is. The black out lights are 100% operational and the Shackles are mounted and usable for a tow bar or tie downs. I did all the fab work underneath so it would be as close to real for not being real!
20140816_190809.jpg20140831_192352.jpg20150208_102420.jpg20150223_180531.jpg20150228_174258.jpg20150228_180206.jpg
 

00888

Member
40
1
8
Location
Town of Niagara NY
The first and second coat of the 383 CARC sub went on nicely. I did a few extra coats on the front end as well as the fenders and quarters to make it a little thinker to take a little more abuse from stones or other road hazards. The grill guard was a real pain to get installed by myself but it went on. now I let the truck sit over night in a warn tent before the 3 color pattern went on. I installed all the extras that were painted ahead of time so that the brown and black could be applied at the same time to all parts and not be mismatched.
20151226_144807.jpg20151226_144815.jpg20151226_144827.jpg20151226_144841.jpg20151226_161505.jpg20151226_161515.jpg20151226_161533.jpg20151226_162021.jpg
 

00888

Member
40
1
8
Location
Town of Niagara NY
Here we have the 3 color is all done. I let the truck sit for an hour or so before pulling the window masks off and installing the new lights. I bought new bulbs so I didn't have to play with it for awhile but one of the new bulbs didn't work! I guess it happens. After the dry time, I installed the windows and rolled her outside to get the rest of the stuff I could do before the sun went down.
20151227_105842.jpg20151227_105853.jpg20151227_105900.jpg20151227_111050.jpg20151219_182943.jpg
 

00888

Member
40
1
8
Location
Town of Niagara NY
This is the completed truck. I still had to install the tailgate handle and window outer sweep. They both went on the next day. This was 2 weeks to the day from when I bought the truck. Now I'm moving to the inside to get all the accessories installed. I may only have the truck for a few months but I still want it right!
20151227_151040.jpg20151227_151050 002.jpg20151227_151102 002.jpg20151227_151111 002.jpg
 

00888

Member
40
1
8
Location
Town of Niagara NY
This is the RT-524 that was hiding under the seat of my M109a3. It was under the seat and nobody ever seen it so the look wasn't important. When I went to install it today in the M1009 I noticed you could see everything and it looked really bad!
20150717_063659.jpg20150717_064121.jpg
Yesterday I spent the entire day dismantling, sandblasting and painting the mount and the radio. I still need to do the white letters but I'm finding it almost impossible to find out how people are doing it. Every option I have tried as left the new paint looking bad or just doesn't work.
20160101_162049.jpg20160101_162117_001.jpg
The mount turned out great. I was very happy with it and instantly put it in the truck!
20160101_182957.jpg20160101_183119.jpg
I'm happy with the radio but I need to get the writing filled in because it looks bad without it! I still have aton of things to do and several I didn't list yet so I'll keep posting as the project continues. Thanks for looking!
 

machinist75

Member
777
7
18
Location
Murphy, TEXAS
here is a quick run down of the chase vehicle. It started as a normal used police car and I got sick of people doing 20MPH when they seen me in the rear view so I figured I'd paint it and here it is. The black out lights are 100% operational and the Shackles are mounted and usable for a tow bar or tie downs. I did all the fab work underneath so it would be as close to real for not being real!
View attachment 601724View attachment 601725View attachment 601726View attachment 601727View attachment 601728View attachment 601729
Cool! The blazer looks real good too.
 

dougco1

Well-known member
Steel Soldiers Supporter
869
649
93
Location
Cooperstown NY
This is the completed truck. I still had to install the tailgate handle and window outer sweep. They both went on the next day. This was 2 weeks to the day from when I bought the truck. Now I'm moving to the inside to get all the accessories installed. I may only have the truck for a few months but I still want it right!
View attachment 601751View attachment 601753View attachment 601754View attachment 601755
I'll be the first in line to take it off your hands in a few months. Great job.
 
Top
AdBlock Detected

We get it, advertisements are annoying!

Sure, ad-blocking software does a great job at blocking ads, but it also blocks useful features of our website like our supporting vendors. Their ads help keep Steel Soldiers going. Please consider disabling your ad blockers for the site. Thanks!

I've Disabled AdBlock
No Thanks