• Steel Soldiers now has a few new forums, read more about it at: New Munitions Forums!

  • Microsoft MSN, Live, Hotmail, Outlook email users may not be receiving emails. We are working to resolve this issue. Please add support@steelsoldiers.com to your trusted contacts.

My New Project - 1942 Ford GPW

Tinwoodsman

Well-known member
Steel Soldiers Supporter
3,923
76
48
Location
Comfort, Texas
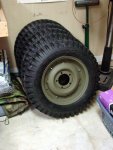
She may PB. She is good with a standard tranny. I painted the 5 combat rims today and they will sit for a few days and I will mount the new NDT's and tuck them away until I get the frame done. That is next.

Painted-Rims.jpg
 

Tinwoodsman

Well-known member
Steel Soldiers Supporter
3,923
76
48
Location
Comfort, Texas
Reproduction from Fitzpatrick Jeeps. Good price and free shipping. Sorry I misunderstood you about your. I thought you said all you Jeep stuff went in the dumpsters. :-(
 

Tinwoodsman

Well-known member
Steel Soldiers Supporter
3,923
76
48
Location
Comfort, Texas
Started the day planning to assemble the rims, tires, tubes and flaps on all 5 tires. I ordered the tubes and flaps from Lucas Tires and specifically told them I need tubes and flaps for combat rims with with offset valve stem holes. Well, the Dickweeds shipped them with center holes so I had to drop back and punt. Tomorrow we will have words.

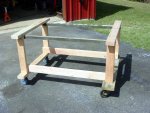
So, I decided to build a dolly to set my frame on for some repairs and clean up. Then I decided to remove the engine from the frame for subsequent placement on my engine stand. Removed the generator, starter, carburetor, distributor and the intake and exhaust manifolds. Unfortunately, I discovered the intake manifold has a broken intake mounting flange so I have to order one of those.

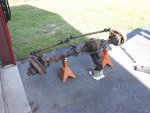
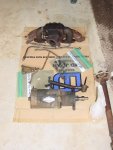
Removed all these parts and the front axle and spring assemblies. Got everything set out of the way and I plan to remove the engine tomorrow and call Lucas Tire. Here are some pictures:

Frame-Dolly.jpgPassenger-Side-Stripped.jpgDrivers-Side-Stripped.jpgFront-Axle-Removed.jpgDrivers-Side-Less-Axle.jpgRemoved-Parts.jpg
 

Tinwoodsman

Well-known member
Steel Soldiers Supporter
3,923
76
48
Location
Comfort, Texas
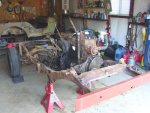
Removed the engine and the tranny/transfer combination and the rear axle and springs. Engine is stripped and on the engine stand and the bare frame is on the dolly ready for some minor fabrication work. Tranny and T/C will be after that.

Engine-Stand.jpgTranny-and-TC.jpgFrame-and-Dolly.jpg
 

Tinwoodsman

Well-known member
Steel Soldiers Supporter
3,923
76
48
Location
Comfort, Texas
I called Lucas Tire today and asked why they did not ship the offset flaps as requested and the Customer Service Representative (and I use that term lightly) said there was no such thing, only center valve stem holes. Then I asked him why they did not tell me when I made my request specifically mentioning two piece combat rims. He said he remembered that conversation clearly (although it was 6 weeks ago) and I made no such request. Finally he told be to cut new offset holes in the flaps he sent.

I then checked with Universal Vintage Tire Company in Hershey, PA and they indeed had the offset flaps. I posted my experience on G503 since several others ordered from Lucas and explained how I was treated and provided a link to Universal Vintage Tire in case they wanted to get offset flaps. I then emailed Lucas with a link to my G503 thread and within 60 minutes I had the owner call me to apologize and said I would have offset flaps sent to me within the next two days.

Don't you just love it. :evil:
 

Tinwoodsman

Well-known member
Steel Soldiers Supporter
3,923
76
48
Location
Comfort, Texas
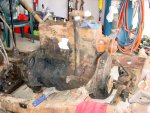
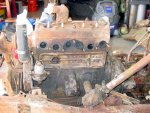
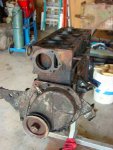
After receiving my "offset flaps from Lucas Tire I mounted all 5 of the NDT's on the combat rims today. My back hurt when I was done and it makes me wonder how I ever did the 395's on the deuce. The I moved on to what I call the "Crud" phase of taking apart the engine block to prepare it for cleaning. Once that is done, I will take it to my machinist to deal with the block issues and install "hardened valve seats" The cylinder walls were in very good shape and the pistons and bearings are all "standard" size so I have plenty of wiggle room.

Mounted-Tires.jpgEngine-Block.jpg
 

papabear

GA Mafia Imperial 1SG
13,520
2,469
113
Location
Columbus, Georgia
Hey, when ya put the engine back together make sure you have a head gasket for the "L" head and not the "F" head!! The "F" will fit perfectly and look correct but you MAY have smoke coming outta your water pump neck...:naner:
 

Tinwoodsman

Well-known member
Steel Soldiers Supporter
3,923
76
48
Location
Comfort, Texas
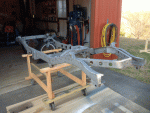
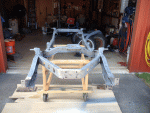
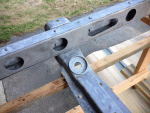
Been forever since I could work on this project. Engine is at the machine shop and I decided to blast the frame now that I have it straightened and patched. Got is half done yesterday but the weather went south so I finished it up today and applied a coat of Phospho rust preventative. Hopefully I can get back on track with regular posts.

Blasted-GPW-Frame.gifFrame-2.gifFrame-Close-Up.gif
 

Danger Ranger

New member
2,253
23
0
Location
Roland, IA
Well Im late to party as usual. Looks great so far TWM.


I too like the cab. I think you should keep it around for those rainy days or those days you just want a little touch of class on that sweet Jeep. Make it match or make it stand out completely. One end of the spectrum or the other.
 

clinto

Moderator, wonderful human being & practicing Deuc
Staff member
Administrator
Super Moderator
Steel Soldiers Supporter
Supporting Vendor
12,596
1,135
113
Location
Athens, Ga.
How did you straighten the frame?

My limited experience with Jeep frames has been that almost all of them are off in some way-either a high or low corner or out of square. All my experience with such issues involved frame benches.
 

papabear

GA Mafia Imperial 1SG
13,520
2,469
113
Location
Columbus, Georgia
How did you straighten the frame?
My limited experience with Jeep frames has been that almost all of them are off in some way-either a high or low corner or out of square. All my experience with such issues involved frame benches.
TWM uses a rare and little known straightening technique known only by a few elders as "Celestial Alignment".

This technique requires hours of star gazing, charting heavenly bodies, gravitational pull at specific points, and specific ground temperatures.

In short, you drink a bunch of Crown, push the jeep frame where is looks like level ground and wait for any "high" areas to settle down to the rest of the areas.
 

Tinwoodsman

Well-known member
Steel Soldiers Supporter
3,923
76
48
Location
Comfort, Texas
How did you straighten the frame?

My limited experience with Jeep frames has been that almost all of them are off in some way-either a high or low corner or out of square. All my experience with such issues involved frame benches.
My frame problems were with the front horns and the rear sections. I clamped sections of heavy duty 2" square tube to the problem areas of the frame while it was on the axles and wheels and then used a 6 foot landscape breaker bar to coach those sections back into alignment. Once they were at the TM specifications, I removed the frame from the axles and welded up a few cracks and I was good to go. But, it is quite possible the stars had something to do with it.
 
Top
AdBlock Detected

We get it, advertisements are annoying!

Sure, ad-blocking software does a great job at blocking ads, but it also blocks useful features of our website like our supporting vendors. Their ads help keep Steel Soldiers going. Please consider disabling your ad blockers for the site. Thanks!

I've Disabled AdBlock
No Thanks