• Steel Soldiers now has a few new forums, read more about it at: New Munitions Forums!

  • Microsoft MSN, Live, Hotmail, Outlook email users may not be receiving emails. We are working to resolve this issue. Please add support@steelsoldiers.com to your trusted contacts.

Need Bow measurement M135/M34

citizensoldier

Active member
3,981
17
38
Location
Northern Michigan. Smelt City
Hello guys. I need the measurement of the upper curved bows for the narrower M135/M34 bed. I need from one square end to the other along the top of the arch. Don't worry about the bolt holes. If you do this pick one with a nice continuous arch. Thank you.
 

m1010plowboy

Well-known member
Steel Soldiers Supporter
3,908
2,712
83
Location
Edmonton, Canada
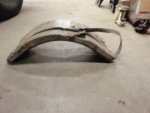
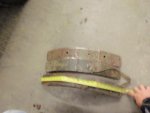
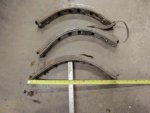
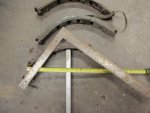
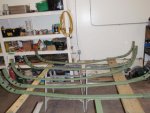
M135 Bow corners

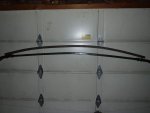
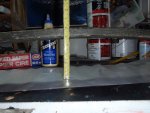
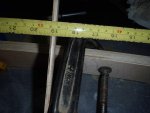
23" length over the top of the radius
19" tip to tip with 4" radius / offset

Not 90 degrees as you can see in the last 2 shots with the top bow requiring a slight degree to pick up the arch.

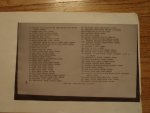
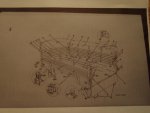
There is a break down of parts in one of the manuals and we should post a pic of that page when we get a chance.
 

Attachments

citizensoldier

Active member
3,981
17
38
Location
Northern Michigan. Smelt City
Man! You go all out! But I guess it's my fault I should have been more clear. :whistle:I need the length of the WOOD bow from 90degree cut to 90 degree cut measured on the top of it fallowing the radius. I am making some stronger laminated wood ones for my M135 bed. It will save me some hassle and figuring. They should be able to take a little more snow load this way. Thank you for doing what you did though. I have the metal corners already. :grin:
 

citizensoldier

Active member
3,981
17
38
Location
Northern Michigan. Smelt City
I do have a question regarding the last shot of your troop seats. What are the brackets and chains on the side? Is that what holds the troop seats up? This must be a Canadian ad on? My US ones do not have anything like that.
 

m1010plowboy

Well-known member
Steel Soldiers Supporter
3,908
2,712
83
Location
Edmonton, Canada
Top bows

That's what you said, Top Bows........ Too funny, embarrassing.....but great useless and boring information I included for you whether you wanted it or not.

Top bow length (wooden top bows not the metal corner pieces) on the original ones in the pic are 69" long. Measurement between the tips of the assembled 'corner pieces' is 61" which puts 4" inside the lovely bow corners in the previous post.

Too fast read, to slow smart.
 

Attachments

m1010plowboy

Well-known member
Steel Soldiers Supporter
3,908
2,712
83
Location
Edmonton, Canada
Chains on troop seats

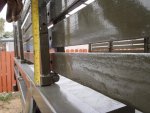
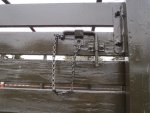
The chains don't show up in the TM so I don't know about their originality. We have adjustable sides XX for the top bows K so they can be in the down position with the pins attached to chains hanging on the side or you can lift the bows and slide the pins into holes in the stake pockets YY.

Next time I'll post the TM first and you can identify K (#7372780) as the part you're looking for and I won't need to give you E.....which was clearly wrong.
 

Attachments

citizensoldier

Active member
3,981
17
38
Location
Northern Michigan. Smelt City
Perfect! Just what i was after. I would like to see more of that adjustable option. I think that is a Canadian ad on and I tend to like the changes they did to their vehicles. I might just have to build some. Thanks again for your time both wrong and right! :grin::jumpin:
 

m1010plowboy

Well-known member
Steel Soldiers Supporter
3,908
2,712
83
Location
Edmonton, Canada
M135 Bows and troop seats

Useless info used. My job is done, thanks. Had you asked the question a minute before I posted the info, I'd look so much better so next time, ask away. Do you have a KB thread, I need to see it.

Stan or someone will need to chime in because an observant look at the truck shows no holes on the four corner pockets (A) (Pocket, side rack stake, left front and right rear - 7397966) or (AD) (Pocket, side back stake, right front and left rear-7397997)....... so I'll need to ask the question some day.

How are the end bows held up when loading tall slim Canadians and unloading short, fat, balding ones?
The chains are longer but I'm not sure where the pins would go.

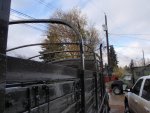
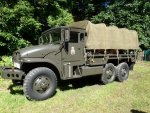
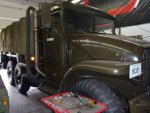
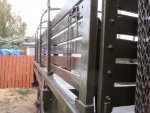
Picture 1 is a Wet Coast truck with raised bows. The second shot shows a pampered, polished, pretty M135 with Bows down.

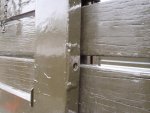
The holes are 21 cm or 8 1/4" above the rail so that looks like the height difference between the two trucks.

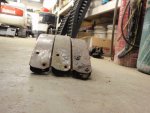
You can see the reinforcing tab added over the hole in the last shot.
 

Attachments

m1010plowboy

Well-known member
Steel Soldiers Supporter
3,908
2,712
83
Location
Edmonton, Canada
M135 Bow bend deflection specification

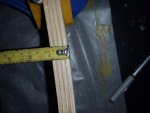
Is there an optimum/ historical/ correct height for the center of the Bows on the M135?

PB210264.jpgPB210267.jpg

The best 60 year old bow in the fleet shows a deflection of about 5" so I started with that as a hobby fun build for ole' Goose. Once I get good at this, I might build a few Christmas presents for Goat and Gizmo if they'll let me. I'd like to build them as close to original as possible so looking for a spec.

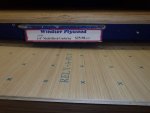
Experimenting with what I thought was 1/4" birch plywood as per the sign but after measuring the first one, she comes up a bit thin. Might try gluing 5 pieces together and tappering the ends if the boys want them a little heavier. The price is right and at 2 1/2" wide, I get 18 pieces out of a 4x8 sheet so after paying the Windsor plywood boys $10.00 for cutting, 1/2 a bottle of $25.00 glue, we're at about $12.00 / bow....not including labour.

PB240283.jpgPB240281.jpgPB240278.jpg

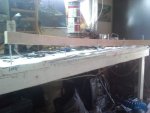
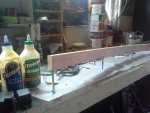
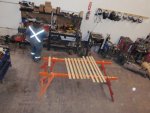
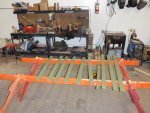
I used an old bow as a jig for the first bow but it has a flat spot which can still be seen even after a few shots of CR so it's not quite good enough. Ended up using 5 bolts in the work bench as a plan 'b' jig and that's making things a little more consistent.

PB240279.jpgPB230269.jpg
 

m1010plowboy

Well-known member
Steel Soldiers Supporter
3,908
2,712
83
Location
Edmonton, Canada
Bows and Bending and Breaking

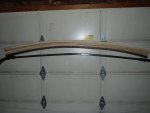
Had some success with Bow building so before we destroy these, thought I'd share the pics. M135 Bows are between 68 1/2" and 70" long. We chose 68 1/2".
I'll have enough bows for all three M135's real soon, just not sure how long they'll last.

We did a non-destructive strength comparison with an original Oak bow and Oak bows are strong. Mattech said guys would crawl between the bows for a nap so I need you boys on a diet! We're going to let a vet try and break one so pics and vid soon.
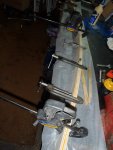
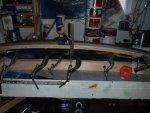
Using the 1/4" Birch Plywood and pins/ bolts/ spikes on a 7' long wood counter works good. A metal press would be better, but this works. One SS thread showed a guy using his deck for a jig surface and we could also use a 2x8 since the arch is only 5 or 6 inches. We chose 5" because it roughly matched an nice NOS piece.
P6170652.jpg20170617_153549.jpg

Now for the little successes. I did not choose these methods, they happened and it made things easier.

The bolts on the two ends of the jig were longer. It made it easier to slide the glue covered pieces into the jig.
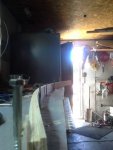
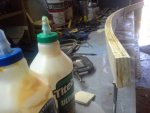
20170617_161119.jpg20170617_153436.jpg20170617_153209.jpg20170617_153410.jpg

Found a piece of wood that was slightly narrower than the bow, maybe 1 3/4". When you make a stroke over your glue it leaves a nice thick row along the edge. A quick smear on each edge and you've got a nice thick layer for the outside edge and a healthy film down the middle. You need to work fast with this glue so this method worked farmyard fast.
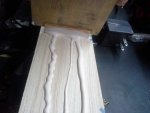
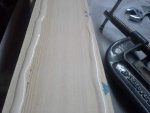
20170617_161702.jpg 20170617_161745.jpg

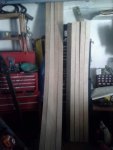
I had our supplier cut 2 - 4x8 sheets in 2 1/2 inch strips so expecting them all perfect would have been a stretch. It is important to have them cut as close as possible to reduce sanding and prep time. Even this little difference in width takes extra time to finish.
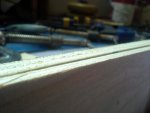
20170617_161142.jpg

Birch does finish up nicely. After 4-5 minutes to glue one together, 24 hours in clamps, it takes about an hour with a 60 grit belt sander and a 120 grit palm sander to get them smooth. Now we just need some help deciding to paint them or not.
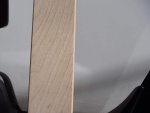
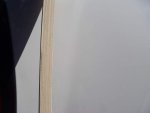
P6170658.jpgP6170659.jpg
 
Top