Home >
MILITARY VEHICLE PARTS >
VEHICLE ELECTRICAL PARTS >
ELECTRICAL CONNECTORS & TERMINALS > Rubber Shell Connectors (qty 10) MS27144-1
Rubber Shell Connectors (qty 10) MS27144-1
Item#
MS27144-1
$8.95
Product Description
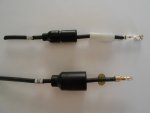
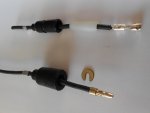
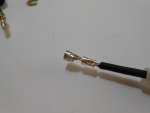
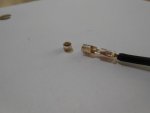
Rubber shell connectors also called Packard connectors. Connectors are part number MS27144-1 (female electrical connector/male rubber shell). Made in USA. Ozone resistant rubber.
Sold in packs of 10 (example if you need 30 enter 3). Terminal ends can be soldered or crimped on to the wire. These are made for 14 AWG stranded copper wire. Connectors are used on many Military vehicles but are good for custom projects too. 0.2 lb
From
http://olive-drab.com/od_mseries_connectors.php
M-Series Vehicles Wiring Connectors
All American M-Series vehicles have standardized wiring plans based on one set of
circuit numbers and rubberized, waterproof in-line wire connectors that are the same for every vehicle. This makes it possible to use the same lights,
switches, trailer connectors, etc. across the board thus simplifying maintenance, spare parts inventories and tools.
Wiring harness used in M1 Abrams tank. NSN 5995-01-323-5201, "Wiring Harness, Branched".
M-Series Military Vehicles Wiring Connectors
Photo: Courtesy of Rick Crider's Military Light Conversion page.
The wiring is standardized, but there are many exceptions to the standardization. Early M-series vehicles (such as M-37) used the "Douglas connectors" with metal shells, not the rubber shells discussed on this page. Some vehicles use the multi-pin "Cannon connector" (with colored caps in the top photo) for the lights or other components instead of the rubber connectors, and so on. Before doing anything, check carefully the exact situation with your particular vehicle.
Most M-series automotive circuits use AWG 14 gauge wire with black insulation called MIL-C-13486 cable. The part number for the wire is M13486/1-5 in 14 ga. and is readily available from surplus dealers or wire suppliers. You will see the part number stamped on the wire. A few circuits are 16 ga. (M13486/1-3 or -5) or much heavier for, say, battery to starter. The connectors in the table below are for 14 gauge wire, by far the most common.
In vehicles, all the wiring and connectors are supplied as a branched wiring harness. The harness packages all the circuits for one part of the vehicle into a bundle with tape wound around to hold it together. Each circuit is identified by a metal band with the
circuit number stamped on it. The circuit terminates with a connector. Female connector pins (male shells) are on the power supply side to minimize potential for shorts. Parts such as composite light assemblies will have matching wire pigtails with the proper circuit number band on each wire and the mating connector to the harness. A few connection points (e.g., trailer connector, light switch) use a multi-pin "Cannon connector" instead of individual connectors. You may find a circuit terminated with a ring connector, usually for a ground.
The M-series connectors are designed for easy maintenance in the field. The connector pins/sockets are to be crimped onto the cable and can be hand assembled or disassembled without special tools (special crimpers are available for perfect crimps, but you can use anything). The resulting connection is solid, stable, and reasonably waterproof. Tool kit to the left (41-K-103-100) includes a supply of connector parts plus the special tools as issued.
Photo: Courtesy of Gene Pantano)
The table below gives all the part numbers involved. The connectors are usually purchased as assemblies for either the male or female side. Each side includes a shell, a washer (male pin side) or sleeve (female socket side), and the connector itself (male pin or female socket). The terminology is a little confusing since the female socket connector is housed in the male shell while the male pin connector is housed in the female shell.
There is a three way adapter (MS27147-1) that is primarily used to add auxiliary equipment (such as radio equipment) to a circuit or to modify a circuit such as when replacing a generator with an alternator. It has three male pins (female shells) molded into one housing allowing three female connectors (male shells) to mate to it forming a splice.
Item No. | NSN | MS or Part Number | Description |
| 1 | 5940-00-399--6676 | 8338564 | Terminal Assy., crimped, female |
| 2 | 5970-00-833-8562 | 8338562 | Sleeve |
| 3 | 5935-00-833-8561 | 8338561 | Shell, male, single (holds female terminal) |
| 4 | | MS27144-1 consisting of items 1,2,3 | Connector, plug, electrical: socket contact, No. 14 AWG, waterproof |
| 5 | 5999-00-057-2929 | MS27148-2
(s/s A-A-52536) | Terminal |
| 6 | 5310-00-833-8567 | 8338567 | Washer, terminal retaining |
| 7 | 5935-00-572-9180 | 8338566 | Shell, single, female (holds male pin) |
| 8 | | MS27142-2 consisting of items 6,7,8 | Connector, plug, electrical: pin contact, No. 14 AWG, waterproof |
| 5935-00-900-6281 | MS27147-1 | Adaptor, connector, 3-way |
MS27142 Female shell assembly
(holds male pin)
MS27144 Male shell assembly
(holds female socket)
Here's the tool I made for handling the female terminal springs. Not exactly high-tech but it sure makes life easier when you're doing wiring jobs.
From
http://www.steelsoldiers.com/showthread.php?9878-Is-this-the-right-crimping-tool post 13
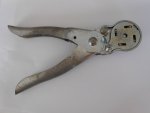
Looks like the Ideal/ Buchanan tool will work just fine. If you're doing mil. spec. wiring and are using the waterproof connectors, the secret is the four-point, non-deforming crimp that the Daniels, Ideal/Buchanan and the silver tool from the wiring kits all do.
With any of them, just make sure they'll accomodate the automotive size wire, not the very small "computer" wire.
rom my reasearch, the Daniels tool is an eight-point crimp whereas the other tools are four-point. I would like to agree with you...the Ideal/Buchannan should work just fine for my money.
think Daniels is splitting hairs. All crimp at 4 points (locations)-- 12:00, 3:00, 6:00 and 9:00. The Daniels tool has four "jaws" and each jaw has two small points instead of one larger one. Does that qualify it as an 'eight point crimp'?
The whole purpose of that style of crimp is so that it won't deform the terminal and keep it from sliding into the plastic liner on the waterproof connector. Slide a waterproof connector apart and compare it to a terminal crimped with an automotive crimping tool and you'll see what I mean. If you soldered the terminals on instead of crimping them you could accomplish the same effect.
Thats a good deal. I held out for price and was rewarded by one similar in price. The only thing that sucks is having to take the spring collar off the female connectors to crimp them. Jones made a tool for this and it looks like it works well, I'm not so talented to duplicate it.
how to use the Daniels tool
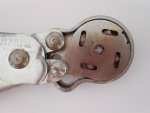
I have used cheapo crimpers in automotive applications forever, and never liked the results (so I solder a lot of my connections). I obtained a Daniels AF-8 crimper, as shown in the pics above, with turret.
I cannot figure out how to use this thing correctly with the M-style connectors (the later style ones, Packard).
I need a tutorial to un-challenge myself and get the thing to work - are there any step by step instructions on how to disassemble/reassemble the terminals (such as get the boot on correctly, after crimping...) and how to correctly crimp the connectors? My field trials were not that successful.
As a former Marine avionics tech (6324/6344) I've used these quite a bit, still do for some applications,
The turrets are used to set depths for different pin and sleeve lengths. the turret can be easily removed , you don't need it for the packard style contacts. I've got 3 sets of these as well as 2 Daniels HX4 open frame crimp sets with multiple dies.
so with all those at my disposal here is what I use when making up packard connections.
Klein Tools -Crimping/Cutting Tools - Non-Insulated/Insulated Terminals
They work perfectly, are easy to use, don't deform the contacts, don't pinch off the wires and can be had for under $25.00 at lowes or home depot. anyone who's seen my truck can attest to what an uptight A**hole I am when it comes to wiring installations.
(comes from working on aircraft all those years)
and best of all , you won't have a fit if they get dropped in the mud, sometimes the simplest ways work best...
- Attached Thumbnails
- This is Klein tool 1005 crimper cutter for 10-22AWG and I need one 0252015
There are a couple of companies that make crimp tools for the military bullet connectors. I think that Daniels manufacturing makes one of the best but they're pretty pricey new. The best place to find them is either at electronic surplus stores or eBay. They make a nice 4 point crimp that just doesn't let go.
Soldering is not the way to attach these vehicle connectors. Soldering has 2 disadvantages in military vehicles. First off, the wire doesn't solder well because it's not pure copper like most electrical wiring. Secondly, soldering makes a rigid connection and any motion or vibration will eventually cause the wired to break at the solder connection.
When I assemble them I like to use a lubricant made by Dow Corning called DC-4. It's available from McMaster-Carr and has to great properties. First it's a lubricant that makes assembly easier and it also keeps the rubber soft and pliable. I've also used it to soften older hardened connectors to get them apart.
Years ago I bought connectors from a company in Illinois. That company is now in Rio Rico, Az. Here's their website link:
http://www.gillman.com/
Here are the contact part numbers:
male MS27142-2
female MS27144-1
I didn't buy any shells from them but they should have them available too.
Originally Posted by
cranetruck
The only problem with soldering is the wicking of solder up the wire, which stiffens it and makes it less vibration proof...the wire may break under those conditions.
Using the correct crimping tool will do the job alone. The original equipment is crimped only.
Very good point Bjorn.
http://www.steelsoldiers.com/showthread.php?23939-Packard-connectors-or-shrink-tube-splices
Packard connectors or shrink-tube splices?
maddawg308
Packard connectors or shrink-tube splices?
Am wondering how many out there use Packard waterproof connectors on their military electrical modifications, or just do an in-line splice with waterproof shrink-tubing. I haven't had good luck making Packard connections, just curious to hear why some folks do them, and some don't. I'm tempted to chuck my Packard connectors and go KISS (Keep It Simple Stupid).
RE: Packard connectors or shrink-tube splices?
Packards, too anal retentive to do it any other way.
- 08-04-2008, 17:22 gringeltaube
Cut wire, insert shrink tube, splice, (preferably) weld, a few layers self-fusing insul.tape (don't use any other!), place shrink tube, heat, ready! Not exactly KISS and yes it takes longer... but its safer and will last longer too!
G.
I use the Packard connectors most of the time. Sometimes I'll make a repair with adhesive-lined heat shrink tubing. I use silicone-rubber motor wire that appears to be very similar to the non-cloth-reinforced rubber wire in newer MVs.
LanceRobson
The simple answer is; it depends......
If I'm likely to have to disconnect the connection for, say, a trailer inter-vehicle cable, then it gets the GI connector. If I'm splicing mid-run or making up a harness or custom run, nothing is as secure or as watertight as a soldered Western Union pigtail splice jacketed with adhesive lined heat shrink tubing. The adhesive is reasonably flexible and is permanently watertight.
With good soft copper wire and a little bench practice, you can make the splice in about two minutes with half that time being waiting for the soldering iron to warm up.
You can avoid the solder if you strip the wire much longer than you would normally do and tie a fisherman's "blood knot" (AKA a "surgeon's knot") and pull it tight before sliding the heat shrink down.
Either the knot or the solder will both keep the connection secure until you are in your grave. The only practical limitation to the life of the splice is the life span of the wire's insulating jacket.
Epay is the most best source I've found for adhesive lined heat shrink I've found. You only need a two inch piece to make up a splice.
Lance
Recovry4x4
Packards for me. Thanks Daniels Machine (AF

08-04-2008, 22:25
hndrsonj
Just got to have the right tools! 08-04-2008, 23:08
nf6x
Speaking of the right tools, I have a circular indent crimper which is "close enough", but not quite right. I need to pull off the ring around the female contacts in order to get them into the crimper, and then put the ring back on afterwards (which is a PITA). I'd like to get the
right crimper. I want a production-grade one, not the cheesy little sheet metal one that comes in some of the connector repair kits.
Can any of y'all tell me how to find the correct crimper, die(s), turret(s), etc. to do the Packard connectors properly? I see lots of circular-indent crimpers and their accessories on eBay, but I don't know which, if any, are right for the Packard connectors.
Yeah, I know that I might have to wait a while before I find what I want at a price that I'm willing to pay, but right now I don't even know what to look for.
Jones
There have been several posts on the Daniels AF-8 crimping tool ( just make sure you're getting the one for automotive wire sized 'cause there's an identical version for computer and comm gear wiring that that's too small for our use)
And, somewhere amongst the strings, I posted a picture of the tool I made to help wrestle the tensioner springs on and off of the connector. It's the only way to go if you're using the waterproof connectors.
Maybe Kenny can help me remember where to search for it.
I see lots of AF-8 crimpers on eBay, at widely varying prices. I was hoping that something like that one would be suitable. I gather that I would still need to select the right positioner turret for it, though.
I have to remove the tensioner springs with my current crimper because the jaws don't open quite far enough to clear the spring, and I've been too lazy to grind in more clearance so far. If the AF-8 would also have the same problem, then I might as well stick with the one that I have.
I'll search around for posts on the AF-8...
Edited to add:
I found your post on the spring tool here:
http://www.steelsoldiers.com/index.p...ic&t=10378
I guess there's no reason for me to replace my current tool with an AF-8, since I'd still need to mess around with the springs. Hopefully I can modify my crimper to pass over the springs without messing it up.
The original connectors are OK, but use the heat shrink out in the middle of a wire, if it needs splicing.
Lee in Alaska
- 08-05-2008, 12:07 Recovry4x4
I need to brew up a similar tool to what Leonard has. The spring sleeves are a PITA. I feel the end product is worth the effort though. I also bought a bunch of wire tabs to stamp the circuit number in. Makes it look real professional.
- 08-05-2008, 12:15 nf6x 2 Attachment(s)
I just did a bit of research to try to find "correct" crimping tools for the Packard connectors, as opposed to tools that are just close enough, like my circular-indent tool that can't fit over the tensioning springs on the female contacts.
First of all, I dug up the military standard drawings for the connector family, including the 2-pin connectors that are used on things like the deuce's fuel tank and the air-shift indicator light:
http://www.dscc.dla.mil/Downloads/Mi...42/ms27142.pdf
http://www.dscc.dla.mil/Downloads/Mi...43/ms27143.pdf
http://www.dscc.dla.mil/Downloads/Mi...44/ms27144.pdf
http://www.dscc.dla.mil/Downloads/Mi...45/ms27145.pdf
http://www.dscc.dla.mil/Downloads/Mi...46/ms27146.pdf
http://www.dscc.dla.mil/Downloads/Mi...47/ms27147.pdf
I did not find any references to "correct" circular-indent crimpers for these connectors, but I did find that Daniels makes a die set called Y627 for their open-frame HX4 crimper, that is designed for our Packard connectors. Judging by the drawings, it appears to make the same sort of straight crimps that I've seen in my original military wiring harnesses.
https://www.dmctools.com/assets/HX4_ds.pdf
https://www.dmctools.com/assets/HX4_env.pdf
https://www.dmctools.com/assets/Y627_env.pdf
I have seen the HX4 crimpers on eBay, but it might be a bit harder to find the Y627 dies used... and they cost $180 new!

There are also various pneumatic, electric, hydraulic, etc. crimping tools that accept these dies for use in larger scale production.
Even though I like those sexy high-tech circular crimps, I think I'll keep my eyes open for this straight crimper and the correct dies. In the mean time, I think that my circular crimper (and I would assume, the AF-8 crimper) make perfectly suitable crimps... they just take a bit more labor. I think I should also make a tool like Leonard's for the spring rings. I've kludged along with a pair of round-jawed needlenose pliers, but this is cumbersome to do, especially oustide a nice, clean shop environment. Even if I find a proper crimper that doesn't require spring ring removal, it's still necessary to remove/replace the srpings sometimes when fixing up old wiring.
- 08-05-2008, 16:44 Jones The AF8 crimpers come with a selector wheel on the side. Just make sure the ones you're thinking of picking up have a wire size range of 26 to 12. I've never used the turrets in mine; I just visually adjust the depth of the connector to correctly place the crimps. The tool I made is just a 1/4" bolt with the end turned to a nose that slides into the connector and whose outside diameter is the same as the outside of the terminal sleeve. Insert the tool and slide the spring onto it. Crimp the terminal and reinsert the tool to slide the spring back off into position.
The open-jaw Daniels is nice but I can slide a lot of springs on and off for $180.00
- 08-05-2008, 17:35 bottleworks
I use Weather-Pak connectors on all added connectors. All splices need to be soldered and shrink-wrapped with marine grade shrink-wrap.
nf6x Quote:
Originally Posted by Jones
The open-jaw Daniels is nice but I can slide a lot of springs on and off for $180.00
$180 was just for the proper dies... that doesn't include the crimper itself!

- 11-30-2008, 02:16 AN/ARC186
Raychem makes a splice system that consists of clear blue heatshrink, gel seals at each end and a solder ring in the middle.just strip the wire and use a heat gun, it's that simple and completely waterproof. We use them in on aircraft all the time.
- 11-30-2008, 02:43 Goatwerks
Snap On, Matco and Mac tools all offer a good quality packard connector pliers.
It uses 2 seperate pairs, one to crimp the wire, and a round one to crimp around the rubber terminal seals.
I love using them for electrical accessories and add ons. One voltage source can have multiple uses.
I use my 24v coffee pot and 2 interior lamps off the same tap.
Get the right tools and you will love these water proof connectors.
Cheers, Jim
Maddawg,
If I were you, I would dump your connectors, just let me know what day you are throwing them in the trash. Tell you what, as a really nice guy, I will help cart them off for you. LOL.
- 11-30-2008, 10:24 Jones I still vote for the Packards. They just 'look right'.
If you don't have an AF-8 (or similar acting crimping tool) the connectors can be soldered on. I've even used the civilian bullet connectors after stripping off the colored sleeve they come with out of the package. The AF-8 "turret" isn't necessary; it just makes hitting the correct crimp location easier, especially if you're doing an entire re-wire job.
The trick is just not to deform them so that they won't slide into the waterproof sleeves.
From my personal experience; if I solder a wire joint then shrink wrap it, I'm certain THAT joint will be one I'll need to take apart-- often several times... AND in the not-too-distant future.


