• Steel Soldiers now has a few new forums, read more about it at: New Munitions Forums!

  • Microsoft MSN, Live, Hotmail, Outlook email users may not be receiving emails. We are working to resolve this issue. Please add support@steelsoldiers.com to your trusted contacts.

New Cummins HMMWV project in the works!

jwaller

Active member
3,724
19
38
Location
Columbia, SC
No special flasher needed: http://galuba.org/LED-Trucklite.pdf I am running a $20 solid state flasher from hummerpartsguy along with the LED light in the switch and the signals function just fine.

ya that is another way to do it. I'm just saying there is a newer style flasher that AMG uses for the trucks built at the factory with LED's.

I too have this LED in my turn signal indicator.
 

steelsoldiers

Administrator
Staff member
Administrator
5,267
4,040
113
Location
Charleston, WV
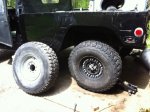
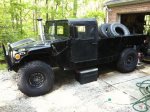
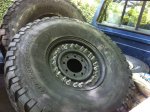
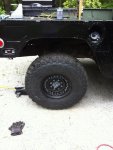
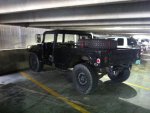
I finally got my tires and wheels mounted over the weekend. Clark Truck in Poca, WV assembled them for me and I picked them up on Friday. I love the look of the 24-bolt rims and the Baja TA's. Looks pretty sinister.
 

Attachments

steelsoldiers

Administrator
Staff member
Administrator
5,267
4,040
113
Location
Charleston, WV
Chris,
It looks like your humvee is guarding the beer cooler! Nice treads too.
LOL, I thought about moving that Rubbermaid box before taking the pic. Thanks Ted. Need to get my high-back seats and 3-point seat belts mounted so I can do some more extensive test driving. Can't wait to put some real miles on it.
 

nattieleather

Well-known member
1,883
145
63
Location
Cleveland, OH
I'd be interested in how loud that cummins is compaired to the original gm motor. I know that with the cummins you're going to be able to pull houses off their foundation... :lol:
 

steelsoldiers

Administrator
Staff member
Administrator
5,267
4,040
113
Location
Charleston, WV
It's pretty stinkin loud right now because I haven't modified the engine cover to fit the Cummins. I hope to get that done in the next few weeks. That should make a big difference in noise and heat transfer. Heat blowing off the engine is fine in the winter but it's miserable in warm weather.
 

patracy

Administrator
Staff member
Administrator
14,653
4,848
113
Location
Buchanan, GA
If you decide that there isn't enough power out of the cummins let me know. You should be able to see 225-250hp with the mods you spoke about in your first post. A set of injectors and a HE351cw from a 3rd gen dodge should push that easily up to 350hp (and still be very driveable).

Course you could go full tilt, 4K GSK, DV's, some fire hydrant nozzles for injectors, and twins for 600-700hp in a daily driver package.... :twisted:
 

steelsoldiers

Administrator
Staff member
Administrator
5,267
4,040
113
Location
Charleston, WV
A hmmwv turbo cover dog house might work without modification.
That shape is pretty close to what I need. I wish someone around here had one I could try on my truck to see how it fits. That might save me a lot of fab work.

If you decide that there isn't enough power out of the cummins let me know. You should be able to see 225-250hp with the mods you spoke about in your first post. A set of injectors and a HE351cw from a 3rd gen dodge should push that easily up to 350hp (and still be very driveable).

Course you could go full tilt, 4K GSK, DV's, some fire hydrant nozzles for injectors, and twins for 600-700hp in a daily driver package.... :twisted:
More power!!:driver: My plan is to get some more road miles on it stock as it sits. I have a EGT/Boost gauge to install first. Then, I'll be able to get a set of baseline numbers. Once that's done, I'll pop that 100 plate in there and see what happens. Please keep your eyes peeled for a 3rd Gen manifold and HE351cw combo for me. I'll do an aftermarket manifold at some point, but would like to try the stock one first. The Ford style manifold that's on my engine currently has the turbo offset to the rear, which really helps with intake and exhaust fitment. I think the 3rd Gen will work just as well.
 

steelsoldiers

Administrator
Staff member
Administrator
5,267
4,040
113
Location
Charleston, WV
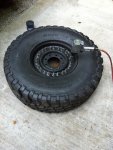
Update time. I got a bunch of stuff done over the weekend. First order of business was swapping out a leaking tire for a known good tire. With 24 bolts holding a rim together, I was glad my dad lent me his impact gun! It went pretty smoothly except for the o-ring that kept trying to creep out of the groove. I ended up sticking it in place with a few dabs of grease. I torqued it back together and aired it up. Thankfully, it didn't have any leaks.

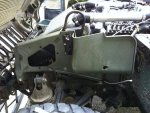
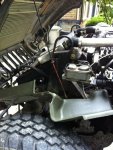
Next, I installed the driver's side splash shield that protects the radiator, engine, master cylinder, etc... from much and errant rocks. That was pretty straight forward except for a bent bracket.

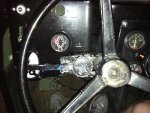
Once that was done, I got to work on installing my Westach boost/egt combo gauge. The hole where the air restriction gauge resided was the perfect size and location for it. I drilled and tapped the manifold for the pyro, used a plugged hole in the intake manifold for the boost feed, soldered a resistor inline with the gauge light to make it live on 24v, wired it up and mounted the gauge in the dash.

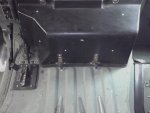
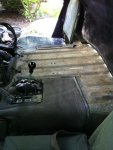
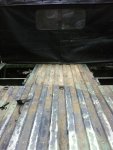
Then, I unscrewed the rotten plywood from the top of the drive-line tunnel. It was filthy and disgusting underneath with lots of muck, spent 9mm casings, and critters.

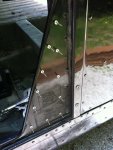
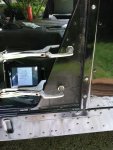
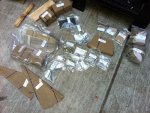
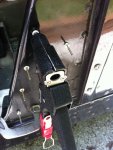
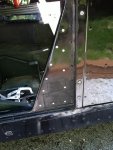
The last big project of the weekend was installing the 3-point seat belt kit. It was certainly time consuming and irritating to install, but I feel much more secure than I did in the 1980's lap belt. The kit consists of a bunch of aluminum stiffener panels that need riveted and epoxied in place. You are supposed to use a separate template kit to locate all of the rivet holes, but they are hard to find. Thankfully, the TM pictures were detailed enough that I could use them to located most of the holes. The biggest PITA was securing the reinforcing plate that holds the latch. It goes on the outside of the body in the tunnel and the bolt comes from the inside. It wouldn't have been too bad with 2 people, but it was darn near impossible by myself. I ended up running a bolt through from the outside, bolting the mount down, drilling the required holes in it, riveting it to the body and then bolting the latch to it. Phew. I still need to mount the passenger side latch and retractor, but at least the reinforcement plates are done.

I took it for a test drive last night to check all of the new stuff out. It was great being able to watch the EGT and Boost numbers. I am concerned that I either have a boost leak or that my turbo is a real dog. My EGT's got as high as 1100 on a sustained climb, so the fuel is there, but the boost never got beyond 12 PSI, which is too low for a 190 hp engine. The usual rule-of-thumb is around 1 PSI per 10 HP. I need to make up a fitting so I can pressurize the system and check for bleed-off.
 

Attachments

steelsoldiers

Administrator
Staff member
Administrator
5,267
4,040
113
Location
Charleston, WV
Rant: I hate the Chinese crap that all of the big box stores are trying to pass off as tools. I took my "professional" grade swivel head Arrow rivet gun home from Lowes and cracked the head on it after 4 rivets. I took that piece of junk back and went to Sears to buy me a "real" rivet gun. Turns out the same factory in China makes the rivet guns for Craftsman. I bought the $10 on sale fixed head gun and gave it a whirl. It survived the rest of the project and I only had to take it apart once to reassemble the dies. I asked the Sears guy where all the good rivets guns were and he said they were online only. WTH?! Rant off.

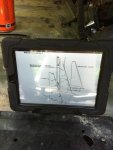
My new favorite tool for MV projects is my iPad. I just download the manuals on it instead of printing the pages off for each project. I like how you can zoom in and get more details when needed. I put a bomb-proof cover on it last year so my 4-year old could use it. The cover also works well for auto projects. :beer:
 

Attachments

nattieleather

Well-known member
1,883
145
63
Location
Cleveland, OH
Slooooooow spool! How did I do? You truck is really coming along. Did you get your trans cover figured out yet? Or is that next on the list. Keep up the good work!
 

steelsoldiers

Administrator
Staff member
Administrator
5,267
4,040
113
Location
Charleston, WV
Nice job! LOL. Still haven't done the trans cover. I think I will take the stock cover and keep hacking away at it until it fits. Then, I will build a new center portion out of sheet metal and then fiberglass over that. I'll gut the stock insulation and use dynamat or some sort of spray on sound deadening.

There are other things on the list ahead of the cover believe it or not. I need to install the rest of the passenger seat belt system, finalize some wiring, install the wiper motor/washer/wipers, change the valve cover gaskets and swap out a couple of half shafts before it will be ready for a trip to the mountains in a few weeks. Hopefully, I'll have time to address the cover before the trip. Otherwise, I'll just stick in some ear plugs ;)
 

nattieleather

Well-known member
1,883
145
63
Location
Cleveland, OH
I like that your making it a pick-up version. A lot of people opt for the 4 seater or the turtle back. I like the look of the 2 seater. That punch out list is never really finished just when you think your done you find something to add to it. MV Ownership Rule 6.
 

steelsoldiers

Administrator
Staff member
Administrator
5,267
4,040
113
Location
Charleston, WV
I like that your making it a pick-up version. A lot of people opt for the 4 seater or the turtle back. I like the look of the 2 seater. That punch out list is never really finished just when you think your done you find something to add to it. MV Ownership Rule 6.
I traded my F350 off on another car so the HMMWV is the only truck I have for now. I am planning on installing high-back seats front and rear so I can haul the whole family when needed. I am going to run it door-less and topless (except for the 2-man top). Basically like an oversized jeep with a bikini top.
 
Top
AdBlock Detected

We get it, advertisements are annoying!

Sure, ad-blocking software does a great job at blocking ads, but it also blocks useful features of our website like our supporting vendors. Their ads help keep Steel Soldiers going. Please consider disabling your ad blockers for the site. Thanks!

I've Disabled AdBlock
No Thanks