• Steel Soldiers now has a few new forums, read more about it at: New Munitions Forums!

  • Microsoft MSN, Live, Hotmail, Outlook email users may not be receiving emails. We are working to resolve this issue. Please add support@steelsoldiers.com to your trusted contacts.

Newbie and MEP-002A

dlsacco

New member
31
0
0
Location
Golden,Colorado
Thank you for that. I had made the high speed limit adjust, and know the screw and stop you are talking about. When I adjust the spring lower the problem didn't seem to be the high speed adjust, as the arm wasn't to the stop. It seemed more to be a problem that the Set point adjust could no longer achieve 1800 RPM's even with the throttle pulled all the way out. It was almost like the throttle cable was too long as I ran out of adjustment on the nut that sets the set point. I looked at the the threaded end back by the control knob to see if that was ment to adjust the cable lenght in any fashion and it didn't seem to be so, and the end of the throttle cable that is attached to the clevis also seems to be non adjustable. I was looking into maybe making a space to put some more range on the throttle cable adjust, to put it back into the right amount of pull with the spring lower. I will have to pull the fan housing and have another poke at this.
 

Ray70

Well-known member
2,407
5,219
113
Location
West greenwich/RI
Yup, you're seeing the same thing I see on my unit. My cable appears to be almost maxed out right now. I can get 1800 RPM but not much more. I also have a fixed end on my cable and the adjustment nuts on the end of the cable are all the way out. I saw that Green Mountian sells a universal aftermarket cable and they talk about and sell a threaded adapter to put on the end of a straight cable. I'm thinking of making one of these adapters and cutting my cable shorter. As it is the cable on my machine is a replacement that was apparently designed for both 002A and 003A which mekes it have like 6" extra slack on an 002A. This extra slack causes the cable to need extra curves to make up the room and I read that it can cause the cable to break or sieze up over time, so I'm going to see about shortening it and giving it more adjustment. I just need to take a look at how the cable attaches to the linkage to see how the adjustable bolt style end that GMG sells will fit. I thought mine has a ball or barrel crimped onto the cable that fits into a pocket in the linkage, but I need to take another look.
 

dlsacco

New member
31
0
0
Location
Golden,Colorado
Interesting! I will take a look at mine again with other than misadjusted / broke in mind if it could be a more generic issue. The adapter / cable end looks pretty simple to fabricate. 10/32 bolt, center drilled for the cable and cross drilled / tapped for a set screw. Thank you very much! I will post piccies of what my linkage looks like for comparison for you.
 

Ray70

Well-known member
2,407
5,219
113
Location
West greenwich/RI
I was just out in the shop ( its slow at work today ) :grd:making up one of the cable adapters and I went to GMG to see if I could find the diameter of the cable ( .063" ) and I noticed 2 pictures of their kit. Apparently its the 10/32 bolt along with a yoke/pin type clevice to attach to the governor linkage. Guess I should look at the linkage before I go too much further. I'll probably need to get or make up a yoke too.
 

Ray70

Well-known member
2,407
5,219
113
Location
West greenwich/RI
dlsacco, you're very welcome, I'm happy to share my similar situation. So my cable has a clevice swaged onto the end of the cable itself, so in order to gain more adjustment I might cut the cable off, drill and tap the existing clevice for a 10/32 and install the cable adapter I made yesterday Or I might be able to drill the clevice for a 2nd pin location which would effectively give me more adjustment. With the cable disconnected from the governor arm, when I pull out the knob it will pull all the way until the clevice hits the end of the cable sleeve. You mentioned yours isn't hitting the max speed screw, is the cable pulled all the way out and the clevice hitting the end of the cable sleeve or is there something else limiting your cable travel?
 

dlsacco

New member
31
0
0
Location
Golden,Colorado
I'm hoping to get time to pull the covers off again Saturday morning to double check what I had in my head about how the cable assy was connected and what the limits of adjusting it for the set point with the governor spring lower were. Thank you all so much for your support with this unit! It's been awesome!
 

Ray70

Well-known member
2,407
5,219
113
Location
West greenwich/RI
You really don't even need to pull the cover off to see what's going on in there, just flip up the cover above the injection pump and you can see everything pretty well. I took another look at mine last night and am starting to wonder if a new spring would help rather than shortening the cable. If the spring gets too weak it seems like it would require more pull on the cable, especially as you move the spring lower and lower with the droop adjuster, making it easier for the governor to strech the spring. Good luck and post some pictures if you can! Ray
 

dlsacco

New member
31
0
0
Location
Golden,Colorado
Right! Some progress. The reason I took off the cover for the fan housing the first time was the star adjuster was frozen, and it was easier to slide the spring down the screw adjuster by unhooking the far end. Also wanted to see whatever mechanics were near the blower wheel. Took Ray's suggestion and worked it through the cover flap this time. Could play with things longer this time as was VERY cautious about overheating with the blower cover off and only ran the machine long enough to flip the breaker and check the results during my first attempt at this. Firstly I soaked the adjuster screw in WD40 and rocked it back and forth till it freed. Was cautious as someone has chiseled one of the star legs off attempting to turn it. In my second pass I found that my memory of what I had done and difficulties was slightly off base. Setting the spring to mid point on the star adjuster screw resulted in too LOW an RPM value with the cable all the way in to be able to adjust it back up to the 1600 RPM / 53.333 Hz value called out in the manual. It drops so low it didn't excite and start. With all the discussion about idling the machines this seemed untenable. I adjusted the low speed adjuster nut to the end of the cable and still way too low. Shimmed the cable back further with a cut flat washer. It now comes up to at least 45 Hz and generates, but that's still way lower than the directed 53.333 Hz. Still believe the cable is too long in some fashion. With the spring set to the same mid point, the High speed adjust would only come up to 71 Hz, not up to the 75 Hz 2250 RPM called out in the TM. This SEEMS to be something other than the high speed limit, as further adjustments outward do not result in further increase in RPM. It looks like it might be related to the rotation of the governer arm. I've checked that it's not hitting on the oil cooler hoses that pass by there, but something in the geometry changes at that point where further adjustment doesn't result in more RPM. It's not the engine limiting things as with the spring set higher, both the low and high speed numbers are achievable. BUT if I accept a 45 Hz to 71 Hz range with control all the way in and out, (with the low speed adjustment shimmed) the load performance seems better. My load is far from a full load, and I might be fooling myself as a result, but it seems to hold better. With the starting / unloaded Hz set at 61-62, the set drops to 60 with my approx 2Kw load applied. On removal of load it returns to 62 Hz, but gallops or hunts for approx. 5-10 seconds before stabilizing at 62. The range of the hunting is only a few Hz. Given it's starting to hunt at this point, further lowering of the spring on the adjuster will probably further de-stabilize the unloaded condition. I won't be able to adjust the low speed up further without some other cable adjustment. Before I touch another thing I'm going to build a 5 KW load bank out of a 240 Volt dryer element and a high speed fan off of EBAY, and verify performance at full load.
 
Last edited:

Ray70

Well-known member
2,407
5,219
113
Location
West greenwich/RI
Next time you're working on it see if you can increase engine speed by pushing the linkage going to you IP with your finger. Have a similar situation where I can't achieve both the rated min and max speeds. I think it's something with the cable. My adjustment is all the way out and I get a min of well under 1000RPM and a max of just over 1800 right now. Some day I plan to work on it a little more, but for now it is able to run if I need it for an emergency. I did notice that mine seems to get to a point where pulling the cable has no effect on the linkage because the spring seems too weak to overcome the weight of the flyballs when set at the position needed to maintain +/- 2 Hz, and it just streches more and more without actually moving the governor arm. So, next time I mess with it I might see about a new spring or possibly shortening the current spring a little bit. Looks like new springs are available from a couple sources. PN 150-1309. It sounds like you are just about at a point where your machine is close enough to use as-is, even if you aren't 100% at what the tech manual calls for.
 

steelypip

Active member
769
68
28
Location
Charlottesville, VA
Good work, and you're definitely going about this the right way. You've replaced ideas with numbers, and you've got all the pieces of the puzzle in place together. As you say, your last missing ability is putting the thing under rated load. See if you can find a way to measure the actual amperage draw (clamp-amp or a shunt for your multimeter) as well - the % load gauge isn't all that reliable, and rating plates on loads lie like a rug.

It sounds like you might have some lever and arm geometry problems. I suggest you look through a few threads here to see if there are any photos with enough detail of the angles and lengths of the various pieces of linkage. If you can't find anything good, I'll stroll out to my MEP-002A and take a few pictures - it's due for its monthly run anyway.

Yes, the hunting is symptomatic of one of two things: more likely a) an overly aggressive droop setting (or the effect thereof because something is the wrong length or angle), or less likely b) something sticky in the linkage. I'd disconnect the spring, retract the solenoid, and make sure everything flops around like it should.
 

dlsacco

New member
31
0
0
Location
Golden,Colorado
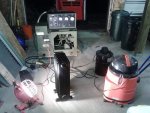
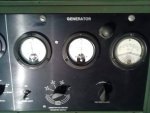
Progress! Located a nos load meter. Tested and showed some load, so rounded up a bunch of heaters lamps, vacuums and loaded it up to 75% on the meter? No smoke, good and steady, eventually the shutters opened..one more tic! Removed and applied the main load with a small lamp load on the convenience outlet. Freq. went from 62 to 60 no hunting with 5 to 75 % load transition. Slight hunting with absolute 0 load but settles in about 10 seconds. I suspect I didn't have enough load to make some of the adjustments. Will complete and test at 125% when load bank parts arrive. Thank you all, tally so far, reconditioned original batteries, all filters were new with unit, one bad glow plug, and one bad load meter! image.jpgimage.jpg
 

dlsacco

New member
31
0
0
Location
Golden,Colorado
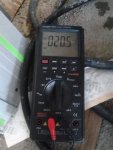
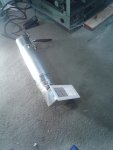
Load bank good right at 5 Kw, Genny governor has mild hunting completely unloaded, dead stable with a 100 watt load, No load 62 Hz, full load 60. Light puff of white smoke when I go from no load to full and then visually clear... Tried adjusting linkage arm length to see if I could get where I could hit the book specs for no throttle / full throttle Hz, but quickly got the sliding shaft to bind if the angle changed much. Im done unless some other inspiration hits. Question...bottom of the gas tank drain thingy...Is that supposed to bleed when unscrewed like the filter ones, or is it just a drain valve for when the cap is off? Thank you all for helping me get this running so sweetly.
 
Top