• Steel Soldiers now has a few new forums, read more about it at: New Munitions Forums!

  • Microsoft MSN, Live, Hotmail, Outlook email users may not be receiving emails. We are working to resolve this issue. Please add support@steelsoldiers.com to your trusted contacts.

optimizer long block - hummer 24V or cucv 24v

richingalveston

Well-known member
1,715
120
63
Location
galveston/Texas
i have yet to be able to get a video to post. i will try again. It is running and sounds pretty good. i just got my insurance set up, and as soon as i can get the hood on and roof pipe finished I can get it inspected and start driving it again.
 

richingalveston

Well-known member
1,715
120
63
Location
galveston/Texas
WARNING---CUCV CARNAGE
IF YOU CANNOT HANDLE THE GRAFIC NATURE OF THIS THREAD PLEASE TURN OFF YOUR COMPUTER NOW!!!!!!

yes I did cut up a perfectly good hood. I will Repent at a later date.
My apologies to the CUCV purist.

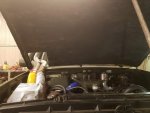
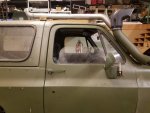
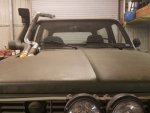
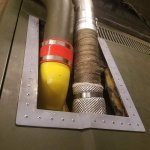
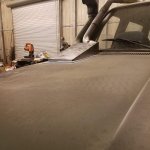
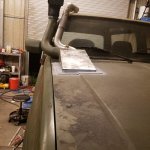
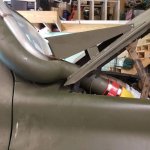
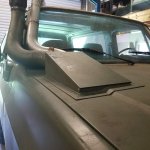
In order to install a snorkel you have to sacrifice something. I am not a fan of the pipe running down the side of the fender so I designed my Snorkel to exit the hood. Since I was already doing the snorkel I added the exhaust.

Yes I am aware that the exhaust looks stupid at this time.
This will be fixed once the roof rack is constructed. I can live with it until then. The batteries are currently in the back seat but will be relocated to where the mufflers were. The 1009 has a step up to the bed from the cab. The batteries will fit in this notch created by the step up. I will probably do the battery work before the roof rack. The truck is tall enough that it is not that hard to get under it to check the batteries and since batteries these days are pretty much maintenance free I should not have to mess with them very often.
There are several advantages to the relocation. The first is weight. The heavy batteries are now right near the rear axle instead of the front upper corner of the truck. Second is they are now in a cool spot and will no longer suffer under the hot hood.

The muffler and exhaust pipe weight is about as much as half a battery so the weight change should help the balance of the truck.
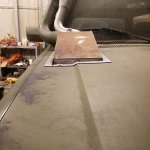
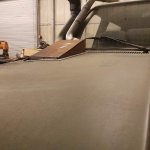
I still have work to do, the opening will be reinforced and covered with a scoop. due to the hinge design of the hood, the back of the scoop will have to hinge open so that it will not bind on the pipes. The pipe on the roof needs more hangers (the wood block is temp) and I need an additional clamp where the pipes connect. The exhaust will get wrapped also.
 

Attachments

Trailboss

Well-known member
Steel Soldiers Supporter
1,577
139
63
Location
Norwood LA
Rich, before you make the exhaust pipe permanent, I suggest drive around with the windows open for summer driving and closed for winter driving and various configurations inbetween. I'm concerned that you will pull the exhaust gasses in the rear window. A carbon monoxide alarm wouldn't be a bad idea at least for the first year.
 

richingalveston

Well-known member
1,715
120
63
Location
galveston/Texas
I don't ever drive with the rear window down.
I use the floor flaps, front windows and vent wings. Any time the back window is open you get all the road trash in the truck. Even with the exhaust exiting the rear side of the vehicle you get the exaust in the back window when it is open.
But you are correct, the exhaust will enter the back window. I plan to put a rear diverter on the roof rack that is similar to the suburban. not sure if the civy blazers had it. It diverts air down the back of the truck and keeps everything clean. I am going to try an up wing right behind the exhaust output to hopefully push the exhaust up above the down wing at the back window.

I also plan to AC the truck in the future.

I have put a lot of thought into doing the exhaust over the top of the truck and I think everything will work out ok. With the muffler under the hood and insulated, it is much quieter than having it under the truck.
 

richingalveston

Well-known member
1,715
120
63
Location
galveston/Texas
hood scoop for snorkel and exhaust

got some work done today to the hood opening before the hood quit opening.
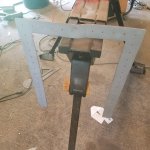
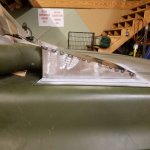
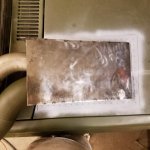
Using flat bar I made the first part of the scoop and used steel rivets to rivet it in place. This gives me something to weld to. the flat bar was mitered and welded including the bend. I made the two side pieces that wrap around to the bend in the hood then cut a small piece to fit the bend and welded it in place.
The next step is to use 2 inch flat bar and weld it to the flat bar I just installed. The 2 inch flat bar will stick out of the hood about 1/2 inch and into the hood 1 1/2 inches. Basicly making a T all the way around the opening. The 2 inch flat bar sticks in far enough so I can weld it to the inner hood braces that were cut. I have some room for some x bracing across the opening.
The scoop will be made out of some heavy sheet metal and be welded to the 1/2 portion of flat bar sticking out of the hood.

Since I had the entire front clip off of the truck, I spent a lot of time today getting the hood and fenders lined back up I still have a few adjustments but before I weld the inner flat bar and the scoop to the hood I have to make sure everything is lined up the way it is supposed to.
The scoop will have to hinge in the back so that it does not hit the pipes when the hood opens.
 

Attachments

richingalveston

Well-known member
1,715
120
63
Location
galveston/Texas
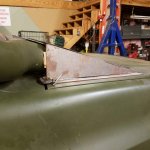
I am almost done. the hood is finished and the scoop is welded together. It will hinge at the very front and lift from the back so it does not bind on the pipes. I got everything painted (first coat) and it is drying tonight, i should get it finished in the next couple days.
The entire hood will get a coat of paint once it is done.
there will be some weather strip on the inside at the front to keep water from migrating through the hinge area.once this project is done i will work on the battery relocation and then the roof rack.
I should be able to start driving it next week.
 

Attachments

richingalveston

Well-known member
1,715
120
63
Location
galveston/Texas
I got the hood scoop finished. It works well, just pull up the back before opening the hood. you can pop the latch with no problem but before lifting the hood you have to lift the back of the scoop up until it sits on the inner brace, the sides are flexed in just a little so it fits tight. A final coat of paint is needed but I am waiting to get the roof rack done. I will put a fresh coat on the entire vehicle once all of the mods are finished.

now time to work on the batteries. and start gathering the material for the roof rack.
 

Attachments

richingalveston

Well-known member
1,715
120
63
Location
galveston/Texas
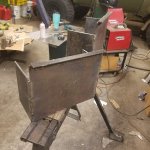
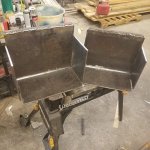
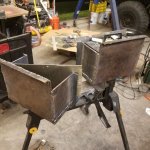
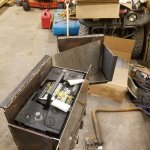
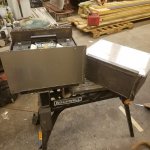
I got the new battery boxes 1/2 built. they are heavy duty because I use the material I have on hand. The backs and bottoms are 3/16 steel and the sides are 1/4 inch.
The front covers will be 1/16 stainless because I have this also on hand. So far the only metal material I have had to buy for all of the stuff built on the truck is 3 sticks of flat bar and two small (2x2) sheets of sheet metal, all from the big box store metal rack.

each box will weigh about 25 lbs. and will be installed above the rear axle. I am going to put a disconnect switch in the drivers side fender well so If there are any electrical issues, the batteries can be shut off quickly. My only problem with them being under the truck is safety. If I were to have a starter run away or other electrical issue, it would take a little bit longer to get the batteries disconnected. And if the batteries were leaking, I would have a hard time not getting battery acid on me while disconnecting if I had to do it in a hurry.

The disconnect will be installed between the two batteries and this is where the 12 volt feed will also connect. I am doing this so if I need to use a 12 volt charger to charge the batteries all I have to do is turn the switch off and then charge each battery. No disconnecting required.
https://www.wholesalemarine.com/perko-250-amp-battery-disconnect-switch-for-12-24-or-36-volt-systems.html
There is almost 4 inches of hand space on top of the battery so it will not be difficult to connect them using a socket with extension.
 

Attachments

richingalveston

Well-known member
1,715
120
63
Location
galveston/Texas
under truck battery boxes

Got a chance to work on the vehicle again and I have the battery boxes almost finished.
I need to trim the covers down to the battery hight, install tie downs, add a rubber flap to the top to help keep the top clean and also bolt the cover in place.
I will then need to weld on mounting tabs once I can get under the truck and figure out where the tabs will be located.
I will try to use any existing holes in the frame to bolt to. I try to put the least amount of new holes in the truck that I can.
 

Attachments

richingalveston

Well-known member
1,715
120
63
Location
galveston/Texas
under truck battery box

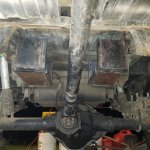
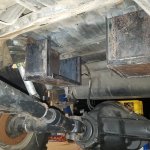
I got the battery boxes in place. I still have to add two mounting tabs to each one that connect the box to the frame they currently just have one tab on the top of the box. The boxes have 8 inches of clearance between them and the axle, no chance of them hitting the axle before the shocks bottom out. The batteries are not that hard to get into the box. First I set them on the rear diff and then it is a pretty easy lift into the box, I can also use the floor jack. The truck is tall enough so that you can sit up under the truck and don't have to do this laying on your back.
I could have put the batteries on the drivers side under the hood but with all this wasted space under the truck I wanted to use it. I think the weight change of getting the heavy batteries over the back axle will be worth the minor trouble it will be to install and remove the batteries. I don't remove the batteries that often and I will have a disconnect within reach so if there are any issues I can flip the switch.
 

Attachments

Sharecropper

Well-known member
Steel Soldiers Supporter
1,836
989
113
Location
Paris KY
Nice work. I applaude you for thinking outside the box (pardon the pun). Are you planning on armoring the cables from the engine to the boxes? I believe if it were me, I would consider running the battery cables in some type of protective conduit, such as Liquid-Tite, which is easily cut to length with easily-installed connectors.

Also, are you planning on weather-proofing the boxes? Because of their location they will probably stay wet in rainy weather. It might be a good idea to apply a heavy coat of undercoating to them to extend their life cycle.
 

richingalveston

Well-known member
1,715
120
63
Location
galveston/Texas
they will get painted and i plan to make a lid for them out of some rubber, they are not water tight, they have some drain holes in the bottom.
water will not hurt them, I just want to keep them as clean as I can. I plan to install a two inch conduit (hard pvc pipe) on the inside of the frame rail to run the battery cables inside to protect them.
I plan to order new cables from batterycablesusa.com and I will install a perko switch inside a weather tight box mounted inside the drivers fender well. The disconnect will break the connection between the two batteries. I should be able to get the boxes done this weekend and get the cables ordered next week.
 

richingalveston

Well-known member
1,715
120
63
Location
galveston/Texas
it has been a while since I have been able to get any work done, the truck has been sitting. I have been starting the truck and letting it run every couple of weeks but have not driven it in several months.
The battery boxes are done and installed with batteries In them, got the measurements and ordered my battery cables. The cables shipped today.
I also ordered some new rear brake calipers with the e-brake built in, they ship tomorrow. I will order new brake cables later this week once the calipers get here just to make sure I get the measurements right.

These are the last two steps to getting it inspected and on the road. I am sure I will have some bugs to work out once I can drive it on a regular basis. The inspection should happen early next week and then I can get new tags.
 

richingalveston

Well-known member
1,715
120
63
Location
galveston/Texas
I am planning on adding a perko disconnect switch in my electrical system for an electrical disconnect.
If I install it on the output of the front battery so that only the front battery + is disconnected, will that be all that is needed.
If I leave the 12 volt feed still connected to the - of battery two, will I have any problems.

As long as nothing gets grounded in the 12volt + side, then both batteries should effectively be disconnected since battery one has the + disconnected and battery two has the - disconnected.

I am trying to decide if I should get a second perko switch for the 12 volt + wire coming off the second battery.

My batteries are relocated but they are still connected in the same manner as stock.

I am not sure if any of the electrical components on the 12volt side can create a ground to potentially drain battery 2 or back feed power in some way that would create a short or damage any of the 12 volt electrical items.

just putting this out there for any comments. I believe a second disconnect is my best option but if I could get away with out it that would be one less item to install.

Thanks
Rich
 

richingalveston

Well-known member
1,715
120
63
Location
galveston/Texas
I finally got some more work done. I was able to get the new custom battery cables installed with a 24v and a 12 volt disconnect.

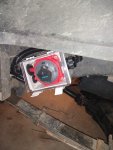
I installed the 24volt disconnect in a weather tight box in the driver side rear fender well, I used a heavy duty 1200 amp perko for the 24 volt disconnect which I know it is overkill. The battery cables are also over sized, the price was less than $100 to go with the larger 4/0 instead of 2/0 so I used the larger 4/0. All of the 4/0 cables have 1 inch split loom covering them for protection.

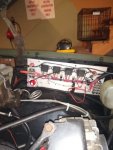
I wired the 24volt disconnect between the two batteries and then from the disconnect I used a 2/0 cable that carries 12volt power to a blue sea 300 amp disconnect which I mounted in my relay panel under the hood. The relay panel is mounted to the inner fender with isolators.

I then ran 12volt power to my interior fuse panel above the glove box and a jumper to the stock 12volt bus (next to the glow plug relay)
from the 12volt disconnect
.

And then a final run of 24v power from the stock 24volt bus bar to the relay panel. All of my lights are 24volt and I use 12volt power to activate the relays.

No fuses in all of the battery cabling. I have either fuses or fusable links on all the lights and other accessories. The cables are all sheathed in wire loom and ran in the frame rails so they are well protected from getting grounded out. I had a couple of bad relays so you can see the missing relays in the picture.

I also got the truck inspected and I should have time to go do the registration tomorrow.
 

Attachments

Top
AdBlock Detected

We get it, advertisements are annoying!

Sure, ad-blocking software does a great job at blocking ads, but it also blocks useful features of our website like our supporting vendors. Their ads help keep Steel Soldiers going. Please consider disabling your ad blockers for the site. Thanks!

I've Disabled AdBlock
No Thanks