• Steel Soldiers now has a few new forums, read more about it at: New Munitions Forums!

  • Microsoft MSN, Live, Hotmail, Outlook email users may not be receiving emails. We are working to resolve this issue. Please add support@steelsoldiers.com to your trusted contacts.

optimizer long block - hummer 24V or cucv 24v

richingalveston

Well-known member
1,715
120
63
Location
galveston/Texas
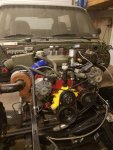
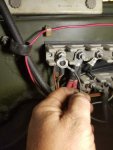
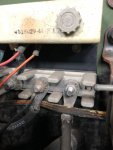
all I have left to do is put the starter in and wire up the batteries and I can start putting fluids back in it, prime all the system and start it up. I have not had a chance to look at tm's to see where the black wire goes in the previous post, if anyone knows, it would save me some time. since there is no fuse link, I think it goes to ground bus but I am not sure. I also have to figure out how to wire up the oil pressure sending unit. The 6.5 came with a three wire sending unit, I currently have a single wire.
If anyone has any wiring instructions for the 3 wire unit then please post it.

Thanks,
Rich
 

Sharecropper

Well-known member
Steel Soldiers Supporter
1,836
987
113
Location
Paris KY
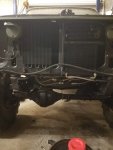
Rich; The black wire in my M1028 goes to the middle stud on the bottom bar. See photo. Regarding the 6.5 oil pressure sending unit, are you talking about the unit in the engine valley under the intake manifold? If so, that is a safety pressure switch which shuts down injection pump/engine if oil pressure is lost. While this may seem like a nice safety feature, if the switch becomes defective it will be a bear to replace. I plugged this opening in my P400 6.5 and plan on using the regular oil pressure port location on the back of the drivers head.

Hope this helps.
 

Attachments

richingalveston

Well-known member
1,715
120
63
Location
galveston/Texas
thank you, yes it is the one in the valley. I thought it was a newer style oil pressure sending unit. I have the current oil pressure switch for the idiot light in place but I wired all my idiot light sensors into the check engine light so the current sending unit is needed or I will have to take the dash apart to fix this. I believe the threads are the same for the one wire oil pressure sending units as the one in the valley so I will just remove this sensor and install the correct one wire sending unit in its place.
Thanks
Rich
 

Sharecropper

Well-known member
Steel Soldiers Supporter
1,836
987
113
Location
Paris KY
I'm planning on keeping my OEM idiot lights intact, and also add Autometer 2-5/8" mechanical gauges in a custom mount which replaces the ashtray. I will retain the OEM sending units for the idiot lights, but the mechanical gauges hook into the systems they will monitor. Or in other words, the Autometer oil pressure gauge will have a pressure line from an oil port through the dash and into the back of the gauge, without an electrical sending unit. Same for the water temperature gauge - it has a thermocouple line which screws into the extra port in the HMMWV crossover, without an electrical sending unit. Real time stuff. I will post photos whenever I get to that part.

https://www.autometer.com/2-5-8-oil-press-0-100-psi-lfg-mech.html
 

richingalveston

Well-known member
1,715
120
63
Location
galveston/Texas
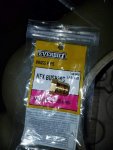
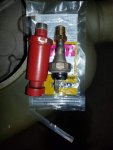
oil presure sending unit

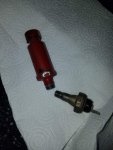
The threads and size are not the same. the large one is the presure safety switch the small is the oil presure sending unit. I am going to see if i can find an addapter so i can use the hole in the valley. maybe i can get a 45 degree also so it can be changed without removing the intake manifold

20190408_190528.jpg
 

Sharecropper

Well-known member
Steel Soldiers Supporter
1,836
987
113
Location
Paris KY
What do you think about getting some hard brass fittings and pipe from Ace Hardware to extend the valley port rearward to terminate at the back of the valley? That’s what I used on the front turbo port of my P400 to pressurize the Spinner centrifugal oil filter.
 

richingalveston

Well-known member
1,715
120
63
Location
galveston/Texas
that is what i am going to try to do. since it is a presure switch and not a temp sensor, the extension should not matter. If i can just 45 it, it would be removable without removing intake. from a quick internet search and read, it looks like the switch one is not reliable so i would like to go with the smaller one that is just a sending unit.
 

richingalveston

Well-known member
1,715
120
63
Location
galveston/Texas
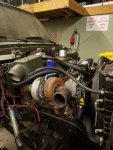
20190408_203415.jpg20190408_203500.jpgcould not find a 45 degree fitting so I just got a reducer bushing and installed the small sending unit. I already had it working with my gauge when using the 6.2 so it was the easiest thing to do. All I have left now is to install starter, bolt up torque converter and rework two oil lines, then it will be ready to fill with fluids, prime and start.
 

richingalveston

Well-known member
1,715
120
63
Location
galveston/Texas
maximum frustration

maximum frustration.
Got the coolant added. did not get to the oil yet and heard something dripping on the floor. The gasket is leaking where the paradox kit mounts to the water crossover which is an easy fix but the real problem is the head gasket on the passenger side is dripping. I have never had a new head gasket (done about 6 or 7) leak when adding coolant. have not started the motor yet. It is leaking right above the starter.
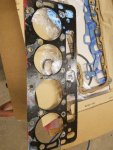
I bought an engine tech gasket set from rock auto. never used this brand before and will not use them again. They seamed thin when I got them out of the package and have no grommets, not even at the cylinder bore. I was hesitant to put them on but they where supposed to be superior engineering.

I considered continuing to add all the fluids and thought maybe some heat would seal them up but I am going to pull the heads and replace them. leaking before the engine has ever started just tells me they wont last long.

two steps forward and one step backward has been the way this build has gone from the beginning so hopefully I am getting close to the being back on the road.

maybe the video will work
 

Sharecropper

Well-known member
Steel Soldiers Supporter
1,836
987
113
Location
Paris KY
Rich - I had to think a few minutes before posting. I certainly don’t want to play Dr Doom, but if that passenger side head was installed and torqued properly, and I feel that it probably was, then there may be a larger issue. In my 50 years of working on engines, I have never heard of a head gasket leaking before cranking. In fact it’s hard for me to believe it is the gasket. Either one or more head bolts didn’t get torqued (or overtorqued and stretched) or the head didn’t get surfaced properly. Dang it is hard for me to say that, but if I were you I would stop until I discovered the issue. I guess the first thing to do is to pull the valve cover and check torque. If everything checks normal, the only other thing to do is pull the head. Question - when the engine burped the timing gears, were any of the push rods bent? If so, were the bent rods in the same side and area of the leak? Still trying to figure out what is wrong.
 

richingalveston

Well-known member
1,715
120
63
Location
galveston/Texas
new head, new motor, did not leak the last time. The head that got damaged was the other side (bolt hole fixed). no bent rods, new lifters. using ARP head studs torqued to 90 lbs. bought a new torque wrench. bolts torqued in correct order. I really think the gasket has to be bad. the motor never ran long enough to heat up and warp the head. The heads had new valves and seats put in them, they were checked and did not need resurfaced. They were not leaking when I pulled them off.
I really think it is a bad gasket. I thought they were very thin compared to any gasket I have ever used, they had a rubber like coating on the entire gasket and no grommets. normally there are copper like grommets around the cylinder bores and bolt holes but nothing with these gaskets.
the video won't upload. The leak is right above the starter about 1/2 inch from the exhaust manifold. I isolated the area with paper towels to make sure it was not coming from somewhere else and just dripping off in this area. It is definitely leaking at the head gasket. It drips every 10 seconds.

I have already been to auto store and ordered new felpro gaskets. they will be here around noon tomorrow so I can break it down this weekend. I will change the gaskets and before I put the rocker covers on and IP in, I will put cross over on and then fill the radiator to see if it repeats. IF so I will take back to machine shop and have the surfaces checked again.
 

richingalveston

Well-known member
1,715
120
63
Location
galveston/Texas
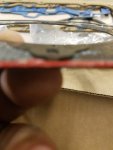
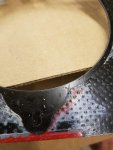
I think it is the gasket. no issues with head or block both surfaces are like brand new. The gasket does have grommets around the cylinder boars and the metal tabs. one of the metal tabs was not seated in the black rubber stuff that coated the entire gasket. Also the metal grommets appear to be a lot thicker than the rest of the gasket, they did not compress to the same thickness. measuring with a micrometer, the metal rings and tabs are .064 and the rest of the gasket is .052. This is after they have been installed and torqued so the metal did not compress, you can see in the pictures, the thread sealant on the head bolts was able to squeeze out around all the holes and in one spot the paint went all the way to the grommet. I did not use that much thread sealant, no more than what I would normally use, just enough to fill the depth of the threads before install.
20190412_215939.jpg20190412_220021.jpg20190412_220025.jpg
I touched up the paint on the motor several days after torqueing the heads and putting the valve covers on.
I will measure the felpro gaskets tomorrow before I put them on but due to the large difference in the thickness of the gasket and how the thread sealer and paint was able to spread into the gasket, I think they are defective.
I noticed Rock Auto does not sell this brand anymore, I am going to check to see if there were problems with them and that is why they don't offer them anymore, maybe I can get a refund.

Rich
 

richingalveston

Well-known member
1,715
120
63
Location
galveston/Texas
yes, i am glad i found it before i got the fenders on it. I don't think it would have survived the start up. Once the water pump presured up, i think it would have leaked in many places. I should have the heads back on it tonight and i am going to do a presure test of some kind before putting the valve covers on and the alts and hydro pump. i will post some pics tonight on how that goes. I don't have any specific tools to do a presure test so i will put a plug in the bottom radiator hose and probably build something from the top radiator hose. Or I may try to connect the two water hoses to the radiator and spin the water pump with a drill.
 

richingalveston

Well-known member
1,715
120
63
Location
galveston/Texas
I got the head gaskets replaced. The drivers side was not leaking but I am pretty sure it was going to once pressure was applied. It was just like the other one where paint had made it all the way into the gasket up to the grommets at the cylinder bores.
I installed the intake manifold and the cross over and also temp connected the radiator so the cooling system was sealed. I rented a test kit from the auto parts store and pressured the system to 6 psi. so far it has held for an hour before I called it quits for the night. I will see if it holds all night.
The test kit goes up to 30 psi but I am not sure how high I should take it. if anyone knows what psi I should set it at and for how long I should let it sit to see if it test good.
thanks,
Rich
 

Retiredwarhorses

Well-known member
Steel Soldiers Supporter
4,400
4,182
113
Location
Brentwood, Calif
I got the head gaskets replaced. The drivers side was not leaking but I am pretty sure it was going to once pressure was applied. It was just like the other one where paint had made it all the way into the gasket up to the grommets at the cylinder bores.
I installed the intake manifold and the cross over and also temp connected the radiator so the cooling system was sealed. I rented a test kit from the auto parts store and pressured the system to 6 psi. so far it has held for an hour before I called it quits for the night. I will see if it holds all night.
The test kit goes up to 30 psi but I am not sure how high I should take it. if anyone knows what psi I should set it at and for how long I should let it sit to see if it test good.
thanks,
Rich

Cooling system pressure should be the same as a HMMWV, 15-16 psi max...your radiator cap should have it stamped
on the cap.
 
Top