• Steel Soldiers now has a few new forums, read more about it at: New Munitions Forums!

  • Microsoft MSN, Live, Hotmail, Outlook email users may not be receiving emails. We are working to resolve this issue. Please add support@steelsoldiers.com to your trusted contacts.

Overhead console VIC-3 radio mount

Buffalobwana

Well-known member
Steel Soldiers Supporter
1,394
178
63
Location
Frisco Texas
Last week I built an overhead console to hold:
* VIC 3 main box
* two crew boxes
* Augis phone to VIC-3 interface system
* Red overhead light (preserve night vision, for night ops, to get chips and salsa for the game)
* regular white overhead light (to get chips and salsa for the game, when you need to see inside the cab better)
* switches for these two lights
(the above was accomplished, below was passed until another day)
* a custom built relay panel, by me, to run 7 LED lights.
* switches for 7 LED lights that are going on the truck

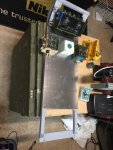
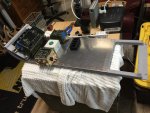
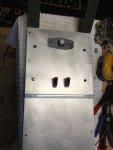
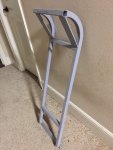
First the frame. This is my second one I made a stupid rookie welding mistake on the first one and trashed it. 1” sq tube bent to 5” outside radius. Radio mounts and cross beams welded on to accept 12x24 piece of 1/8” aluminum plate.
EC2140DB-0CEE-4620-A590-463D1934C49E.jpg
 

Buffalobwana

Well-known member
Steel Soldiers Supporter
1,394
178
63
Location
Frisco Texas
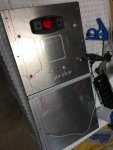
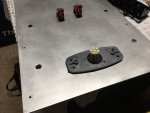
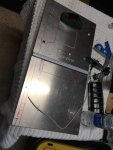
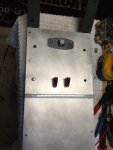
Fit aluminum plate, lights (notice use of marker light for red light “night-ops” lighting ... more on this later) a white LED strip from Amazon that I’m very impressed with and Radio and use red marker to mark locations. Note shiny aluminum finish. I really like this thickness. It’s rigid, easy to work with, drill, file etc. good stuff.

E3944802-C7EF-487D-842E-49D71809714B.jpgE5028F7A-8FDD-4936-B23D-D117B270C9B2.jpg
 

Buffalobwana

Well-known member
Steel Soldiers Supporter
1,394
178
63
Location
Frisco Texas
Now for the electrical.

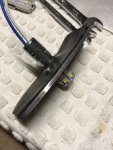
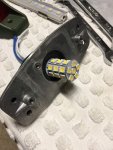
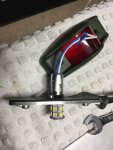
Red Light: your normal red marker light does not throw enough light to light up the cab sufficiently for “chips and salsa night ops” so, I removed the normal rubber light mount that comes with a full marker light and made my own. I have some LEDs that really are crazy bright, has same base as the marker light, but too long to fit with stock socket. I also have individual light sockets. So I made a thick rubber gasket that firmly held the light bulb in place and the base is simply attached to the bulb. This may or may not work, but the rubber is pretty thick, and the design is purty good. Time will tell.

2C082B14-3716-4353-878D-9D1F16C30A6B.jpgF3D0F907-33E2-4E8F-A8F8-0ADD0DA8C116.jpgE7990333-FC84-4F14-BC25-E21443FE6D0C.jpgFAE5092B-96E7-4F45-BB4F-3541609F628C.jpg
 

Buffalobwana

Well-known member
Steel Soldiers Supporter
1,394
178
63
Location
Frisco Texas
I’ll try to find the link to this LED light bar. It’s super bright easy to install and happens to be 12” (the exact width) and 12/24v too.

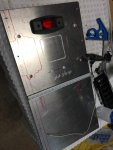
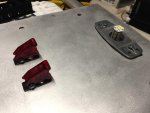
I had some really cool toggles with red spring loaded covers that I was going to use on another project, so, I put them here, can order more for the other project. I like the feel of them. Solid. Also, this 1/8” aluminum contributes to the feel. I think a 18ga or thinner sheet metal just wouldn’t have the same thick, solid feel.
9ACE552A-A85E-4099-9207-ED5AE228ED1A.jpg4ECAB63A-5B4F-4764-BB5E-5CBC64D4F901.jpg09B35873-F511-4CAF-9BF8-1DF17025EB3C.jpg
 

Buffalobwana

Well-known member
Steel Soldiers Supporter
1,394
178
63
Location
Frisco Texas
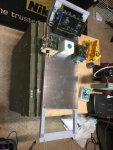
Now to mount the radio, I had to move the crew boxes in a little to ensure stability, and in order to accommodate proper mounting, I welded an additional piece of 1” sq tube to the main frame to mount crew boxes farther in.

I drew outlines on the aluminum and secured aluminum to frame temporarily with self tapping #8 screws. This gave me pilot holes for the 3/16” rivets I would use later to secure the aluminum.

The main radio box was secured with stainless 5/16” bolts to its two angled flat 3/16” bar. The two crew boxes were secured with 5/16” rivnuts into the 1” 14ga sq tubing. The phone interface was secured with a generous amount of JB Weld after I peeked inside and realized I would definitely break something if I tried to drill or screw in there.

05EAA884-5BB6-4BD3-8225-1780AD5DB138.jpg4AC2577B-8C25-41ED-BEE9-9469D4EA96CF.jpgC3B02F1A-FBB3-4C39-86BA-99A380F73064.jpg
 

Buffalobwana

Well-known member
Steel Soldiers Supporter
1,394
178
63
Location
Frisco Texas
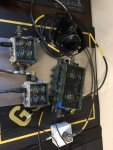
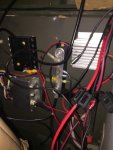
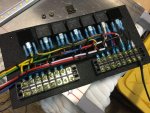
I spent about 2-3 hours making a 7 relay board for the LED lights I’m planning on putting on the truck. Modern LEDs are draw so little power that relays aren’t really necessary, but, first, I wanted to clean up the electrical mess behind the seat

ADA484D3-E3D4-4092-8FAA-55E0E8895AF8.jpg

and second I wanted the LED light Wiring to be clean, easy to understand and as compact as possible. While the relay board doesn’t solve the mess behind the seat, it does prevent from adding to the mess, and it gave me a goodnight idea on how to solve it! (More on that later).

Here is my Relay panel that didn’t make it on the condole, yet.
812684CA-9305-4B77-B230-67CF7FABEDB8.jpg
 

Buffalobwana

Well-known member
Steel Soldiers Supporter
1,394
178
63
Location
Frisco Texas
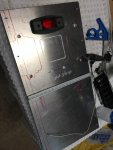
Notice the aluminum finish from beginning to end. I use a vibratory sander with 100 grit and make tiny circles, as tight as possible, then, experiment with sanding in large circles until every bit of shine is gone. Use a fan to blow the aluminum dust away as you do this.

410F1309-A26F-4DD8-9F96-2BD4A67A266B.jpg4D03AB28-BAF9-4A4B-B68B-2FF242368CFF.jpg34CF74EF-1ED5-49F1-B8EA-D4B742E3EFAC.jpg
 

Buffalobwana

Well-known member
Steel Soldiers Supporter
1,394
178
63
Location
Frisco Texas
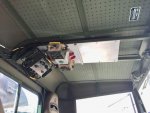
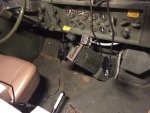
That’s about it. I wired up the lights to the switches and ran a lead down to my power source behind the seat. And mounted it.

67DC0B1D-495B-41C0-8D92-EF9AAE05085F.jpgFBD2199A-3E62-4764-8550-FCB895FBAA5E.jpg03B6819B-1E22-496A-A695-D14B5E0C2566.jpg
The final routing of the cables about as clean as you can get them EAD0E9D6-D019-46DD-815D-DCF3FBEF7561.jpg
 
Last edited:

Buffalobwana

Well-known member
Steel Soldiers Supporter
1,394
178
63
Location
Frisco Texas
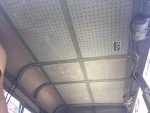
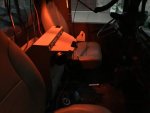
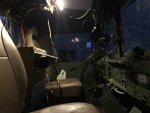
The camera doesn’t capture the coolness of the red light. Makes it look orange. Trust me, it’s cool! The led really Lights up the cab. Pretty pleased.

4D650907-A1F1-4E4B-81AB-86648ADC3A7B.jpg602DB060-0584-4A4B-AFBB-5B626E7C4A2E.jpg6EFDF71E-1DFF-4D31-9A48-D8E0D9E60CF5.jpg
 

Buffalobwana

Well-known member
Steel Soldiers Supporter
1,394
178
63
Location
Frisco Texas
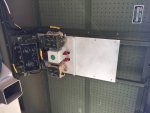
Just before I installed it, I noticed one of the switches had a loose contact. I couldn’t find any solder, said, “Eh, it’ll ride.”

It didnt. Started flickering after just a short time. So, down it comes. I believe this is a sign from God saying, “you got it this far, go ahead and install the relay panel, all the push button breakers and get it ready for LEDs, while you are at it, build that big bumper you have designed and install your winch. (God wants me to cover the truck with really bright LED bars I think. Who knows, but why question such obvious signs like this!)
 

Buffalobwana

Well-known member
Steel Soldiers Supporter
1,394
178
63
Location
Frisco Texas
Well, at the moment they work as really good noise canceling headphones and a great Intercom system for the truck so you can carry on a conversation with your passenger at highway speeds. It works great for that. Augi made a cell phone to radio interface that works great so I can accept calls and make calls at highway speeds.

As for comms with another vehicle, I need another truck with a VIC 3 to talk to. In other words, I need friends with radios.
 
Top
AdBlock Detected

We get it, advertisements are annoying!

Sure, ad-blocking software does a great job at blocking ads, but it also blocks useful features of our website like our supporting vendors. Their ads help keep Steel Soldiers going. Please consider disabling your ad blockers for the site. Thanks!

I've Disabled AdBlock
No Thanks