wsucougarx
Well-known member
- 6,951
- 72
- 48
- Location
- Washington State
I am starting this thread to chronicle my particular off-grid/off-road/outback camper/bug-out vehicle/emergency comms project with my newly acquired M109A3 w/w. There have been a ton of M109A3 camper based threads in here so I figured I may as well throw mine in the bunch. My intention is to built a rig that maintains a military feel (I know what you're thinking...no creature comforts) and military appearance (KISS). Due to the limitations on space, I am concentrating more on what I feel is important in a truck with regard to emergencies and living. So no in-house shower or toilet facilities. This is all still in the planning phases so this thread may go on and on until I get things figured out.
I won't get in the specifics about how I got this truck as you can read it here:
http://www.steelsoldiers.com/deuce/54658-jblm-m109a3-w-w-recovery-success.html
Here's what I have to serve as my platform:
198x AM General M109A3 w/w
Personal Coolant Heater
Split Brake Circuit
Hardtop (in the process)
1200 miles/102 hours
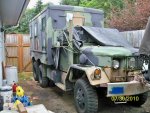
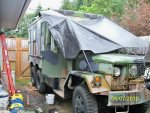
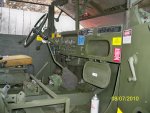
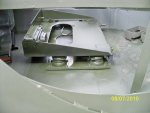
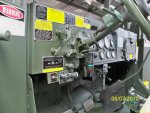
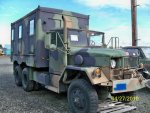
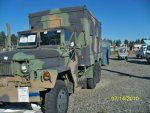
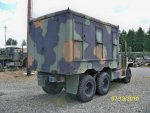
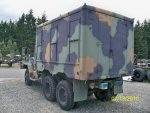
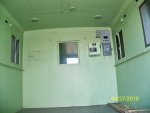
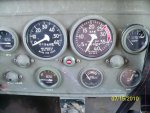
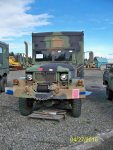
Here are some pics I have already posted in the thread above. These pics will serve as the before pics and shows the platform I am using for this build.
More details to follow.....
Table of Contents:
M105A2 Page 13
I won't get in the specifics about how I got this truck as you can read it here:
http://www.steelsoldiers.com/deuce/54658-jblm-m109a3-w-w-recovery-success.html
Here's what I have to serve as my platform:
198x AM General M109A3 w/w
Personal Coolant Heater
Split Brake Circuit
Hardtop (in the process)
1200 miles/102 hours
Here are some pics I have already posted in the thread above. These pics will serve as the before pics and shows the platform I am using for this build.
More details to follow.....
Table of Contents:
M105A2 Page 13
Attachments
-
 85.2 KB Views: 544
 -
 71.6 KB Views: 501
 -
 84 KB Views: 491
 -
 84.6 KB Views: 472
 -
 35.2 KB Views: 592
 -
 61.3 KB Views: 582
 -
 79.1 KB Views: 557
 -
 94.3 KB Views: 607
Last edited:
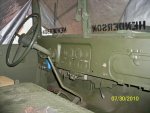
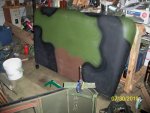
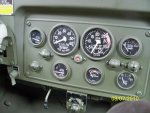
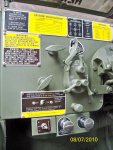
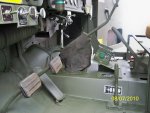
") . I used 383 green and 383 brown Gillespie paint from Rapco. These two colors are way too glossy for my tastes but they'll work for now. Hoping the UV's will flatten them out down the road some. The flattest black I could find was Rust-oleum Chalkboard paint (thanks James Hicks). Also decided to repaint the interior as she came off the assembly line in 198x. The original interior paint is Forest Green 34079. The windshield assy had to be replaced as the window frame was pretty bad with rust. Rather than spending the money now for small parts, I decided to take parts off a truck I am currently not operating...sorry truck:-0. You can see the contrasting color between 383 CARC Green (windshield) and the forest green (dash). I am also in the process of adding the multi-fuel heater to the van portion of the truck. I got the heater platform and heater mounted today. Also got the exhaust pipe and intake shroud mounted to the outside of the box.
. I used 383 green and 383 brown Gillespie paint from Rapco. These two colors are way too glossy for my tastes but they'll work for now. Hoping the UV's will flatten them out down the road some. The flattest black I could find was Rust-oleum Chalkboard paint (thanks James Hicks). Also decided to repaint the interior as she came off the assembly line in 198x. The original interior paint is Forest Green 34079. The windshield assy had to be replaced as the window frame was pretty bad with rust. Rather than spending the money now for small parts, I decided to take parts off a truck I am currently not operating...sorry truck:-0. You can see the contrasting color between 383 CARC Green (windshield) and the forest green (dash). I am also in the process of adding the multi-fuel heater to the van portion of the truck. I got the heater platform and heater mounted today. Also got the exhaust pipe and intake shroud mounted to the outside of the box.