acme66
New member
- 349
- 9
- 0
- Location
- Plains, Montana
https://www.youtube.com/watch?v=i8qp53AIQrA
Yea, I know, don't and never, but those are the same things we say about split rims right and how many of us have done that by hand too? Not down playing the danger but I can be more frank on here than I can on youtube. I am going to go out on a limb and say I think this is one of those things that gets overblown. The **** thing terrifies me and I go about it very methodically because of it. I bet if I changed several of these a day in a service station I would lose my fear and start changing them on auto pilot. Bad things happen on auto pilot, just ask the missing 1/2 inch of my left middle finger or the jointer that took it. I tried very hard to never put myself in the direct path and kept myself aware of exactly where it would go if it went. Never gave it more than a chance for a glancing blow if I could help it. Anyway I think the perception is worse than the reality on this one. Not that it can't hurt you or kill but that they are little more than ticking time bombs and the next mouse fart will set them off. That’s the stuff they say to keep Joe Blow from messing with them but are we Joe Blow? I'm not, you decide for your self I guess. It was practical information that was missing. I am disclaimered up so while my official advice is don't, here are my tips:
Inspect the caging tool for damage and replace if you see ANYTHING that looks funky.
Do what I did and try to damage the caging bolt by whacking it by hand on something hard. If you mark it, replace it.
Make sure the truck is aired down. That will mean opening valves 1,2 and 3. Leave them open, leave them all open, even 4.
Chock it if you don't have mud to freeze it into.
Inspect the caging socket; get to know it with a light. If you see damage it is over, replace the whole thing.
Play with the tool to get the feel of the socket, make love to it with the bolt. You want to KNOW when you have it properly seated.
Lube the threads. JUST THE THREADS. I used wax. Lots of tension is going on there and you don't want the added stress of a galled up nut.
Go check the air again.
No air tools or socket wrenches when caging. Use an open end so you can see, hear and feel what is going on.
Treat it like a loaded gun when caged, stay out of the line of fire, inspect from angles. No helpers.
I think the tire rubber lubricant (the real stuff) helped center that diaphragm. I didn't show it because I don't know if it is good for it but I think it helped.
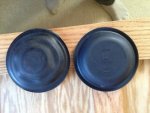
Getting those diaphragms in was frustrating. It took a long time. Nothing is going to make that better. Expect it. Don't rush.
Clean the clamps before you install them. I lubed them, I think it helped.
Replace the clamp nuts with quality 3/8 stainless nylon lock nuts. You will thank me.
Tighten the clamps and tap them, tighten and tap, tighten and tap. Don't over tighten and damage the bolts.
Uncage, then immediately recage.
Re-inspect everything again and then loosen the clamps. I could hear and feel the rubber adjust itself.
Tap and tighten, inspect and uncage.
I used NAPA part numbers MBI DP12 and MBI DP16. I have yet to replace any of the service diaphragms but I wanted some on hand. Still looking for a decent price (or any) source for new (or rebuilt) whole cans. Recommendations (part numbers and store names) appreciated.
I know others have done this so if you have some tricks post them here, you know in between the rage and your going to die comments.
Always remember (both you and your lawyer) my OFFICIAL stance on this is don't, but if you do, no auto pilot ok?
Happy New Year from Montana.
-Ken


