jbmilart
New member
- 29
- 0
- 1
- Location
- Grizzly Flats in N. California
I've just replaced the old 1/4" rubber tie downs for the M101a3 cover. I searched all over the Internet for the correct diameter size rubber cord... couldn't find any. I then settled for the next size up... 3/8" rubber cord, which is what truckers use to tie down their tarps. I found that most companies only sell these in 150' rolls and can cost up to 60 bucks or more... but I found a company out of Oregon... "Autohauler Supply"... selling the 3/8" solid core rubber cord for $36.00 dollars for a 150' roll... way more than I needed... but the price was right.
Once I received the rubber cord, I now had to figure out how to thread the 1/8" larger rubber... through a 1/4" hole on the cover's tie down tabs.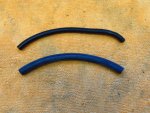 These are the two rubber cords... the original rubber is on top and the new 3/8" rubber is on the bottom. I figured to "melt" the original 1/4" holes on the tabs making them bigger. Since the cover is vinyl over a woven cloth... I decided to use my 12" steel punch to do the job.
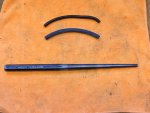 This is the punch I used... heating the punch with a torch... up about half way up the shaft... not red hot... but... just hot enough to melt the material. Shoving the hot punch through the holes... turning the punch as I went... created a melted coating on the inside of the holes... searing the edges of the fabric, actually sealing the holes just like the original holes looked like.
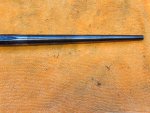 If you look closely at the punch... the wear mark in the middle of the tool, is where I stopped pushing the tool through the tabs, creating a hole slightly bigger than 3/8" in order to get the cords through without much friction. I also noticed that some of the holes... kind of shrank a little when they cooled... but a couple more passes cured that up pretty quickly. I also used a drill to clean up some of the rough edges in the holes making the rubber cords pass a little easier.
Photos of the finished work...
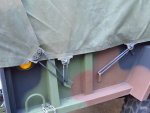
Left front of trailer.
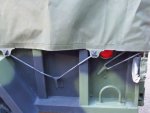
Left rear.
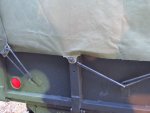
Left tail gate.
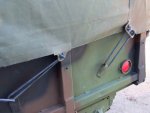 Right tail gate.
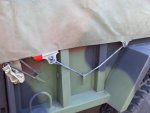 Right rear.
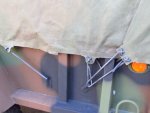 Right front.
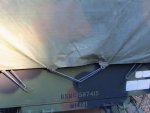 Front of trailer.
I hope this thread isn't beating a dead horse... just thought this might help someone who wants to try and keep much of the originality in their trailer covers as possible. I was lucky that this trailer cover had very good tie down tabs to work with. Now the next question is... what to do with this extra 100' of 3/8" rubber cord?
Here's the website for the 3/8" solid core rubber cord: http://www.autohaulersupply.com/ Part Number: RR375S
Once I received the rubber cord, I now had to figure out how to thread the 1/8" larger rubber... through a 1/4" hole on the cover's tie down tabs.
 These are the two rubber cords... the original rubber is on top and the new 3/8" rubber is on the bottom. I figured to "melt" the original 1/4" holes on the tabs making them bigger. Since the cover is vinyl over a woven cloth... I decided to use my 12" steel punch to do the job.
 This is the punch I used... heating the punch with a torch... up about half way up the shaft... not red hot... but... just hot enough to melt the material. Shoving the hot punch through the holes... turning the punch as I went... created a melted coating on the inside of the holes... searing the edges of the fabric, actually sealing the holes just like the original holes looked like.
 If you look closely at the punch... the wear mark in the middle of the tool, is where I stopped pushing the tool through the tabs, creating a hole slightly bigger than 3/8" in order to get the cords through without much friction. I also noticed that some of the holes... kind of shrank a little when they cooled... but a couple more passes cured that up pretty quickly. I also used a drill to clean up some of the rough edges in the holes making the rubber cords pass a little easier.
Photos of the finished work...

Left front of trailer.

Left rear.

Left tail gate.
 Right tail gate.
 Right rear.
 Right front.
 Front of trailer.
I hope this thread isn't beating a dead horse... just thought this might help someone who wants to try and keep much of the originality in their trailer covers as possible. I was lucky that this trailer cover had very good tie down tabs to work with. Now the next question is... what to do with this extra 100' of 3/8" rubber cord?
Here's the website for the 3/8" solid core rubber cord: http://www.autohaulersupply.com/ Part Number: RR375S


