• Steel Soldiers now has a few new forums, read more about it at: New Munitions Forums!

  • Microsoft MSN, Live, Hotmail, Outlook email users may not be receiving emails. We are working to resolve this issue. Please add support@steelsoldiers.com to your trusted contacts.

Ricks Deuce build

bigginstactical

New member
246
1
0
Location
port angeles washington
Those are mighty clean cuts. You're a wizard with a cutting wheel:

- Just a plain straightedge to guide the wheel?

- And then how do you finish those inside corners (I'm not thinking the cutting wheel gets you there, but maybe so)?

Usually I scribe, sharpie or tape a line to follow. Haven't used a guide as I'm able to get it fairly straight with this method. Here are some pics of what I'm using. You want the really thin 3m wheels. They are expensive but worth it if you have to do a lot of cutting. Id say 90% of the cuts I made on this whole project where with that tool. This is what I used on the window hole as well.
 

Attachments

bigginstactical

New member
246
1
0
Location
port angeles washington
No kidding I can't get my cutting wheel to work that well. What size and thickness are you using for the skin and tubing. About to start building my roof 100% custom and thinking 18ga for skin and 1" square tubing for structure.
Personally I think both are a little overkill. I try to make things I do stronger then what it should be and I feel it is with what I used. I used 3/4 heavy wall square tubing. Huge difference between heavy wall and normal. I used 20 gauge sheet metal for the roof as It is very strong but you are still able to bend it around a bit. I don't have many sheet metal tools like rollers and box break so being able to manage the metal is huge for me. Most roof skins on vehicles are 20 with the rare occasion of 18. I was able to screw the pieces on and hand bend them into shape to weld. So for me 20 is the best all around. If you have access to a roller or similar products you cant really go wrong with 18. Same with the 1 inch tubing, for me the 3/4 worked well, but if you can afford thicker materials and have the tools to work with it you might as well. Although I did have about 400 pounds standing on the middle of my roof testing the framework and it hardly flexed haha! I would not go less then 20 on the roof. Your choice would be fine but I feel you'd be able to save some weight and money and still be perfectly stout, but either way that roof should be strong for you.
 

w3azel

Member
229
0
16
Location
Waipahu/HI
Working with the metal is easy, well minus cutting. All the lines are going to be straight except the back corners. My biggest concern is welding all that metal. My welder can handle it, I don't know if I can. At this point I'm getting sick of welding sheet metal as it is. If you didn't have issues I'll do 20ga. Then again I might be doing this sheet metal thing wrong, I weld all my seems the entire length and sand them smooth then touch up with filler. Before this project my welding experience was with tube chassis in college and that was 6-7 years ago.
 

bigginstactical

New member
246
1
0
Location
port angeles washington
I would recommend the method I quickly drew in the picture. Its a stronger joint and doesn't make the metal so brittle at the weld. Quick description (don't judge my drawing haha) green line is original metal, red is sleeve, brown is new metal. I usually overlap about an inch or two under the two pieces of metal. Drill and spot weld the sleeve to the new metal side. Cut fit and lay your new metal or other metal on top of the sleeve and spot weld. Then you can stitch weld the seem or fully weld like you have been doing. This way seems harder but it is pretty fast because it holds your metal flat to the other piece and in the end is a stronger joint. Stitch welding is actually better then welding solid but I did weld solid up over the top of the roof where you can see. I stitched the whole top and will just run a wide swath of seam sealer over the butt joint. I wouldn't bondo the roof seams in the middle because the chances of the bondo cracking from flex is pretty high up there. Seam sealer would be the way to to IMHO. Buy a couple boxes of self tapping screws and screw all your pieces together for fit. Once tacked I just drilled the hole a little bigger and welded it as a spot weld. Not saying this is the only good way to do it but this how we do almost all our replacement panels for the safety of those driving their cars and it has worked for us.
 

Attachments

w3azel

Member
229
0
16
Location
Waipahu/HI
That is very helpful and I think that self tapping screws idea will really help. I'm a one man show on this project, well me and my trusty engine hoist. Ive never dealt with seam sealer, is it like a caulking and how do you smooth it out and paint over it?
 

bigginstactical

New member
246
1
0
Location
port angeles washington
That is very helpful and I think that self tapping screws idea will really help. I'm a one man show on this project, well me and my trusty engine hoist. Ive never dealt with seam sealer, is it like a caulking and how do you smooth it out and paint over it?
Glad to help! I have had zero help through this whole project also. I had a little bit of input but that's really about it. Self tappers are the way to go. Also invest in some clamps. Makes a big difference. Seam sealer is like caulking. We use about 8 different kinds but I will recommend three for you to try. I will say upfront they are expensive but you get what you pay for with sealer. The first would be the 3m sausage tube.Pic is below. It is thin and always stays flexible. We use a solvent from crest called Acry Solv. to smooth it out. You can use a mild cleaner for urethane products to do the same thing. I only use this over a primed surface and it must dry over night. Next is another crest product called black jack. Its self leveling and fairly hard. Dual mix (two tubes connected) cartridge. Drys and is paint able in half an hour. Last would be SEM single tube seam sealer. Can't find a pic of it but I can get the part number if you want. It is a one part, just squeeze it out with a caulking gun. It can be painted over instantly, wont be hard so don't mess with it. It can also be applied over bare metal. For seams you will see or things you want to smooth we use 3m. Semi visible seams we use SEM as it is not as thin but can be smoothed or brushed. For quick fixes Black Jack. On this project I have mostly used SEM and probably will use it for pretty much the whole thing. You can put a whole bunch over the roof seam and brush it out to seal it up really well. You can also get roof sealant from an RV shop but it doesn't last as long as a good sealer that is painted over. Sorry for the long winded reply haha!
 

Attachments

Last edited:

Another Ahab

Well-known member
17,991
4,536
113
Location
Alexandria, VA
I used a 3 inch 3m cut off wheel. Pretty much what I used on almost the entire project for cuts haha.
Hey biggins-

There's no distortion and no discoloration whatsoever at all the areas that you cut (very impressive). I'm thinking these problems might be kind of common for someone that doesn't have the experience you seem to have (i.e., it seems you keep that grinder moving along when you cut). Is this "touch" at all a problem for a rookie when making grinding cuts? Are these cuts straightforward, or is there a learning curve?
 

bigginstactical

New member
246
1
0
Location
port angeles washington
The main thing is getting a feel for the tool and how to avoid it catching. If it catches on sheet metal it removes metal you don't want taken off haha. With some practice its not bad. Best advice I can give is get a good tool and buy the same disks. We have tried many kinds and nothing beats those. They last a lot longer and you can use them all the way down to the shaft. Many other ones we tried disappear in about one minute of use after your about halfway through the disk. Even some made in the USA ones we tried last month where sadly useless. With the good tool and 3/16s disk combination you will be able to get some good cuts with some practice. Best of luck!
 

bigginstactical

New member
246
1
0
Location
port angeles washington
This weekend I got quite a bit done. I welded the filler panels between the doors up on both sides. Also made the header pieces above both rear doors and welded them up as well. Fixed the holes where the very front of the roof bolts down and installed nut zerts, so I can use a standard bolt now. All the welds are ground and ready to sand the minor surface rust on the outside off of them. One thing I did find out after some testing is that The Rustolium Rusty Metal Primer will work as a weld through primer. Normally when we weld two pieces of metal together(like a piece of sheet metal onto frame work) we spray a weld through primer on both surfaces. This helps alleviate future rusting from the weld itself and helps protect the two surfaces from rust inside the joint. Having worked on vehicles we fixed previously (also vehicles straight from the factory) there still ends up being rust. So I figured ill try welding through RMP. Low and behold it works really well. It doesn't burn out past the weld hardly at all. It also has the added benefit of better protection then a normal weld through primer. So for each panel install from now on I will be prepping and spraying them with RMP first. I don't know how long it will last but anything is better then nothing in my opinion. I think it is a good idea for anyone replacing, or patching metal on their vehicle to spray this first.
 

Attachments

IsaLandr

Tartaned Goði
186
18
18
Location
Centralia, WA
Take the ferry in one of your MVs and let us know how much it costs and how the ferry crew reacts. I'm not brave enough to try it with one of mine. +)

Hel, I don't even like taking the ferry with my work truck.
 

bigginstactical

New member
246
1
0
Location
port angeles washington
Set the roof back up for a final fit. I haven't refit it since I installed the framework on it and the sheet metal. Wanted to do one last check to make sure it didn't shift too much from welding. Also wanted to adjust the b pillar to make sure all the door gaps are still gtg. Could not be done without the roof on. It did shift slightly but not enough to cause trouble. I just have to move it around with a screw driver for line up of holes and bolt it up. Ill paint the rear window width up to the roof black so it appears the window is full height. Starting to come along though!:driver:
 

Attachments

rustystud

Well-known member
9,259
2,943
113
Location
Woodinville, Washington
Take the ferry in one of your MVs and let us know how much it costs and how the ferry crew reacts. I'm not brave enough to try it with one of mine. +)

Hel, I don't even like taking the ferry with my work truck.
Hey, where talking about Washington State Ferries here. I barely trust them with just me aboard let alone my deuce !!! Now if we where talking about British Columbia Ferries that would be a different story. Why can't Washington have some ferries like those ?
 
Last edited:

IsaLandr

Tartaned Goði
186
18
18
Location
Centralia, WA
Hey, where talking about Washington State Ferries here. I barely trust them with just me aboard let alone my deuce !!! Now if we where talking about British Columbia Ferries that would be a different story. Why can't Washington have some ferries like those ?
That's gonna be a long drive around the Sound, then. Bring your earplugs. And probably pack a lunch.

But then again, a pretty good excuse for a nice long airing of the MV of your choice. Like any of us really need an excuse, right?
 

bigginstactical

New member
246
1
0
Location
port angeles washington
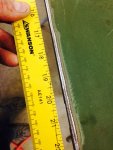
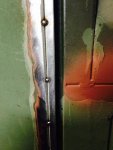
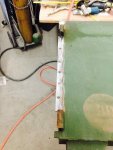
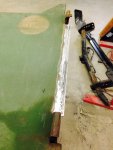
Managed to get some good time in last week. I final fit most the doors and decided to attempt to take of the front passenger door. The drivers side was a nightmare so I planned on leaving the pass but noticed a big gap in the front I wanted to fix. Surprisingly the hing pins came out with no trouble. I re-drilled to the larger size bolt and now that part is done. The front door edge gap though was an issue. Uncle Sam either has a variant or needed .25 inch of sheet metal elsewhere because I cannot explain why the center part of the door was shorted metal haha. I quickly fabbed a new edge and welded it on. Doors are done now thankfully.photo 1 (3).jpgphoto 2 (3).jpgphoto 1.jpgphoto 5 (2).jpg
 

bigginstactical

New member
246
1
0
Location
port angeles washington
Now that the doors are complete I started to work on some smaller stuff before paint prep. The left rocker underneath was badly rusted and I felt I should cut it out. The bolts for the fender bracket where wasted to drilled and tapped those also. The left fender bottom bolts to the body where shot as well so drilled and inserted new ones to snug the fender up. Haven't figured out how I'm going to repair the metal but that's what tonight is for :) Have a pretty similar repair on the right side as well. I also finished up the filler panels on both sides between the doors.
 

Attachments

Top
AdBlock Detected

We get it, advertisements are annoying!

Sure, ad-blocking software does a great job at blocking ads, but it also blocks useful features of our website like our supporting vendors. Their ads help keep Steel Soldiers going. Please consider disabling your ad blockers for the site. Thanks!

I've Disabled AdBlock
No Thanks