• Steel Soldiers now has a few new forums, read more about it at: New Munitions Forums!

  • Microsoft MSN, Live, Hotmail, Outlook email users may not be receiving emails. We are working to resolve this issue. Please add support@steelsoldiers.com to your trusted contacts.

S-280 camper build

6x6guy

Member
478
21
18
Location
McHenry, Il.
Just do what I did on my shelter - rolled on the Herculiner and spray or apply another component or paint over the base
at which time you get the best of both worlds - durability and strength with the Herculiner and comfort or lack of heat from
from a lighter colored paint ( the best thing I ever did is throw a camo netting over the shelter - cuts down the heat another
15 degrees in the sun - the only way to go and stay cool ).
 

MWMULES

Well-known member
Steel Soldiers Supporter
In Memorial
5,580
349
83
Location
DESOTO, KANSAS
My shelter is going in a deuce so my spare is mounted under the front of the bed.

The shelter itself measures right at 12'. When I added the skid it sticks beyond each end 3" because I wanted the skid to stick beyond the shelter itself to protect it during loading/unloading. That's makes to overall length 12' 6" so I just won't be able to close the tailgate with the shelter installed. I didn't see that as a big deal.
Mine is with the tailgate down, the down side is I can no longer pull a M105 behind it, I can but can't make turns as the tailgate will hit the front gate and first bow on the trailer.
 

m16ty

Moderator
Moderator
Steel Soldiers Supporter
9,580
218
63
Location
Dickson,TN
Mine is with the tailgate down, the down side is I can no longer pull a M105 behind it, I can but can't make turns as the tailgate will hit the front gate and first bow on the trailer.
Dave, I never thought about turning issues when towing a trailer with the tailgate down, good point.

I've going to probably have the tailgate removed anyway so that shouldn't be a problem. If I go on extended camping trips I'll probably want to pull a m105 to carry extra stuff.
 

Another Ahab

Well-known member
18,007
4,579
113
Location
Alexandria, VA
Most commercial van trailers are bare aluminum on the roof. Most camper trailers are either white or black rubber roof.

I figured there would have been more of a temp difference between black and white. I'm sure the black was gloss though so that's bound to help. Also, taking a surface temp of the top side isn't telling the true story. A temp reading of the back side would be more accurate.

I haven't gotten around to doing Gimpy's test yet but I will.
Sorry, but I lost track of that:

- What is "Gimpy's Test"?


test.gif
 

m16ty

Moderator
Moderator
Steel Soldiers Supporter
9,580
218
63
Location
Dickson,TN
Well I got to work on the shelter a little today. I managed to get everything striped out.

I did run into a small problem though. My ceiling is sagging a little in spots and would like to get the sags out. Does anybody know how the ceiling is held up and if there is any framework up there? I know there is bound to be some framework but I've already drilled a couple of holes where I thought a cross member was and all I hit was insulation.
 

firefox

General
Steel Soldiers Supporter
1,845
51
48
Location
Berkeley CA
TB 750-240 MAINTENANCE AND REPAIR PROCEDURES FOR
S-141/G, S-144/G, S-250/G, S-280/G,
AND S-318/G TYPE SHELTERS
JULY 1969

This may help. All I have is the hard copy or I'd send you a copy.
LOGSA should have one on line if you can get access. Lately, I haven't
been able to download from them. Let me know if you have a way to
download stuff from them.
 

m16ty

Moderator
Moderator
Steel Soldiers Supporter
9,580
218
63
Location
Dickson,TN
Thanks Firefox. I think LOGSA has restricted access to all the manuals in recent times to us lowly civilians. I'll do a Google search and see what I come up with.

I've already done a Google search for any applicable TMs but I haven't searched for any TBs.
 

rustystud

Well-known member
9,298
3,072
113
Location
Woodinville, Washington
TB 750-240 MAINTENANCE AND REPAIR PROCEDURES FOR
S-141/G, S-144/G, S-250/G, S-280/G,
AND S-318/G TYPE SHELTERS
JULY 1969

This may help. All I have is the hard copy or I'd send you a copy.
LOGSA should have one on line if you can get access. Lately, I haven't
been able to download from them. Let me know if you have a way to
download stuff from them.
LOGSA doesn't allow civilian use of their site anymore.
 

firefox

General
Steel Soldiers Supporter
1,845
51
48
Location
Berkeley CA
http://www.steelsoldiers.com/showthread.php?137906-S-280-camper-build&highlight=

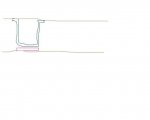
The shelters consist of horizontal "U" beams in the roof.
Picture a "c" channel on its back with its legs pointing up,
then weld some flat iron strips to the top of the legs that
stick out to the sides but not into the middle.
I think if you tap with a very small ball peen hammer on the roof
and listen carefully, you should be able to detect where the flats are.
It may not be as easy underneath since they have an insulation pad
stuck to the bottom of the channel to keep heat and
EMF .from transfering into or out of the
shelter.
 
Last edited:

m16ty

Moderator
Moderator
Steel Soldiers Supporter
9,580
218
63
Location
Dickson,TN
The shelters consist of horizontal "U" beams in the roof.
Picture a "c" channel on its back with its legs pointing up,
then weld some flat iron strips to the top of the legs that
stick out to the sides but not into the middle.
I think if you tap with a very small ball peen hammer on the roof
and listen carefully, you should be able to detect where the flats are.
It may not be as easy underneath since they have an insulation pad
stuck to the bottom of the channel to keep heat and
EMF .from transfering into or out of the
shelter.
Are the toes of the channel pointed up or down on the roof? Are you saying that there is a layer of insulation between the roof channels and the ceiling?

From what I've come up with research, the cross members are on 22" centers. 22" corresponds to the attachment points for stuff already mounted in the shelter (lights and shelving) but when I drill a small hole in the ceiling at the 22" mark, all I hit is insulation. I'm not drilling too deep for fear that I'll punch though the roof but if there is a layer of insulation between the ceiling and the cross members, that may be my problem.
 

DrillerSurplus

New member
443
7
0
Location
Salt Lake City. UT
Are the toes of the channel pointed up or down on the roof? Are you saying that there is a layer of insulation between the roof channels and the ceiling?

From what I've come up with research, the cross members are on 22" centers. 22" corresponds to the attachment points for stuff already mounted in the shelter (lights and shelving) but when I drill a small hole in the ceiling at the 22" mark, all I hit is insulation. I'm not drilling too deep for fear that I'll punch though the roof but if there is a layer of insulation between the ceiling and the cross members, that may be my problem.
The drawing for a Gichner S-280C/G that I've seen shows 14" to the first center then on 22" centers to other end where there is again 14" from last cross piece to the end.


Here are some reference materials that might be useful.

View attachment s-280_12ft DRAWING.pdfView attachment TB 43-0124-Maint & Repair Procedures for Shelters.pdfView attachment TM-10-5411-207-24P S-280C-G.pdf
 

m16ty

Moderator
Moderator
Steel Soldiers Supporter
9,580
218
63
Location
Dickson,TN
Well I'm back to work on the shelter. The main priority at this point is to first get A/C and lighting. That way I can at least throw a cot in the back and get some camping in before summer is over.

I've studied all the A/C options I can think of and at this point I'm leaning towards one of those portable stand alone units but I'm still flexible on this.

Kenny brought up LED lighting and I've also been researching them. One of the main advantages of LED is you can get them in 24v so you have the option of running them off truck power or 120v (either shore or generator). I first looked at the strip lights but found something else that is interesting. My shelter already has fluorescent fixtures in the ceiling and I've been looking at LEDs that that replace the fluorescent bulbs.
 

m16ty

Moderator
Moderator
Steel Soldiers Supporter
9,580
218
63
Location
Dickson,TN
Well I've hit a roadblock on 24v 24" LED tube lights. I have found them in 48" but they want $65 each for them :shock:. I've got a call into my buddy that is in the lighting business but he hasn't came up with anything yet. Anybody know where I can find 24v 24" LED tubes?

I have even contemplated just buying some clear plastic tube and just run the LED strip lights through them. I just haven't figured out how to fix the ends. I did find on Alibaba where I could get the ends straight from China but you had to buy 1,000 of them.
 

m16ty

Moderator
Moderator
Steel Soldiers Supporter
9,580
218
63
Location
Dickson,TN
My Buddy in the lighting business came through for me. He found the 24",24V LED tubes for $21 each.

Although the shelter is wired for 10 of the florescent lights, I think just three of the LEDs will do me. I know I hotwired in some 120v just to see if the lights worked and half of the bulbs are missing and it's still way brighter than needed. The LED tubes are supposed to put out quite a bit more light than the florescent tubes so I told him I'd start with three and see how that worked.
 

m16ty

Moderator
Moderator
Steel Soldiers Supporter
9,580
218
63
Location
Dickson,TN
Well I've been really busy at my day job and working a bunch of hrs. so I haven't had time to work on the shelter much.

I did get my 24v florescent bulbs in. Looks like they are going to work great. I got them from this place- http://www.dyna-brite.com/ . I'd have to go back and look at the invoice but I think they were $21 each. They would be great in other applications also where you wanted to run a florescent light off of truck power. They aren't listed on their site but they can get them.

The only problem I ran into was it took me about 10 days for the bulbs to get in so I thought I'd get ahead of the game and go ahead and wire the fixtures for 24v direct (you bypass the ballast). As luck would have it, the bulbs are polarity specific and I wired them backwards. I did re-wire one fixture and saw the light work. I'll post some pics when I get them all working.

For the 120V power, I ran it to a 5amp LED transformer that has a 24v DC output. A standard 3-way switch lets me swap the lights between 120V AC (driving the transformer) and 24V DC (from truck) with the flip of the switch.
 
Top
AdBlock Detected

We get it, advertisements are annoying!

Sure, ad-blocking software does a great job at blocking ads, but it also blocks useful features of our website like our supporting vendors. Their ads help keep Steel Soldiers going. Please consider disabling your ad blockers for the site. Thanks!

I've Disabled AdBlock
No Thanks