• Steel Soldiers now has a few new forums, read more about it at: New Munitions Forums!

  • Microsoft MSN, Live, Hotmail, Outlook email users may not be receiving emails. We are working to resolve this issue. Please add support@steelsoldiers.com to your trusted contacts.

seeking CUCV IP Replacement how-to

cucvrus

Well-known member
11,474
10,441
113
Location
Jonestown Pennsylvania
Small screw driver in the one side. Just pop the clip and the loom holders open like a clam shell. The clip holding them is on one side only. Be patient. How rusty are the valve covers? Are you going to remove them? Are they leaking? If they are not leaking I would treat them in place.
 

jpg

Member
611
15
18
Location
Boston, MA
Broke the clips. Now I can't get the passenger side valve cover off. If I pry, the metal of the valve cover flexes before the gasket releases. It seems they used some pink latex goo on the threads and gaskets last time this was closed up.

photo (37).jpg
The TM says to pound on it with a soft hammer. Perhaps I'll use my head...

I wish Rick's wife lived nearby...
 

jpg

Member
611
15
18
Location
Boston, MA
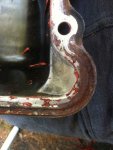
Well, I did that in the wrong order. I ground the rust off the valve covers and repainted them. Then I went to clean off the pink gasket goo, and I found why they used pink gasket goo. The valve covers are bent up and have rust where the gasket should seal. Are these redeemable? I'm looking for new ones.

photo (37).jpgphoto 1 (29).jpg
 

cucvrus

Well-known member
11,474
10,441
113
Location
Jonestown Pennsylvania
That Orange gasket material is the Genuine GM sealant they were using at the time. That was good stuff. They changed the compound in it now. #0 years and things got better. i would have avoided removing the valve covers if they were not leaking. But you are ahead of that now. You need a small pry bar and a rubber mallet to knock them loose. The Wife is at work today. She opts out of the dirty work anymore. She has a job in health care. Sorta understand not wanting grease under my nails anymore either. Make sure to clean the holes out real well where the bolts go in. It could create a block if you put bolts in holes that are full of sealer. Wire wheel the bolts clean also. Good Luck. You are learning fast. Sure you don't want to change the head gaskets while you are at it? You are over 1/2 way there.
 

cucvrus

Well-known member
11,474
10,441
113
Location
Jonestown Pennsylvania
Well, I did that in the wrong order. I ground the rust off the valve covers and repainted them. Then I went to clean off the pink gasket goo, and I found why they used pink gasket goo. The valve covers are bent up and have rust where the gasket should seal. Are these redeemable? I'm looking for new ones.

View attachment 697741View attachment 697740
The valve covers are fine. Just clean them well with a wire wheel and use Permatex The Right Stuff and reassemble after you clean everything up. Place them on a flat surface and lightly tap the flange level again. They are not scrap. Trust me. Keep going you are doing GREAT.
 

jpg

Member
611
15
18
Location
Boston, MA

cucvrus

Well-known member
11,474
10,441
113
Location
Jonestown Pennsylvania
That will work. And believe me. It is THE RIGHT STUFF. It works wonders. It has not failed me ever. Make sure you have clean surfaces and pre-clean them so they are oil and silicone free. I use acetone, DX 330 or denatured alcohol. Some kind of solvent. MEK, MAK Lacquer thinner. They all work. Clean is the key.
 

jpg

Member
611
15
18
Location
Boston, MA
TM says to put RTV on cover. I suspect that works if you have the engine pulled, but with it in the truck I'd be worried about getting RTV on the rockers. Is there any reason not to put the sealant on the block, so you can maneuver a clean cover into place?
 

cucvrus

Well-known member
11,474
10,441
113
Location
Jonestown Pennsylvania
I would just put it on an make sure everything is as clean/dry as possible. You may get a small amount misplaced. Just be careful as you can. Nothing will happen with a small residual amount coming in contact with mechanical parts. I would use gaskets if you have a major concern. They work well with the Right Stuff also. Good Luck.
 

Barrman

Well-known member
5,273
1,795
113
Location
Giddings, Texas
If you put the valve cover upside down on the edge of a wooden bend. With the bolt holes against the bench. Then put a ball peen hammer in the bolt hole and hit that with another hammer. It will bend the holes so they are "up" just a bit when you go to bolt it all back together. Every little bit counts when trying to get these flimsy valve covers to not leak again.

I have found that a seat cushion from a yard or deck chair layed over the radiator valence makes things much easier. You still do one arm pushups, but it hurts less.

When you go to fire it up. Crank for no more than 10 seconds at a time. Have a charger ready to put on the batteries too. The last few I did I just made an afternoon of it. Get everything hooked up, crank for a count of 10. Go work on something else for a while. Come back and crank for another 10 count. Repeat and a few hours later you got all your chores done and the engine will chug. Here is where you will need the charger. Because you will think it will start if you just crank it one more time. It rarely is just one more time and by the time it is ready to run, your batteries are shot and the starter is hot. Patience is a help.
 

Kaiser67M715

Member
699
26
18
Location
NH
If you put the valve cover upside down on the edge of a wooden bend. With the bolt holes against the bench. Then put a ball peen hammer in the bolt hole and hit that with another hammer. It will bend the holes so they are "up" just a bit when you go to bolt it all back together. Every little bit counts when trying to get these flimsy valve covers to not leak again.

I have found that a seat cushion from a yard or deck chair layed over the radiator valence makes things much easier. You still do one arm pushups, but it hurts less.

When you go to fire it up. Crank for no more than 10 seconds at a time. Have a charger ready to put on the batteries too. The last few I did I just made an afternoon of it. Get everything hooked up, crank for a count of 10. Go work on something else for a while. Come back and crank for another 10 count. Repeat and a few hours later you got all your chores done and the engine will chug. Here is where you will need the charger. Because you will think it will start if you just crank it one more time. It rarely is just one more time and by the time it is ready to run, your batteries are shot and the starter is hot. Patience is a help.
Do add to this, remove glowplugs-much easier on engine and starter. Plus when it starts to mist you'll know fuel is at the injectors.

Sent from my SM-S920L using Tapatalk
 

acesneights1

Member
1,449
23
20
Location
CT
I have done more of these than I care to remember. Leave the lines loose at the nozzles. Make sure both batts are good and charged. Have someone crank it with accelerator to the floor. As soon as you see fuel at the lines , stop, lock the nuts down cycle the glow plugs and crank full throttle till she fires and keep at least half throttle for about 30 seconds then another 30 or so at 1/4 throttle. There is no tach but just keep rpms high enough to keep it from stalling until air is out. Don't over revv it. It should fire off fairly easy. Rarely had one that didn't and usually a reason. DO NOT use starting fluid.
 

jpg

Member
611
15
18
Location
Boston, MA
Thanks guys.

I don't own starter fluid. No worries there.

I got the fuel system reassembled. Fuel lines are finger tight at the injectors. I put fresh paper towels under them so I'll see any sign of fuel. Cranked it twice for 10-sec, waiting several minutes in between. No fuel visible yet. Letting the batteries recharge now.

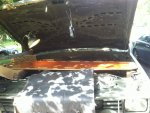
Here's a pic of my field expedient top creeper. The back board from the back of the M1010 made it massively more comfortable to work near the firewall. It rests on the inner lip of the fender on the right, and a cardboard box protects the fine finish on the fender on the left. A folded shooting mat over the hood latch was also key.
photo 1 (30).jpg

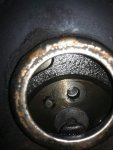
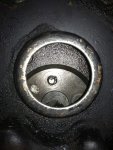
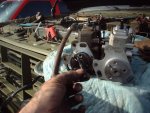
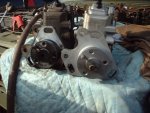
Here are some pics of how you can screw up. The left pic is missing the follower pin. The right pic is not. The left pic has the pin in the correct slot, the right pic has the pin in the bolt hole.
photo 2 (28).jpgphoto 1 (31).jpg

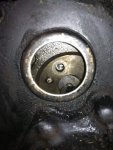
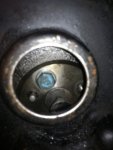
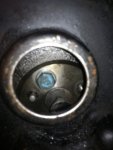
Below is what it should look like, before and after installing the bolt. Note the follower pin in the middle. Details on that below...
photo 2 (29).jpgphoto 3 (19).jpg
 
Last edited:

jpg

Member
611
15
18
Location
Boston, MA
While waiting for my batteries to recharge, I read through the thread recommended by acesneights1 above:
http://www.dieselplace.com/forum/63...l-diesel-engine/443715-ip-swap-lots-pics.html

It all sounded familiar except the part where he said, "Don't forget to swap over your follower pin". What's a follower pin? Well, it's a part of the IP that the TMs mention only in the context of troubleshooting an IP. If the videos I watched mentioned it, I totally missed it. Sure enough, mine was still stuck in my old IP.

I copied these pics from the thread mentioned above:
FollowerPin.jpgfollower pin.jpg
The pin fits in the hole in the center of the IP, see pics above.

So I put my tools away and am heading for the booze to drown my sorrows. Next time I get a chance to work on the truck, I'll unbolt the spider and the IP again, install my follower pin, and put it all back together again.
 

Chaski

Active member
684
56
28
Location
Burney/CA
Doh!

At least you have experience now.


I'm also a firm believer in pulling the glow plugs when it comes time to prime the system again. Once you see white clouds shooting out all 8 glow plug holes you know you are ready to reinstall the glow plugs and start it right up.
 
Last edited:

cucvrus

Well-known member
11,474
10,441
113
Location
Jonestown Pennsylvania
Thanks guys.

I don't own starter fluid. No worries there.

I got the fuel system reassembled. Fuel lines are finger tight at the injectors. I put fresh paper towels under them so I'll see any sign of fuel. Cranked it twice for 10-sec, waiting several minutes in between. No fuel visible yet. Letting the batteries recharge now.

Here's a pic of my field expedient top creeper. The back board from the back of the M1010 made it massively more comfortable to work near the firewall. It rests on the inner lip of the fender on the right, and a cardboard box protects the fine finish on the fender on the left. A folded shooting mat over the hood latch was also key.
View attachment 698829

I got a pic of what it looks like to get the pin in the right hole when installing the IP. For the record...
View attachment 698828
I seen that was missing in the picture. I was assuming you were showing that the slotted hole gets used with the peg and not the round hole. Good Luck.
 

jpg

Member
611
15
18
Location
Boston, MA
I seen that was missing in the picture. I was assuming you were showing that the slotted hole gets used with the peg and not the round hole. Good Luck.
Nope. I didn't know about transferring the follower pin until after I'd bolted down the IP and the spider. Today I unbolted all that, installed the follower pin, reassembled it all, and now I get a nice mist when I crank the engine. I guess the follower pin does something important... Next step is to tighten down the connections to the injectors, bolt on the intake manifold and vacuum plumbing, and see if I fixed it.

For the record, here is a pic of what the IP should look like, with the locator pin in the proper slot and the follower pin in the middle. I edited my earlier post where I showed pictures with the follower pin missing, so it doesn't mislead any future newbies.
photo 3 (19).jpg
 
Top
AdBlock Detected

We get it, advertisements are annoying!

Sure, ad-blocking software does a great job at blocking ads, but it also blocks useful features of our website like our supporting vendors. Their ads help keep Steel Soldiers going. Please consider disabling your ad blockers for the site. Thanks!

I've Disabled AdBlock
No Thanks