• Steel Soldiers now has a few new forums, read more about it at: New Munitions Forums!

  • Microsoft MSN, Live, Hotmail, Outlook email users may not be receiving emails. We are working to resolve this issue. Please add support@steelsoldiers.com to your trusted contacts.


So who has bumped the power on a 6CTA cummins

Mike929

Member
Steel Soldiers Supporter
820
22
18
Location
DFW, Tx
It's not mine. The guys doing the truck are members here, but dont have the time to post the build. I saw the photo album, and there are a bunch of build pix. Takes money to spend money on a truck like this. There will be a build thread on it, I was assured. Should go over 35mph up the Grapevine now.
Do you know if this build was ever posted? Possibly some keywords that I could search?

Looks like an amazing build, thanks for the pictures.
 

Attachments

spook

New member
17
0
0
Location
Ft. Myers/FL
Guys,


i have been studying (drooling over) this thread for a few months, and I have been anxious to make the pump adjustments discussed herein. I forced myself to wait until I had a pyrometer installed, and I put in a digital Auberins this weekend. After a lengthy internal debate I went for post-turbo thermocouple location about 1.5" from the turbo collar. The only other mod I have made to the truck (besides night-camo paint job!) is to delete the muffler.


The pyrometer correctly reads the outdoor temperature (87 degrees in my Florida shop) when the truck is cold so I am sure that the gauge is accurate......at least before the exhaust starts flowing. When I cranked the truck for the first time with the pyrometer installed my idle EGT was only 165 degrees. Full throttle acceleration only produced 325 degrees and 55 mph cruising (no addl load, 14 00R20 tires) only 300 degrees. I adjusted the low fuel screw this morning with a noticeable difference in smoke/power at initial acceleration, but the EGT only increased about 25 degrees in pre-boost and back to 300 degrees at cruise. I intend to run the full fuel rate up, too, but I am concerned that my pyrometer may not be accurate now, so I am hesitant to do much else without some expert input.


Could I really only be putting out 300 degree exhaust post-turbo? I was expecting more like 700-800 degrees are these trucks detuned that much? The thermocouple that came with the Auberins kit was a bit short on the probe end, but I think it still has about 1 5" penetration into the 4" exhaust which is at the short end of recommended. thought maybe it is accurate, but too close to the wall of the exhaust where it might get cooled too much?


Thoughts please, and thank you, in advance, for your input.
 

Jeepsinker

Well-known member
5,341
329
83
Location
Dry Creek, Louisiana
For more accurate (and useful) readings, the probe should have been installed pre-turbo. You want to see the egt before it gets to the turbo so you know it isn't going to melt anything. Post turbo temps just show you high egt too late.
 

74M35A2

Well-known member
4,145
312
83
Location
Livonia, MI
Check obvious things like thermocouple polarity (red is usually "-" on thermocouples), C/F setting on display if selectable, is the gauge a 12V or 24V unit, and which did they ship you, is the gauge set to the compatibility of the thermocouple (J type, K type, etc....).

300F is not correct, unless you have some dead cylinders that are diluting the exhaust with fresh air, cooling it down.
 

JxxxOxxxE

Member
48
0
6
Location
OKC
Whats the highest EGT someone has seen yet from turning it up? Or, whats the largest load you've put on the truck and what EGT did it produce?

I am about to turn up my 929A2, but I use it quite regularly to haul some big loads. I've got a EGT and boost gauge... I'm thinking the 929 and the tractors obviously experience more loads than the standard 923/925....
 

MO MV man

New member
397
4
0
Location
Imperial, MO
Finally got to drive the new combination.......

Yesterday afternoon, I finally got to take it for a spin and try the new combination.
With only 1.75 turns on the top screw, three clicks on the governor springs, the WIX 46664 filter and a thorough check of the modulator cable/throttle/throttle stop adjustment, I am beyond thrilled.

Sure there is more to be had but compared to before (which wasn't "bad" by any stretch of the imagination!), it's worlds nicer to drive now.

The tranny performance is spot-on, both in shift timing and firmness; left it in 1-5 and it did the rest. Awesome.

From a stop is smooth, very strong and it goes through the gears much faster than it used to (meaning the truck is accelerating faster and the tranny is keeping up as it should) and effortlessly.

I have NO idea how fast it'll go on the highway. The thing just keeps pulling and pulling.

I cannot imagine what another turn to turn and a quarter would do on the fuel screw and a main fuel adjustment. Whew! Thanks for this thread!

Yesterday, I did the air filter mod using the WIX 46664, as laid out by acme66 in another thread. Worked GREAT!
Ought to flow a lot better than the original Donaldson.
Today, I adjusted my governor springs three clicks. I used the alternator nut (NO sweat) and accessing the springs is no problem whatsoever.
I did have to remove the shutdown lever (again, no problem). Idle speed did rise to 1000 BUT it's a piece of cake to adjust. No worries whatsoever.
After the engine got some heat in it, I slowly brought the rpm's up and it went to 2500 effortlessly. I'm beyond impressed.
The throttle is SUPER crisp for such a huge engine. I'm shocked.
I ran out of time to take it for a spin before heading to work this afternoon. I'm dying to get it out on the road!
What I've done so far: Air filter mod Straight pipe 1.75 turns on fuel screw 3 clicks on governor springs
Soon as free time allows: Pull the fuel screw and grind some off of the bottom to allow more turns (aiming for 3) Adjust the main fuel on the back of the pump
 

ClarkeF

Member
206
5
18
Location
Hestand, KY
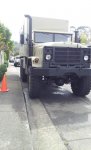
I just did the this modification to my 1989 M293A2. I went to participate in two Memorial Day parades this past weekend. The truck wouldn't maintain speed on modest hills - so I figured why not? I only made two changes - the governor spring and the full-fuel adjustment on the back of the pump. I'd like to thank nevrenufhp and Young Gun for all the posts on the subject.

interesting is that my access screws were secured with safety-wire - there was no security nut that I had to chisel or vise-grip off. I just pulled the three safety-wires off - one for the rear cover, one across the governor spring access cover and one for the idle.

Step one - disconnect electrical connector and remove two 10mm bolts securing the fuel cut-off solenoid to the valve cover.

IMG_2415.jpg

When you are done it's going to look like this - lots of room to get to what you need to:

IMG_2419.jpg

Step two - rotate the fuel cutoff until you can get an 8mm socket on the nut. Remove nut and pull the lever out of the way to get a socket on the cover. Do NOT remove the cutoff lever from the shaft fully. There is a small spline key which WILL go missing. If you do take the lever off, just remove the spline and place is a safe place. The truck won't shutoff if that key is missing from the shaft... I had to recreate mine from a hardened washer.

IMG_2422.jpg

Note the key (before it went missing). I used a 7/8" 12-point socket for the cover.

When the cover is open you either will or you will not see a governor spring. I used a 18" breaker bar with a 7/8" socket on the alternator nut and rotated the engine by rotating the alternator nut clockwise (tighten by raising the bar and rotating toward the engine when standing on the passenger side) until a governor spring was visible. Rotating the alternator rotates the engine. Don't rotate the alternator by pulling down on the nut which might loosen it...

IMG_2426.jpg

Using a flat-bladed screw driver in the notch, I initially tightened the spring three clicks / detents. You will feel and see the notches move. Mine took some persuading. After driving the truck, I didn't like the idle - I couldn't adjust it down below 900, so I backed off one click for only 2 clicks of adjustment. With two clicks to each spring the engine stops revving at 2350 RPM and the idle was better at about 750-800.

I initially tried to do video of the adjustment but needed both hands to move it a click. I like what someone else here did - on the modified 10mm they used for full-fuel adjustment - they ground down the socket edge on either side to make two prongs that would fit in the detent allowing you to put your socket on it and turn it with more control. What happens if you don't do the same adjustment on each side? Does anyone know?

When you have made your adjustment to one spring, go back to your breaker bar and continue to rotate the engine until the other spring appears. Make the same adjustment. Screw the cover back on. CAREFULLY place the fuel cut-off lever back on the shaft, ensuring that the key is still in the key way (or put it back if you put it in a safe place). Tighten the 8mm bolt. A drop of blue loctite on the bolt prior to installation would not go amiss.

Okay - now on to the Full Fuel adjustment.

This is the cover with the two bolts.

IMG_2416.jpg

Do what you need to do to remove the two bolts. If you have a anti-tamper bolt, then cut a notch, use a chisel to loosen it, vice-grips - whatever. Remove the two bolts. You will end up with a plate with a threaded hex adjustment and a lock nut. Lever that plate off - there is small tab that sticks out from the side of the plate which allows you to pop it off.

IMG_2420.jpg

The mail fuel adjustment is UNDER that cover. See the arrow?

This is what you see underneath:

IMG_2425.jpg

a 10mm nut and a 14mm nut. I used a 10mm 1/4" socket which a friend shortened and fit it inside a 14mm 3/8" socket. Holding the 14mm in place, I loosened and then rotated the 10mm nut several turns - backing it off until I reached the end of the shaft. While holding the 10mm from rotating further, I then backed off the 14mm nut until it reached the 10mm nut - and snugged them together locking the new fuel setting in place. Sorry for no pictures of the tool itself - I forgot to take one apparently.

Here is the view after I backed off the nuts:

IMG_2429.jpg

Place the cover with the adjustment back over the hole. Place the cover over that and snug down your two cover bolts. Reinstall the fuel cutoff solenoid - you will have to hold the solenoid back to fit it in place again the lever. Reconnect the electrical connector for the solenoid. Did you pull the breaker bar off the alternator?

Close things up and take it for a spin. I came back from my spin, picked up the wife and took off - she was impressed! No longer quite the dog... I'll be doing the same thing to a friends truck - I figure about 30 minutes tops. It took me over an hour with needed to replace the shaft key I lost.

If anyone needs help in the South-East PA area, I'd be happy to show how the work is done.

-Clarke


Ok..Lets see if I can clear it up.
The full fuel stud with 2 nuts:
On the very back of the pump there is 2 screws, which one is tamper proof(round head). The first hard part is getting that screw out. Vice grips or chisel works. Get those 2 screws out, and pull off the tin cover, and the screw with the jamb nut on it. That screw is the pre-boost fueling(I dont bother with that one). Once those are out of the way, you will have access to the full fuel nuts. With a flashlight you can see them in there, which are recessed in a round hole by about an inch. That's why wrenches wont fit, because of it being so recessed. Since Bosch didnt put big plungers in the MW pump, you can back out the nuts all the way. Loosen up the 10mm nut to the end of the threads, then hold that socket still. Back out the 14mm nut into the 10mm nut and snug them up together. You could possibly do it with no special tools, but it's the 14mm socket that's the hard part/ tight fit. You can simply make your own by drilling out the center of a 3/8 drive 14mm deep socket to fit a 1/4 drive 10 mm deep socket. A good grunt tight(German torque) is all it needs, no breaker bars. Then, put it back together and test drive.
I can edit in more if you want, like the links to the videos on gov spring tightening, and the low rpm/excess fuel screw(one on the top).
 
Last edited:

nevrenufhp

New member
200
16
0
Location
Sacramento
Thanks Clarke. I just try to show everyone that it's not such a scary thing to do the adjustments.
Still waiting on someone to make a how-to video on the rear fuel rate adjustment. Any takers?
 

Scott88M

New member
152
0
0
Location
East Greenwich, RI
Terrific write up and pics exactly what I need. One question that makes me feel dumb. I'm finally ready to do my governor Springs now but I'm shaky on where to put the breaker bar to turn over pump. You said alternator nut, as in, on the alternator? I think that's the last bit of info I need to finish tackling these mods, I did do the low rpm nut big difference.
 
Last edited:

spook

New member
17
0
0
Location
Ft. Myers/FL
I did my truck Saturday morning with some re-tuning yesterday. It pulls very well now, but I may back my full fuel rate back a bit. Getting a little too hot as is, and I'm about to go to 16.00R20s so I know the effectively taller gearing will give me even higher EGTs. Has as anyone tried the BatMo compressor swaps referenced back a few pages? I would really rather pay for a new compressor to lower my EGTs than have to turn my fuel down! It runs too good to go back! I would like to hear how the swap affects HP as well as EGT reduction if anyone has firsthand experience.

88M, yes put your breaker bar socket right on the pulley-nut of the alternator. Push the bar over the top and away from you (assuming you stand on the alternator/passenger side) and watch the crank pulley turn the same way (clockwise). Remember that it will take one full revolution of the crank to cycle the governor one-half revolution to the other set of springs. Also, be prepared for oil to pour out of the governor spring access when the cover is removed. Mine drained about a quart out, over my front axle and onto my shop floor before it quit. No big deal, but a catch pan might save some cleanup time.

I, too,would back my springs back from the 3 clicks I adjusted them 2, but I'm just going to get the PacBrake spring kit referenced above.

Thanks to all who have posted above! You have been a great help in making my truck perform more like it looks!
 
Last edited:

MO MV man

New member
397
4
0
Location
Imperial, MO
Why the idle speed adjustment issues after putting clicks on gov springs?

Thought it might be a great time to clarify that since it seems concerns regarding adjusting the idle speed down after the spring adjustment seem to pop up regularly here.
Before spending money and time on a spring kit.

I adjusted my springs three clicks and it most certainly did bring the idle speed up.
BUT adjusting it back down is beyond simple using the idle speed screw (flat blade screwdriver head with a jam nut) on the injection pump.

Are folks trying to adjust the idle speed down using the threaded rod on the throttle linkage (that connects to the pedal)?
If so, you will run out of adequate adjustment quite quickly there.
 

Scott88M

New member
152
0
0
Location
East Greenwich, RI
Thanks for the alternator clarification, i had no idea that worked that way. After sitting next to my truck with these instructions i did the gov springs in maybe 20 mins i had been nervous to try. And even with the instructions i ALMOST lost that keyway, you're not kidding watch out with that thing.
 

spook

New member
17
0
0
Location
Ft. Myers/FL
In response to a couple of PMs I have received, and as sort of general information to update my experience with the EGT issue I inqured about in post #283, I am elaborating on my experience with my new pyrometer and my sebsequent MW pump settings on my 925A2. If any of you think some of this info may be more helpful/searchable in a separate "pyrometer thread", I will be happy to oblige.

I called Auber Instruments regarding what appeared to be the "too-low" EGTs my newly installed gauge (Auber Instruments SYL-1813) was showing. Their support tech sent me their thermocouple troubleshooting guide via pdf file which I printed and followed. From my subsequent tests I was fairly sure the themocouple was faulty, but I also still suspected that the thermocouple's penetration into the exhaust was inadequate. I called Auber that afternoon, and they put a new replacement thermocouple in the mail that day. During my discussions with the tech, I never mentioned my concern that the probe might not be long enough, but on her own she apparently decided that I might fare better with the longer version of their thermocouple (TC) for EGT for that is what she sent me. I have included a picture herein showing the original TC (Auber designation TC-KEGT that came as a bundled kit with the gauge/meter) side by side with the longer TC (Auber designation TC-KEGTL). The new, longer probe immediately gave me the readings I expected when I pushed it about 2" into the exhaust stream, but as I backed it out to about 1.25" the readings began to drop significantly. The moral to this story, I think, is that if you order the Auber gauge, my opinion is that you order it and the longer TC-KEGTL separately in lieu of the the bundled combination which includes the shorter TC-KEGT. The necessity of the longer TC may also be entirely dependent upon your choice to install it pre-turbo or post turbo as the diameter of the manifold is smaller than the diameter of the exhaust.....more on that unsolved debate later....
Auber Thermocouples.JPG
 

spook

New member
17
0
0
Location
Ft. Myers/FL
To continue (I am not smart enough to figure out how to paste text between photos so they are all relevant in location, so I am making separate posts in an attempt to keep the pictures with the appropriate text. Sorry)

My Auber pyrometer is installed in one of their "accessory enclosures" attached to the rear of my shifter tower as depicted in the photos. I wanted the meter wired to the battery switch so that it would be a lighted reminder to turn that switch off as I exit the truck. Under my dash I found an unused wire tagged as 180 that had an open female bayonet plug at the end. Upon testing the wire it showed 24 volts that was turned on/off by the battery switch and the -24 (page 819 wiring schematic) lists the wire as being a power feed for a 360 degree warning light so I was sure it had plenty of capability to feed my gauge. I connected the meter's power feed to this wire and grounded it with a short wire to one of the exisiting instrument's ground post. The Auber meter is available in different display colors but I went with the default red to match the existing instrument lighting.

I mounted the aluminum Auber enclosure box to the shifter tower with small self-tapping sheet metal screws. I drilled 1/2" holes in the rearward face of the box so that my hex-driver would fit into the box to drive the mounting screws at the front side of the box. Covered the wiring with 1/4" Big End braided wire loom and fastened that into place withBig End 3/8" wire clamps. I need to pick up three 1/2" plastic flush-plugs to fill those three hex-driver access holes and touch up the box, and I will be finished with the pyrometer installation.


Pyrometer 1.JPGPyrometer 3.JPGPyrometer 2.JPG
 

spook

New member
17
0
0
Location
Ft. Myers/FL
To further my update for the PM requests:

My pump setup as of right now:
3.5 turns out on the full fuel adjustment, one full rotation on the star wheel, 6.5 turns out (Appx) on the low fuel screw (it just barely clears the pump housing), and 3 clicks on the governor springs.

88M, I have not noticed the filter-minder pulling down but I will check that out tomorrow. I will also look into the air-filter change you noted. Thanks.

The truck's throttle response at neutral is as good as any hot-rod diesel I have owned/tuned...and truly amazing to me out of an 8.3 liter with no other mods than a muffler delete. I am getting peak EGTs at 915-930 post turbo about once out of every three wide-open-throttle accelerations. I'm not convinced this means my pre-turbo temps are in the 1200s, but I know that the 300 degree delta is typically accepted. I will look back through this thread and the forum because I do remember that someone posted data from two thermocouples that indicated the delta-T across these turbos (some turbo maybe?) was only 100 degrees, not the 300 degrees as usually quoted. I am going to order another thermocouple tap to put into my manifold so that I can quickly, but temporarily, move the thermocouple into the manifold to check each pump configuration's EGTs with different loads. I will be sure to post the results here when I get them. Give me a couple of weeks so that I can get my 16.00s installed and the wife gets out of town so I have more time to tinker (and to sneak those 16.00s onto the truck while she's gone!)

I decided on permanent post-turbo TC install because I am not a fan of having cheap Chinese thermocouples (are there any failure proof versions?) ahead of my turbo waiting to vacation through my compressor, and because I could find no good way to get a pre-turbo reading that would include all the cylinders. In looking through the SS site I think I have only found two pics of the TC install on an 8.3 and both of those were in the forward most plenum of the manifold as it enters the turbo. I pulled my turbo to see if that location only serves the front cylinders, and it appears that is the case. Unless I missed some opening in this central divider (I reached back to feel the divider with my fingers and it felt solid to the back of the manifold), the plenum divider pictured below separates the exhaust from the front three cylinders from the exhaust of the back three. I know the pre-turbo TC location is deemed to be "more accurate", but only getting EGT's from half the cylinders seems to lend a false sense of security about that accuracy. If anyone has a better location pre-turbo, I am all for learning how to better manage my engine and will appreciate your input. I briefly considered putting two pyrometers in the truck with one TC in each chamber of the turbo inlet, but again, I am worried about one TC being ahead of my turbo so two sounds twice as scary. I will just log the data from the EGTs pre-turbo (even if it's only the three front cylinders) and compare them against the post-turbo data for the same driving situations so that I can interpolate my permanent TC location's post-turbo temps into meaningful pre-turbo temps without the danger of the TC being in front of the turbo.


Exhaust Manifold to turbo inlet 8.3 6CTA
Exhaust Manifold Turbo Inet.jpg
 

spook

New member
17
0
0
Location
Ft. Myers/FL
One last thing that may prove helpful to those of you considering these pump mods: this link from post #59 (thank you Young Gun!)

http://www.steelsoldiers.com/attachment.php?attachmentid=453641&d=1380133189

This PDF was EXTREMELY illustrative and helpful in my understanding of the mods at the rear of the MW pump, but I had read through the ENTIRE THREAD at least six times before I found it and opened it. I'm referencing it here again for those of you jumping in here late that may be reading past that link the same way I did.

Hopefully, I have addressed all the issues questioned in the PMs I received. Thanks again to all of you for a great thread!
 

cobratodd

New member
31
0
0
Location
Connecticut
Okay, a did the Low Buck mod on the full fuel screw, I turned it out 3 full turns and tightened the jamb nut back down, went for a ride and really don't see a big difference. So I will take the next step, the star wheel, one full turn for starters. I take it, these are subtle adjustments/tweaks - not like adding a programmer on today's diesel pickup to jump 100hp. It's more like 30 or so?? And with the mass of the huge trucks, 30hp is a grain of sand on the beach.
 

74M35A2

Well-known member
4,145
312
83
Location
Livonia, MI
To further my update for the PM requests:

My pump setup as of right now:
3.5 turns out on the full fuel adjustment, one full rotation on the star wheel, 6.5 turns out (Appx) on the low fuel screw (it just barely clears the pump housing), and 3 clicks on the governor springs.

88M, I have not noticed the filter-minder pulling down but I will check that out tomorrow. I will also look into the air-filter change you noted. Thanks.

The truck's throttle response at neutral is as good as any hot-rod diesel I have owned/tuned...and truly amazing to me out of an 8.3 liter with no other mods than a muffler delete. I am getting peak EGTs at 915-930 post turbo about once out of every three wide-open-throttle accelerations. I'm not convinced this means my pre-turbo temps are in the 1200s, but I know that the 300 degree delta is typically accepted. I will look back through this thread and the forum because I do remember that someone posted data from two thermocouples that indicated the delta-T across these turbos (some turbo maybe?) was only 100 degrees, not the 300 degrees as usually quoted. I am going to order another thermocouple tap to put into my manifold so that I can quickly, but temporarily, move the thermocouple into the manifold to check each pump configuration's EGTs with different loads. I will be sure to post the results here when I get them. Give me a couple of weeks so that I can get my 16.00s installed and the wife gets out of town so I have more time to tinker (and to sneak those 16.00s onto the truck while she's gone!)

I decided on permanent post-turbo TC install because I am not a fan of having cheap Chinese thermocouples (are there any failure proof versions?) ahead of my turbo waiting to vacation through my compressor, and because I could find no good way to get a pre-turbo reading that would include all the cylinders. In looking through the SS site I think I have only found two pics of the TC install on an 8.3 and both of those were in the forward most plenum of the manifold as it enters the turbo. I pulled my turbo to see if that location only serves the front cylinders, and it appears that is the case. Unless I missed some opening in this central divider (I reached back to feel the divider with my fingers and it felt solid to the back of the manifold), the plenum divider pictured below separates the exhaust from the front three cylinders from the exhaust of the back three. I know the pre-turbo TC location is deemed to be "more accurate", but only getting EGT's from half the cylinders seems to lend a false sense of security about that accuracy. If anyone has a better location pre-turbo, I am all for learning how to better manage my engine and will appreciate your input. I briefly considered putting two pyrometers in the truck with one TC in each chamber of the turbo inlet, but again, I am worried about one TC being ahead of my turbo so two sounds twice as scary. I will just log the data from the EGTs pre-turbo (even if it's only the three front cylinders) and compare them against the post-turbo data for the same driving situations so that I can interpolate my permanent TC location's post-turbo temps into meaningful pre-turbo temps without the danger of the TC being in front of the turbo.


Exhaust Manifold to turbo inlet 8.3 6CTA
View attachment 495510
Thanks for the detail and pictures. A broken EGT probe (thermocouple) located pre-turbo would not go through your compressor, but rather through the turbine housing.

I'm also interested in the next step for increased airflow in regards to lowering EGT, such as the BatMo wheel on our stock HX40 turbo, or does one move up from the HX40 to an HX50 or even HX55? Isolate the after-cooler onto it's own dedicated coolant circuit with electric pump? Swap to a true front-mount intercooler like the more modern big rigs?
 
Last edited:

ClarkeF

Member
206
5
18
Location
Hestand, KY
Thanks Clarke. I just try to show everyone that it's not such a scary thing to do the adjustments.
Still waiting on someone to make a how-to video on the rear fuel rate adjustment. Any takers?
I'll take one when I do my friends truck - probably this weekend. I should have an extra set of hands available...
 
Top
AdBlock Detected

We get it, advertisements are annoying!

Sure, ad-blocking software does a great job at blocking ads, but it also blocks useful features of our website like our supporting vendors. Their ads help keep Steel Soldiers going. Please consider disabling your ad blockers for the site. Thanks!

I've Disabled AdBlock
No Thanks