• Steel Soldiers now has a few new forums, read more about it at: New Munitions Forums!

  • Microsoft MSN, Live, Hotmail, Outlook email users may not be receiving emails. We are working to resolve this issue. Please add support@steelsoldiers.com to your trusted contacts.

soldering headlights. Anyone done this?

acetomatoco

New member
2,198
7
0
If you cut em off longer, you can just use butt connectors to put the Packard or Douglas connectors on... and use black shrink tube to cover the butt connector.
 

WillWagner

The Person You Were Warned About As A Child
Super Moderator
Steel Soldiers Supporter
8,539
2,761
113
Location
Monrovia, Ca.
There's no wires on Mikes' new lights. The only thing i'd be scared of would be melting the potting or the factory soldering on the new light. It looks like there is solder on the light already. Maybe snip the wires off your old light, strip them, give them a good solder, then try to put then both together with a good low duty cycle gun.
 

Dieselsmoke

New member
1,146
2
0
Location
CA/NV
I've done it. I had some brand new yellow lenses that had the wires broken off. used a low heat soldering iron and they've been fine.
 

steelsoldiers

Administrator
Staff member
Administrator
5,265
4,018
113
Location
Charleston, WV
Nifty idea there Mike. Did those come with contact tips designed to press against the back of a socket? It would be great if you could come up with a socket that would clip over the end of each one so you could change them out quickly. I think I saw some European 24v lights for a unimog or something that had spade terminals on the back. That would be easy to make a little adapter pigtail for.
 

bigmike

Well-known member
Steel Soldiers Supporter
2,005
356
83
Location
Dixon CA.
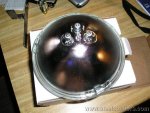
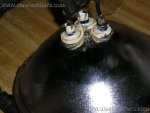
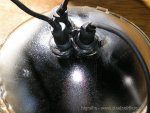
solder job complete

Well the solder off/ solder on job is complete...not too hard for a green horn like myself.

The steps:
1) Bought Wagner 4863-1 bulbs off internet w/o pigtails $17.50
2) Pulled back rubber boots on old headlights and picked off sealant with fingernails.
3) Heated metal ring with soldering gun on old bulb while lifting slightly on pigtail. Pigtail and ring come off quickly.
4) Placed ring and pigtail on new bulb aligning on metal nipple/connector.
5) Heated ring and pigtail while sitting on metal nipple/connector. When solder melted by touching it to bulbs connector (so you don't get a cold solder), applied solder filling metal ring. Note: there is nothing to hold pigtail to metal ring so an extra hand helps greatly.
6) After cooled, squirt 3/8" ball of high temp form a gasket just above soldered area.
7) Push down and rotate rubber boot at same time to even out sealer.
8) Grin at your fine work. :wink:
 

Attachments

WillWagner

The Person You Were Warned About As A Child
Super Moderator
Steel Soldiers Supporter
8,539
2,761
113
Location
Monrovia, Ca.
RE: solder job complete

Sweet. Hope they last longet than Norms.
 
Top
AdBlock Detected

We get it, advertisements are annoying!

Sure, ad-blocking software does a great job at blocking ads, but it also blocks useful features of our website like our supporting vendors. Their ads help keep Steel Soldiers going. Please consider disabling your ad blockers for the site. Thanks!

I've Disabled AdBlock
No Thanks