• Steel Soldiers now has a few new forums, read more about it at: New Munitions Forums!

  • Microsoft MSN, Live, Hotmail, Outlook email users may not be receiving emails. We are working to resolve this issue. Please add support@steelsoldiers.com to your trusted contacts.

Survival 109 build

QUADJEEPER

Member
Steel Soldiers Supporter
797
6
18
Location
Winter Springs, FL
Got my seat cushions/mattress back from the upholstery shop today. Looks good to me. Has some character stains, good for stories. :mrgreen: Fabric is an old army tarp. I think it will be plenty durable. Now I just have to build a place to put them!
 

Attachments

Another Ahab

Well-known member
17,841
4,199
113
Location
Alexandria, VA
Got my seat cushions/mattress back from the upholstery shop today. Looks good to me. Has some character stains, good for stories. :mrgreen: Fabric is an old army tarp. I think it will be plenty durable. Now I just have to build a place to put them!
Some things are worth the cost of paying somebody who knows what they're doing:

- They look great; the shop did a nice job.
 

QUADJEEPER

Member
Steel Soldiers Supporter
797
6
18
Location
Winter Springs, FL
Another sluggish day today. Sugar levels all over the place. Ugg. Did trim out the pass through opening and measured for the sliding door for it as well as the dinette seating. Almost looks like it would make a good fireplace. Also managed to melt down my 15a to 30a adapter running the air. Was 100F here yesterday, nearly that again today. Guess I need a 30a dedicated circuit for the truck.
 

Attachments

QUADJEEPER

Member
Steel Soldiers Supporter
797
6
18
Location
Winter Springs, FL
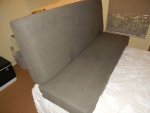
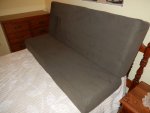
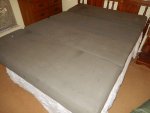
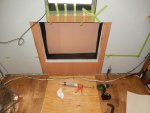
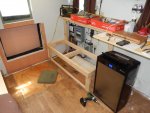
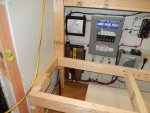
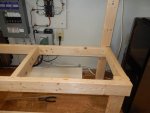
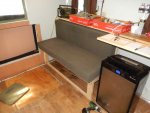
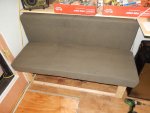
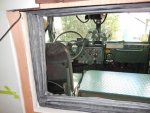
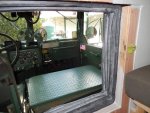
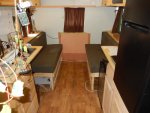
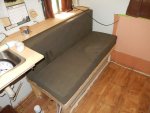
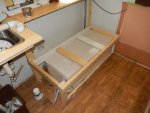
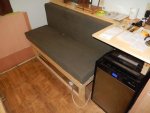
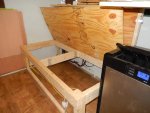
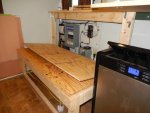
Todays project was to start on the dinette seating framework. Before I started on that, I cut a new battery compartment cover out of 3/4" plywood, trimmed it smaller so I can frame it and the opening in aluminum angle. Also figured out how I was going to create a holddown system for the eight batteries. Need to find the funds though before either of those projects come to pass. The bench seat frame was fairly easy to lay out, I did need to factor in the sliding door for the pass through as well as allowing both the seat back board and the seat bottom board to be hinged for access. Haven't cut the plywood yet for those parts, but did place the cushions to see how it fit and with a temp. board, how it sat. Need to trim the shelf board about 2 inches so your shoulders don't hit it while seated. Once I get the sliding door tracks in, then I can figure how my table will attach to the mid air space below the top of the pass through.
 

Attachments

QUADJEEPER

Member
Steel Soldiers Supporter
797
6
18
Location
Winter Springs, FL
X2 I'm sitting here on fathers day waiting to get my truck and I'm tired looking at all the work you have in this beast. Awesome just awesome!

Man I got a ton of work to do just to park near that thing!
Ha ha, no, we all have to start somewhere. Thanks though. Have a bunch more to do before it is anywhere near completion.
 

QUADJEEPER

Member
Steel Soldiers Supporter
797
6
18
Location
Winter Springs, FL
Did about 5 min. of work on the truck this afternoon. The boot arrived today for the pass through. I ordered the 7" version. Installs very well, nice and snug on the sheet metal edge. Still need to trim it at the corner and where it goes over the bracing and cab roof to cab seam. I think it will have enough flex for the extreme articulation the deuces are capable of.
 

Attachments

QUADJEEPER

Member
Steel Soldiers Supporter
797
6
18
Location
Winter Springs, FL
Got quite a bit done today even with the heat. Picked up my cabinetry this week and modified it for what I needed and got it in the truck. Not bolted down yet other than the base for the fridge. Painted the bottom area's just in case there is ever water on the floor.
 

Attachments

QUADJEEPER

Member
Steel Soldiers Supporter
797
6
18
Location
Winter Springs, FL
Also cut out the bottom panels for an access to the extra space in the toe kick area. Figured why let several cubic feet go to waste. Added some "mouse" holes to the lower rear on each side so I can run wiring and piping behind the cabinets. Set my fridge up on it's cabinet to see how it looked. Will be enclosing the fridge with the exception of some ventilation openings.
 

Attachments

QUADJEEPER

Member
Steel Soldiers Supporter
797
6
18
Location
Winter Springs, FL
Had a decently productive day today. Installed the right seating area plywood, hinged for access. Just used some hinges I had laying around, will use piano hinges when I get them. Quite a bit of storage under the seat, plus have good access to the electrical area. Cushions fit well with the plywood. Got the left side seat frame started as well, but ran out of 2x4's and plywood. That side is the location for the water tank. Haven't blocked it in or strapped it as of yet. Need to finish seat frame and check pipe routing before securing tank. I made the cross bracing easily removable so I can pull the tank if needed. I used two lag bolts in the end of each brace, cut the heads off and drilled matching holes in the rear frame so that they can slip in without an issue. Front will be normal screws. Just set the left side cushions in place to see how it looked. Will be installing filler panels below the cushions soon.
 

Attachments

Another Ahab

Well-known member
17,841
4,199
113
Location
Alexandria, VA
I made the cross bracing easily removable so I can pull the tank if needed. I used two lag bolts in the end of each brace, cut the heads off and drilled matching holes in the rear frame so that they can slip in without an issue. Front will be normal screws. Just set the left side cushions in place to see how it looked. Will be installing filler panels below the cushions soon.
That is a great idea. Excellent. [thumbzup]
 
Top