• Steel Soldiers now has a few new forums, read more about it at: New Munitions Forums!

  • Microsoft MSN, Live, Hotmail, Outlook email users may not be receiving emails. We are working to resolve this issue. Please add support@steelsoldiers.com to your trusted contacts.

Tactical generator environmental modifications

Hard Head

Member
Steel Soldiers Supporter
540
22
18
Location
Greenville SC
Well everything is in the oven and curing. Got lucky and found a very large 4' x 6' x 5' Styrofoam lined cardboard box. I put all the sprayed parts in it with a small electric radiator heater to keep it warm. So far so good. It is just 75 in the box so everything should cure without evenly. I have to run up to Charlotte today and pick of the rest of the materials for sound absorption. I will let everything cure until Tuesday before I glue on the rest of the material. Anyway, I will replace the door and panel seals with a better material while I wait. I can also experiment a little more with various exhaust silencers. I have to fab up the intake screen and filter material housings to attach to the sides of the generator. Going to make a screen for the bottom drain out of doubled 1/8 screen material sandwiched in expanded metal channel. It will be removable for cleaning. So I have plenty to do this weekend while I wait for rubber to cure. I got another 802A that I need to test anyway. Who knows what can be right or wrong when you get them! It's a gamble to say the least. And the reserves are going thru the roof right now!
 

Hard Head

Member
Steel Soldiers Supporter
540
22
18
Location
Greenville SC
Had other work get in the way so I had to wait a few days to get back on this. Everything I sprayed is fully cured now and dead to thumping! Might as well thump a rock. I will reassemble the cabinet and test it today. Once I have the new readings I will see if more noise controls need to be implemented. I have an assortment of fiberglass sound board, foam and rubber. A nut driver bit is a must now! Too many machine bolts to put on and possibly take off again. Another great tool is a step bit. Only one bit required and it cleans the coating out of each hole with blazing speed. I didn't take the coating out of the rivet holes yet. I will do that after the test.
 

Hard Head

Member
Steel Soldiers Supporter
540
22
18
Location
Greenville SC
I assembled the box and did a sound test.


Sides - 69 db at 3 yards (79 db @ 1 inch)
Front - 72 db at 3 yards (84 db @ 1 inch)
Top - 78 db < 1 yard (82 db @ 1 inch)
Rear ( new exhaust hood ) 75 db at 3 yards.

Note! before I added the new exhaust hood I was reading around 98 db < 1 yard above the unit.

I added the sound curtain for a test and got 70 db on the exhaust side at 3 yards. Slightly better than the control box end! I did lay some sound material on the hood and top of the unit and it dropped 5 db. That strip of material costs $80. Wondering if it is worth the money for 5 db. 10 db I would say yes. I only have about 1/2 inch of space above the muffler. You have to keep 2" air space for the rubber types of sound materials. I will try some 1" and 2" Owens Corning 703 and see if it makes much if any difference.


The main thing now is I have closed the bug holes and stopped snow and ice from getting into the radiator vent.
I used automotive calk strips to seal all of the door handles to the doors when I reassembled.
I filled all the corners in the doors. Checked for any place light was entering around doors and assembled parts and caulked them with butyl.
I put rubber corner seals in the top corners of the instrument panel cover to seal it up so critters won't crawl in.


I am going to build a cone from gasket material to cover the exhaust pipe and remove the spring. It rattles quite a bit! This will seal the exhaust exit point into the generator body which will prevent water from getting in. The top if the generator is pretty darn sturdy now with the hood and the 1/4" thick cross member I put in it. No more sunk in spot and it will support weight now. Anyway I did notice that the small doors are 5 db loader than the side doors at 0 feet. I will fix them with some matting. Airflow went up with the modifications to the tool storage box. I wonder if I should just remove it and put tools in the document box. That box really restricts air flow on the right side intake.


I will continue to test and report the numbers.
 
Last edited:

Another Ahab

Well-known member
18,007
4,582
113
Location
Alexandria, VA
I would have thought it might be a little quieter after all that you did.

Still, considering everything:

- are you pretty satisfied yourself?

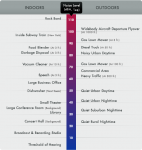
sound_level_examples.png
 

Hard Head

Member
Steel Soldiers Supporter
540
22
18
Location
Greenville SC
It is about 5 db quieter than it was. The mods to keep crap out of the radiator increased the sound on the side but I managed to contain it so I am very happy. The great thing is it is not loud at all above the generator like it was. You could easily hear the generator in the second floor bedrooms. I will add some sound absorption material in the top and I believe the final outcome will be between 1/4 and 1/2 the noise level of what it used to be in these rooms. 10 db is half the perceived noise level and I can cut it by almost 20 db. I just laid 1/2 inch of open cell foam on the top and cut 5 db immediately. I ordered a silicon rubber boot to seal the new exhaust pile to the top of the unit. I can take the rattling muffler plate spring out now! I decided to take the tool box off the small door and add sound material behind it. I can cut 5 db off the front of the unit. The lessons learned will go into the next one and it will be easier to do since I won't have any hand forming and rolling. I am increasing the discharge angle of the hood by 35 degrees. I am also modifying for all commercial screening.

Flying critters are locked out and leaves and snow cannot get into the radiator. Water and sound leaks above the muffler will be eliminated. We are also working on a pellet form of the insecticide oil to put in the cabinet to help drive away bugs. So I really think my dirt dauber in the generator / stator days are over!

It was worth the trouble. Also the structural improvements made the top rock solid so I am happy with that too. A person can stand on it now if they want to! Don't have to worry about kids (people and goats) from standing on your generator :)
 

Another Ahab

Well-known member
18,007
4,582
113
Location
Alexandria, VA
It was worth the trouble. Also the structural improvements made the top rock solid so I am happy with that too. A person can stand on it now if they want to! Don't have to worry about kids (people and goats) from standing on your generator
They're always a nuisance, climbing up on stuff; those d*** goats.


goats.jpg
 

Hard Head

Member
Steel Soldiers Supporter
540
22
18
Location
Greenville SC
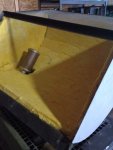
I took the hood off and put some OC 703 in using 3M 94 spray adhesive. IMG_2162.jpg


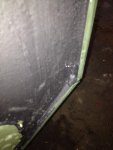
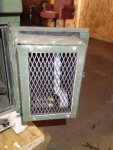
The other 2 pics show where I filled around the latch and in the open door edges with butyl rope caulk.

IMG_2164.jpg
IMG_2165.jpg

I was told that a clear rubberized coating might be good over the face of the fiberglass to keep if from defacing over time. Pretty good air flow in the hood now. I purchased a can of clear Rust-Oleum leakseal tonight. I will spray it on a scrap and see if it helps bind the face. Any ideas would be appreciated. Since this is the prototype I may put perforated metal of the face of the next one. I just need to make some slide frames and weld them in to hold it. Maybe spraying will do the trick. Who knows.
 

Hard Head

Member
Steel Soldiers Supporter
540
22
18
Location
Greenville SC
MEP-803A Specs:


Sound level: 70 dBA at 7 m / 23 feet at rated load

(I found this interesting)

I will crank it once I get to work and measure at 1 meter and also at the 7 meter distance today.

Next things to try!!!!

I will pick up another stall mat this morning and see what difference it makes just laying on top of the unit. If it is good I will just leave one there and let it overlap just a little. My noise issue is above the unit. One of the guys in the warehouse has some heavy vinyl curtains he is going to give me to see if they make a difference in exhaust sound. I will overlap them at different percentages and if they are good I will incorporate them.
 

Hard Head

Member
Steel Soldiers Supporter
540
22
18
Location
Greenville SC
Some more modification pics
box_tools.jpg

I modified the front tool storage box to allow for more airflow and I put sound materials and padded the box to prevent rattles.

intake_screen.jpg
I added 1/8" screen behind the intakes. I used wire ties to secure.


I did a sound test and even with the wind we were ambient around 63 db at 7 meters all the way around. It was tough given the wind and a dog barking.
I still have some leaks to address (95 db around exhaust exit, and 95 db under the unit)

I think things are going very good especially on the exhaust side.

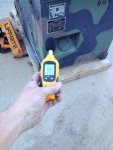
Here are the measurements at 1 meter

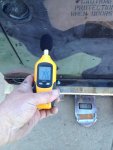
Top ( about 30 " )

top less than 1 meter.jpg


Side ( 0 the 1 meter)

side 0 meter.jpgside 1 meter 77.jpg

Back (1 meter)

front 1 meter.jpg

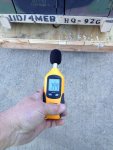
Back (< meter )

Back_1 meter.jpg

Front (almost a meter, I was :))

front_meter.jpg
 

Attachments

Last edited:

Hard Head

Member
Steel Soldiers Supporter
540
22
18
Location
Greenville SC
I didn't get my silicon boots in today, but when I do I will show how they are attached and hopefully they will take care of the 95 db sound leak around the muffler exit hole.

I will take the unit off the skid and fix the bottom drain holes. The stall mat is not nearly as efficient as the open cell fused mass loaded vinyl material. 2 db vs 5 db just laying on the unit. One is 89 and the other is 25. 89 wins the sound war as I would expect. So we modified the hood design to increase the down angle slightly and the exhaust connection from 4" to 6" and a slide in screen 1/2" should be plenty for this.
 

Hard Head

Member
Steel Soldiers Supporter
540
22
18
Location
Greenville SC
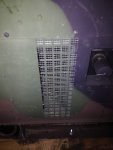
Just a note, I have since made a better hood that incorporates the exhaust and air exit. We designed and fabricated a filter unit that goes under the unit (covers the battery and drain holes). It stops ants! I will add some pictures of it tomorrow. I will be selling them if anyone is interested. I also make 2 similar external filter housings for the intake to keep out crawling insects such as ants that can get through the screen wire. I am currently upgrading 6 - 803's and 2 802's. Folks seem to like not getting pests in the generator cabinet! I also take the time to replace every non captive nut point with high quality aluminum rivnuts. Out neighbor puts these in Nascar vehicles! I put in over a 100 per unit! You can easily disassemble any panel without having to get to a nut! Great for the control box and fuel tank access!
 

Another Ahab

Well-known member
18,007
4,582
113
Location
Alexandria, VA
Just a note, I have since made a better hood that incorporates the exhaust and air exit. We designed and fabricated a filter unit that goes under the unit (covers the battery and drain holes). It stops ants! I will add some pictures of it tomorrow. I will be selling them if anyone is interested. I also make 2 similar external filter housings for the intake to keep out crawling insects such as ants that can get through the screen wire. I am currently upgrading 6 - 803's and 2 802's. Folks seem to like not getting pests in the generator cabinet! I also take the time to replace every non captive nut point with high quality aluminum rivnuts. Out neighbor puts these in Nascar vehicles! I put in over a 100 per unit! You can easily disassemble any panel without having to get to a nut! Great for the control box and fuel tank access!
Do you have any pics of those in place?
 

BobbyT

Member
65
37
18
Location
Little Rock, Arkansas
Yup. Fantastic invention. If you are doing more than 15 of them at one time, I would recommend getting a pneumatic rivet gun for them or a large two handed manual one cause trying to squeeze a small rivnut gun a bunch will kill your hands.... :D I don't have a great close photo of mine installed but you can see where they are when I was putting it all back together. Sorry to hijack your thread Hard Head...
image.jpg
 

Another Ahab

Well-known member
18,007
4,582
113
Location
Alexandria, VA
Yup. Fantastic invention. If you are doing more than 15 of them at one time, I would recommend getting a pneumatic rivet gun for them or a large two handed manual one cause trying to squeeze a small rivnut gun a bunch will kill your hands.... :D I don't have a great close photo of mine installed but you can see where they are when I was putting it all back together. Sorry to hijack your thread Hard Head...
I've seen pop-rivets, but can't remember seeing any of these (Lowes, Fastenal, and like that).

Where do you buy them?
 

Guyfang

Moderator
Staff member
Moderator
17,033
24,901
113
Location
Burgkunstadt, Germany
The military uses them a lot. The Hummer has a bunch of them, the hummer trailers also. We bought a hydraulic gun when we had to do a bunch, (120 vehicles and trailers) upgrades to hummers and trailers. We started with a BF hand operated rivet gun. It had arms at least a meter long. After doing two Hummers you had your body building for the day. Someone else had to take over. But once you had them in right, man was it nice! They were perfect.
 

Another Ahab

Well-known member
18,007
4,582
113
Location
Alexandria, VA
The military uses them a lot. The Hummer has a bunch of them, the hummer trailers also. We bought a hydraulic gun when we had to do a bunch, (120 vehicles and trailers) upgrades to hummers and trailers. We started with a BF hand operated rivet gun. It had arms at least a meter long. After doing two Hummers you had your body building for the day. Someone else had to take over. But once you had them in right, man was it nice! They were perfect.
They are a great idea!

I've used something similar for carpentry back when I did some technical work for theater; things called tee-nuts.

The riv-nuts are like tee-nuts, only for sheet metal instead of lumber; that's a great item.
 
Top
AdBlock Detected

We get it, advertisements are annoying!

Sure, ad-blocking software does a great job at blocking ads, but it also blocks useful features of our website like our supporting vendors. Their ads help keep Steel Soldiers going. Please consider disabling your ad blockers for the site. Thanks!

I've Disabled AdBlock
No Thanks