• Steel Soldiers now has a few new forums, read more about it at: New Munitions Forums!

  • Microsoft MSN, Live, Hotmail, Outlook email users may not be receiving emails. We are working to resolve this issue. Please add support@steelsoldiers.com to your trusted contacts.

The -803 is finally home

76shovel

Member
69
10
8
Location
Bunnell/FL
Well i got off work this morning and got to it. Started by checking all the wire connections and making sure they were secure. Then i proceeded to install the quad fuse. Still waiting on the shipper to get the mov shipped to me. Checked all the fluids just to see where they are. The engine oil was lower than i thought it should of been.. The coolant was low amd later discovered a pin hole in the radiator. Then the fuel tank, that was something i had never seen before. Not to mention to take out of the unit.

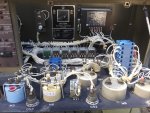
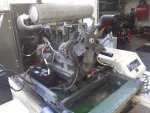
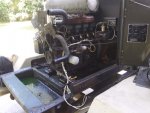
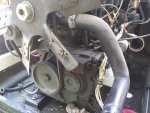
I took some pictures and will load them to share
 

76shovel

Member
69
10
8
Location
Bunnell/FL
What i noticed...once i checked things and before disassembly i hooked the batteries up and attempted to power the unit and see if fault lights worked. Well ot was nothing. Checked power at starter and had plenty. Soco disconnected them and excerised all the switches and knobs and tried again, nothing... Then i remembered the circuit breaker by the phase knob behind the panel. It was pulled out amd when i pushed it in and powered everything and turned the run switch to prime and run the fuel pumps took off and had fault lights.

I so bad wanted to try to start it but i didn't. I did crank it but just to see if it would and just for a short second. After seeing the fuel tank later on I'm glad I decided to not try to start.

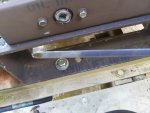
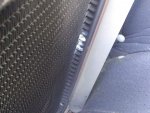
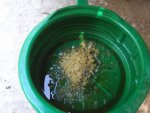
It was then I started to disassemble a panel here and a panel there and soon it was pretty much apart. Like Guy mentioned on another post about taking them apart like that. Its a pain to get them to line back up but you get to see alot more of your generator that way. Socot worked out for me. I noticed my front gasket is leaking and noticed my radiator has a hole in it also. Plus it's prime time to clean it good also. speaking of, cleaned the inside of the fuel tank and that thing was horrible. So my new parts list is a front engine gasket...(do i need the engine number for the gasket set), thermostat and gasket for it, radiator repair, 2 upgraded well nuts, new belt, 150 10-32 hardware, thinking about installing riv-nuts in certain areas. And then after all that hopefully start the assembly process.

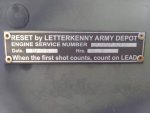
Do have a question...on my reset tag it doesnt specify a tier 2 reset so i assume it is a tier 1. The hrs on it say 2.0 hrs on it. Is that short for 2000 or is it really 2hrs at the time of reset0731191150a.jpg0731191151.jpg
 
Last edited:

Zed254

Well-known member
866
466
63
Location
S. Hampton Roads, VA
Letterkenny runs them around 2 hours when they are finished working on them and record the out-the-door hours on the reset tag. Both of my generators have similar reset hours. Your reset date is September 2005.
 
Last edited:

Light in the Dark

Well-known member
Steel Soldiers Supporter
3,828
5,936
113
Location
MA
And if you are taking the gear end cover off, spend the $10 and replace the crank seal in that case while you are at it. Cheap money while you are there.
 

76shovel

Member
69
10
8
Location
Bunnell/FL
Thank you...i didn't know of they had a "gasket kit" or had to buy the engine rebuild gasket kit. I dont think i need to tear the whole engine down but do need to replace a few gaskets...probably end up just buying the whole engine kit...thanks again Zed& Light
 

Light in the Dark

Well-known member
Steel Soldiers Supporter
3,828
5,936
113
Location
MA
Oh and inspect the belt too, if it looks at all worn or dry cracking, take it off now while you have all the room in the world. With the radiator and end off, you should also consider replacing the tank well nut with one of the upgraded brass units (check the forum for links).
 

76shovel

Member
69
10
8
Location
Bunnell/FL
Light... Im half a step ahead of you, but not to say i got everything...lol...i ordered a complete gasket set, felt some play in the water pump and a new belt just because. I ordered the brass bulk head fittings the other day for the tank (Shipping was as much as the parts)so they should be here before to long. While i had most of it apart i took advantage of it and hosed out the inside and cleaned it fairly well. This way of the is more leaks they will be able to be seen.

Now, the radiator is starting to be a thorn. What i thought was a small hole between the core and tank turns out to be about 8 more tiny lil pin leaks along the same areas. So hopefully when i send it in and get it cleaned it wont reveal more bad news. So far i think i am around 300 dollars with this thing but i believe it will be all worth it when it is completed and functional woth zero issues...

Thank you for all the helpful insight as i work my way through this project
 

Light in the Dark

Well-known member
Steel Soldiers Supporter
3,828
5,936
113
Location
MA
Yeah just sent the rad out to a reputable shop and don't think twice about it. Great time to install a new radiator cap too.. see how easy it is to spend other peoples money? ;)
 

76shovel

Member
69
10
8
Location
Bunnell/FL
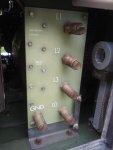
Ha ha ha...thanks I appreicate that. Im doing a fine job myself on this thing. Something i noticed is i need the fasteners/nuts for the output lugs...mine arnt there. Is there a place i can source them1564748361239566501834.jpg
 

Light in the Dark

Well-known member
Steel Soldiers Supporter
3,828
5,936
113
Location
MA
Have you referenced the parts manual? The info is in there, complete with manufacturer part number. The manual you want is 9-6115-642-24P. Perfect opportunity to 'crack the books' as this German chap I know likes to repeat :)
 

Light in the Dark

Well-known member
Steel Soldiers Supporter
3,828
5,936
113
Location
MA
And not to withhold data, but if you can't find it... we will help. But part of owning these machines is being able to do for yourself, what others can't. If you can find the part number, share it here... and I will show you an additional website which may be quite beneficial​ to your part hunting in the future.
 

76shovel

Member
69
10
8
Location
Bunnell/FL
To be honest...i save all the tech manuals on my phone everytime, but when i save them it saves them as the referenced number that they are and i dont remember which tm number is which. Seems like there is 9 different manuals for a different aspect of it. I am in the process of printimg them out and putting them into binders. For me it is much easier for my analog thinking... I'm just not much of a digital guy...lol. Trust me i believe in manuals, and use them. Thats why i put them in sleeve protectors to keep the smudges off. It will all come together and i will have them all printed out. It's just getting to that point
 

Light in the Dark

Well-known member
Steel Soldiers Supporter
3,828
5,936
113
Location
MA
-10 manuals are the 'operators' manuals
-24 are the 'troubleshooting' manuals
-24P are the 'exploded parts diagram' manuals

There are a few others, but just look for these end distinctions to help you understand which manual you should be referencing. In the TMs listed here, there are these set of three for the overall machine, and then a set just for the engine (and have ENG in the filename).
 

76shovel

Member
69
10
8
Location
Bunnell/FL
That helps to clear things up a bit. Understanding what you are looking for is always beneficial.

The water pump should be the last part to come in and should be here Tues, but still need to drop radiator off to be fixed. Hopefully by the end of next week it should be ready to fire for the first time since i got it home.

Any thoughts on using riv-nuts on the holes that are stripped out to secure the panels together
 

Daybreak

2 Star Admiral
Steel Soldiers Supporter
1,522
771
113
Location
Va
Howdy,
Or, think outside the box

*************original**************
NSN 5940-00-958-1214 part# 69-692-1 Terminal Stud
Specs
OVERALL HEIGHT 3.938 INCHES
OVERALL DIAMETER 1.375 INCHES
LARGEST DIAMETER 1.188 INCHES SINGLE END
ELECTRICAL INSULATION FEATURE UNINSULATED
MOUNTING METHOD STYLE STUD
BASIC SHAPE STYLE NONTUBULAR, ROUND
MOUNTING THREAD SERIES UNC
CONDUCTOR ACCOMMODATION TYPE SINGLE TURRET SINGLE END
MATERIAL COPPER ALLOY CONDUCTOR ACCOMMODATION
MATERIAL COPPER ALLOY MOUNTING FACILITY

Part # Manufacturer's Listed
DG3M6F-S-RPC DOSSERT CORP
JHP112-53 HOLLINGSWORTH JOHN R CO
S-38615-G5 PENN-UNION CORP DIV PENN-UNION CORP
S44706 PENN-UNION CORP DIV PENN-UNION CORP
13208E5820 CECOM LR CENTER
13208E5820-1 CECOM LR CENTER
2803005-0-153 ELECTRIC BOAT CORP DBA ELECTRO DYNAMIC
2803005-0-153 ELECTRIC BOAT CORPORATION
30554-69-692-1 LIBBY POWER SYSTEMS LLC
961-0081 HOLLINGSWORTH JOHN R CO

Buying the whole terminal stud
***************************
OR
You would have to check to see it the threading would be the same
Purchase say 1 unit of a

https://www.gardnerbender.com/en/p/GSBC-2/6-2-AWG-Solid-Copper-Split-Bolt Or other manufacturer's similar unit.
https://penn-union.com/products/sku/s-2

#2 AWG Split Bolt - copper alloy
Take the nut, and center crush and use it on your studs

https://www.amazon.com/Penn-Union-Copper-Split-Connector-Conductors/dp/B00J5LL82Y
 
Last edited:
Top