loosescrews
Member
- 53
- 0
- 6
- Location
- Springfield, Mo
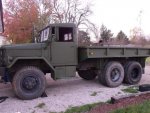
First off, greetings from Missouri. I've been watching the forums for a while and lurking, getting the hang of how everyone works here and soaking in as much info as possible. This place seems to be full of decent folks that love this hobby, and I wanted to you all to know how helpful your info has been during my buildup of a 68 kaiser M35A2.
I picked up the deuce back in April and have been working on it for what seems like ages straightening everything out, from years of neglect from a local fire department and various other parties over the years. She was a rough sight, but I fell instantly in love with it. Back in the 90's I was in the Army(19k) and had a chance to fiddle around with these trucks. I knew they were capable, rough riding, stout vehicles. I never knew they were addictive.
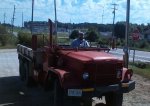
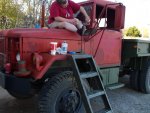
The above is one of the first pic I thought to take of the truck, and it was about as mission capable as me. After the loss of a son, I became reclusive and packed on the lbs. Knowing I had to do something to try to save myself, I decided I would find something that would get me active, and out and about again. The solution was the above truck and I decided I would do all the work to it myself. I had enjoyed mechanics back when, and hoped it would give me a chance to get part of myself back.
The day I picked up the truck it was having the tanker bed that was on it stripped off, and a standard bed put on. The previous owner had picked it up from a fire department, and did as little as possible to it while trying to flip it. Having known about its inactive life at a rural fire department, I asked him to ensure the filters and oil were done, and he agreed. The 3 hour drive back to the house was eventful, as the only filter he had changed was the final, and the secondary and primary were chocked full of rust and crud. The oil had been overlooked as well. The fuel line was crushed as well under the core support.
Correcting the problems mid trip, I made it home with Mrs. Soldier #2 tailing up my column. We stood on the porch glad to have brought the vehicle home and wondering what we had gotten ourselves into. The following few weeks were spent on restoring the truck to serviceable condition and appraising what we had and where we needed to point our attention to next. Various problems that were fixed included, filters(again), cleaning, fuel lines flushed, fuel tank flushed, cleaning, horn repair, steering adjustment for play, fluids checked and replaced as needed, wipers converted to new style automotive blades, (did I mention cleaning?), tightening all the lug nuts that were falling off, gauge repair, circuit diagnosis and repair, trips to harbor freight, and many other things I most likely have forgotten to mention.
Once the lions share of all the lacking maintenance had been caught up, I turned my sights to the appearance of the vehicle, which was fairly rusthole free, but in dire need of refreshing.
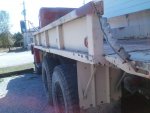
As you can see, the bed had a nice thick coating of carc which appeared to be brushed on. The cab of the truck was painted in a coat of fire engine red enamel paint that was failing. With my work cut out from me I headed off to harbor freight and got the composite 6"da and a few rolls of paper for it. I also acquired the inline pneumatic needler for trouble areas.Assorted things people over the years had welded to the bed were removed, ground level and sanded smooth. Runs and chips were feathered and places where paint had lost adhesion were needled. The military traction compound was removed with the needler, and all areas where major sanding or bare metal was visible was coated with a self leveling filler primer, and re-sanded, thus preparing for paint. All areas to be painted were first washed with mineral spirits (the closest thing to Solvent, Dry Cleaning I found) and followed by acetone. Glass and lenses were masked and coated with Vaseline where left bare. In hindsight, it would be easier to mask all items that needed it.
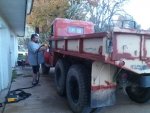
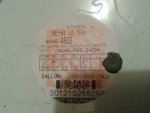
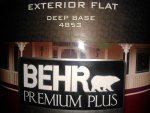
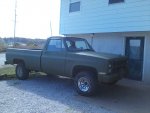
The painting system I chose to use was the Behr Ultra Exterior latex, purchased from home depot, and a Wagner control max hosed hvlp spray system. Using the mix of 2 cups of paint, to three-quarter cups of water, then adding 1/4 cup of 99 percent isopropyl alcohol, I finally added one tablespoon of Flotrol to the mixing container and mixed thoroughly with a drill mixer on my drill press for one minute. It was then strained and loaded into the gun, filling it to the appropriate level. This mixture achieved a good viscosity for spraying, and excellent coverage and leveling, with a nice "carc"ey texture and finish. I have an old 85 gmc k-1500 I tested the painting system on(please forgive the spare on the front), leaving it to weather for a month. I wanted to test adhesion, finish hardness, and weathering before committing on the deuce. It exceeded my expectations for ease of application, finish hardness, and finish quality.
After my hesitation about painting a vehicle with house paint was dismissed, I proceeded to apply the paint to the prepared surface of the M35.
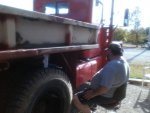
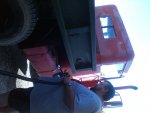
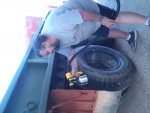
Finishing the bed first, I moved onto the cab.
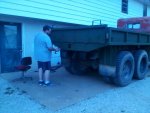
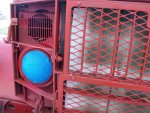
With rain pressing down on us, we pushed for the finish and within 2 hours of the paint being applied on the cab, it started raining. Fearing the worse, I went and checked the paint the next morning. I was relieved to find that the paint weathered the downpour flawlessly. Having the alcohol in the mix sped the drying time, even in the cooler temperature of the evening. To be cont....
I picked up the deuce back in April and have been working on it for what seems like ages straightening everything out, from years of neglect from a local fire department and various other parties over the years. She was a rough sight, but I fell instantly in love with it. Back in the 90's I was in the Army(19k) and had a chance to fiddle around with these trucks. I knew they were capable, rough riding, stout vehicles. I never knew they were addictive.

The above is one of the first pic I thought to take of the truck, and it was about as mission capable as me. After the loss of a son, I became reclusive and packed on the lbs. Knowing I had to do something to try to save myself, I decided I would find something that would get me active, and out and about again. The solution was the above truck and I decided I would do all the work to it myself. I had enjoyed mechanics back when, and hoped it would give me a chance to get part of myself back.
The day I picked up the truck it was having the tanker bed that was on it stripped off, and a standard bed put on. The previous owner had picked it up from a fire department, and did as little as possible to it while trying to flip it. Having known about its inactive life at a rural fire department, I asked him to ensure the filters and oil were done, and he agreed. The 3 hour drive back to the house was eventful, as the only filter he had changed was the final, and the secondary and primary were chocked full of rust and crud. The oil had been overlooked as well. The fuel line was crushed as well under the core support.
Correcting the problems mid trip, I made it home with Mrs. Soldier #2 tailing up my column. We stood on the porch glad to have brought the vehicle home and wondering what we had gotten ourselves into. The following few weeks were spent on restoring the truck to serviceable condition and appraising what we had and where we needed to point our attention to next. Various problems that were fixed included, filters(again), cleaning, fuel lines flushed, fuel tank flushed, cleaning, horn repair, steering adjustment for play, fluids checked and replaced as needed, wipers converted to new style automotive blades, (did I mention cleaning?), tightening all the lug nuts that were falling off, gauge repair, circuit diagnosis and repair, trips to harbor freight, and many other things I most likely have forgotten to mention.
Once the lions share of all the lacking maintenance had been caught up, I turned my sights to the appearance of the vehicle, which was fairly rusthole free, but in dire need of refreshing.

As you can see, the bed had a nice thick coating of carc which appeared to be brushed on. The cab of the truck was painted in a coat of fire engine red enamel paint that was failing. With my work cut out from me I headed off to harbor freight and got the composite 6"da and a few rolls of paper for it. I also acquired the inline pneumatic needler for trouble areas.Assorted things people over the years had welded to the bed were removed, ground level and sanded smooth. Runs and chips were feathered and places where paint had lost adhesion were needled. The military traction compound was removed with the needler, and all areas where major sanding or bare metal was visible was coated with a self leveling filler primer, and re-sanded, thus preparing for paint. All areas to be painted were first washed with mineral spirits (the closest thing to Solvent, Dry Cleaning I found) and followed by acetone. Glass and lenses were masked and coated with Vaseline where left bare. In hindsight, it would be easier to mask all items that needed it.

The painting system I chose to use was the Behr Ultra Exterior latex, purchased from home depot, and a Wagner control max hosed hvlp spray system. Using the mix of 2 cups of paint, to three-quarter cups of water, then adding 1/4 cup of 99 percent isopropyl alcohol, I finally added one tablespoon of Flotrol to the mixing container and mixed thoroughly with a drill mixer on my drill press for one minute. It was then strained and loaded into the gun, filling it to the appropriate level. This mixture achieved a good viscosity for spraying, and excellent coverage and leveling, with a nice "carc"ey texture and finish. I have an old 85 gmc k-1500 I tested the painting system on(please forgive the spare on the front), leaving it to weather for a month. I wanted to test adhesion, finish hardness, and weathering before committing on the deuce. It exceeded my expectations for ease of application, finish hardness, and finish quality.

After my hesitation about painting a vehicle with house paint was dismissed, I proceeded to apply the paint to the prepared surface of the M35.


Finishing the bed first, I moved onto the cab.


With rain pressing down on us, we pushed for the finish and within 2 hours of the paint being applied on the cab, it started raining. Fearing the worse, I went and checked the paint the next morning. I was relieved to find that the paint weathered the downpour flawlessly. Having the alcohol in the mix sped the drying time, even in the cooler temperature of the evening. To be cont....
Last edited:


