ldmack3
Well-known member
- 849
- 1,740
- 93
- Location
- N. Central Idaho
So far so good, still no pressure loss. If all is well tomorrow I will mount it and retorque all fasteners.
Steel Soldiers now has a few new forums, read more about it at: New Munitions Forums!


Did you chase the clamp ring studs with a die? That makes working with the nuts so much easier. I learned that one the hard wayAil I've got is a 1/2" Crapsman which at full power takes one full second to turn the nut 1 revolution before it bottoms put. Once they quit turning I switch to a 5' 3/4" torque wrench and step up the settings. Should probably get a torque amplifier but man do I sleep well after doing one wheel!
 The best part about the 1:64 torque multiplier is that you can use a 1/4" torque wrench on it with an adapter, so you don't have to use a 4'-long torque wrench for everything on the wheels. That's actually how I set the torque on all the nuts in the project - 90 or so inch-pounds input became 450 foot-pounds output!


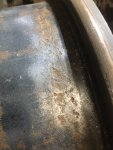
If you're planning on rustoleum rusty metal primer, try a small spot first. I tried it on some rusty metal a while back and it was terrible. I had to clean it off and start over. I have used permatex rust treatment spray then normal primer/paint and it seems to work much better.This wheel was a beyoch to get separated seemingly due to rust. I've already used a wire wheel and sandpaper,
I plan on Rusty metal primer and Rustoleum Rust top coat.
Any concern with wheel failure and explosive decompression? Leaking down I can handle.
I used the brush-on Permatex rust treatment on the first rim I did, only to find out after taking the rim apart while troubleshooting a leak, the Krylon paint I was using was flaking off along with the rust treatment coating underneath. It seems that this is too heavy duty of an application for the Permatex stuff, so I just wirewheeled, primed with Rustoleum automotive primer, then painted with Krylon Fusion.If you're planning on rustoleum rusty metal primer, try a small spot first. I tried it on some rusty metal a while back and it was terrible. I had to clean it off and start over. I have used permatex rust treatment spray then normal primer/paint and it seems to work much better.