• Steel Soldiers now has a few new forums, read more about it at: New Munitions Forums!

  • Microsoft MSN, Live, Hotmail, Outlook email users may not be receiving emails. We are working to resolve this issue. Please add support@steelsoldiers.com to your trusted contacts.

tsm # for the air compressor rebuild info ? or service specs ?

sweetk30

Member
316
6
18
Location
horseheads,ny 14845
well figured it all out my self with no tsm info or others posting up .

so for others later on here is the info .

drain coolant from pass side lower radiator tank drain . going to need 5-6 gal out to get down and have room to spare .

undo coolant lines from driver side block to air compressor .

undo suction line from intake port .

undo hard line from top of unloader head and unbolt it from intake . then remove it at the flex hose to firewall. swing up and out of the way on engine .

remove rear unloader head bolts and rear center cap bolt . works better this way as to springs in the system pushing up .

then remove the front unloader head bolts .

this gets tricky . with a mix match of movements cram your hand around the back of the compressor under the injection pump . hold up the 2 corner bolts you couldn't remove 100% and slide / twist the unit around to the engine block . this will get you the room needed for remove all 100% . repeat for front bolt . then slide the whole unit out off the air compressor body .

you might need to unbolt and remove the center cap at some point in this prosses . caution its spring loaded under pressure .

once all out and off clean / check / get kit ready to reinstall.

but from another fellow member in another thread he said check the aluminum unloader head body for flatness . his was way out . mine was also .

cheep trick 1 12"x12" piece of glass . 250-500-800-1000 grit sand paper wet/dry . then start low and figure 8 patter it on the glass with the paper on the glass . lots of lube or water .

it took me 20 or so min to get mine 95% flat - true . then cleaned up the whole upper half parts pile and reinstalled .

in short it can be done on engine . no removal or turning of compressor or injector pump .

haldex 3559545k is the current kit # updated from the old # I was able to fine . this is for 8.3 cummins engines with haldex air compressor .
 

skihilltruck

New member
1
0
1
Location
northeast
Sweetk30
Reviving an old thread here:
Reman compressor is $1200 around here, so I am trying the cheaper things first.

The first time I took everything out of the truck but when I did the cap flew off the unloader head, so:
1- Im not exactly sure I got everything reassembled exactly correctly.
With the cap off, I put the thin guage 3 loop spring on the bottom, then the washer (assembly based on what looked like it had worn on each other), and then cleaned/sanded/lubed the plunger part that goes up into the cap. Inserted longer spring into plunger, lined up plunger so it could contact then washer and pushed cap down into head with lubed o-ring.
So basically just a clean and reinstall.

Still not building air pressure.
So:
either 1-unloader still stuck
2-gaskets/warped head leaking
3 compressor piston bad.

Will order Hladex parts kit and disassemble per your instructions.
Will check head for flatness and true.

The crux is that I have not found a picture/TM diagram/description of the parts assembly sequence for the unloader. Could you clarify?
Thanks in advance
 

simp5782

Feo, Fuerte y Formal
Supporting Vendor
12,130
9,405
113
Location
Mason, TN
Sweetk30
Reviving an old thread here:
Reman compressor is $1200 around here, so I am trying the cheaper things first.

The first time I took everything out of the truck but when I did the cap flew off the unloader head, so:
1- Im not exactly sure I got everything reassembled exactly correctly.
With the cap off, I put the thin guage 3 loop spring on the bottom, then the washer (assembly based on what looked like it had worn on each other), and then cleaned/sanded/lubed the plunger part that goes up into the cap. Inserted longer spring into plunger, lined up plunger so it could contact then washer and pushed cap down into head with lubed o-ring.
So basically just a clean and reinstall.

Still not building air pressure.
So:
either 1-unloader still stuck
2-gaskets/warped head leaking
3 compressor piston bad.

Will order Hladex parts kit and disassemble per your instructions.
Will check head for flatness and true.

The crux is that I have not found a picture/TM diagram/description of the parts assembly sequence for the unloader. Could you clarify?
Thanks in advance
Compressor 3558006X is around 380 to 550 exchange. There are several variants for the ss296 unit.

Sent from my SM-G935P using Tapatalk
 

CARMAN

Active member
Steel Soldiers Supporter
649
86
43
Location
Broad Run VA
well figured it all out my self with no tsm info or others posting up .

so for others later on here is the info .

drain coolant from pass side lower radiator tank drain . going to need 5-6 gal out to get down and have room to spare .

undo coolant lines from driver side block to air compressor .

undo suction line from intake port .

undo hard line from top of unloader head and unbolt it from intake . then remove it at the flex hose to firewall. swing up and out of the way on engine .

remove rear unloader head bolts and rear center cap bolt . works better this way as to springs in the system pushing up .

then remove the front unloader head bolts .

this gets tricky . with a mix match of movements cram your hand around the back of the compressor under the injection pump . hold up the 2 corner bolts you couldn't remove 100% and slide / twist the unit around to the engine block . this will get you the room needed for remove all 100% . repeat for front bolt . then slide the whole unit out off the air compressor body .

you might need to unbolt and remove the center cap at some point in this prosses . caution its spring loaded under pressure .

once all out and off clean / check / get kit ready to reinstall.

but from another fellow member in another thread he said check the aluminum unloader head body for flatness . his was way out . mine was also .

cheep trick 1 12"x12" piece of glass . 250-500-800-1000 grit sand paper wet/dry . then start low and figure 8 patter it on the glass with the paper on the glass . lots of lube or water .

it took me 20 or so min to get mine 95% flat - true . then cleaned up the whole upper half parts pile and reinstalled .

in short it can be done on engine . no removal or turning of compressor or injector pump .

haldex 3559545k is the current kit # updated from the old # I was able to fine . this is for 8.3 cummins engines with haldex air compressor .
So I managed to get all the top bolts loose but as you said can not pull the back ones out due to length and space. I took unloader bolts out for more room but then put them back in to hold it together, but how to you rotate the top with the springs in? I could not remove the unloader with injection pump in the way. Debating just pulling the pump out until I noticed the steering reservoir attached.
 
Last edited:

Andyrv6av8r

Well-known member
Steel Soldiers Supporter
1,200
457
83
Location
Spartanburg,SC
So I managed to get all the top bolts loose but as you said can not pull the back ones out due to length and space. I took unloader bolts out for more room but then put them back in to hold it together, but how to you rotate the top with the springs in? I could not remove the unloader with injection pump in the way. Debating just pulling the pump out until I noticed the steering reservoir attached.
It's been a few years since I did it but it will come off with the pump in place. Those back bolts are the key to the puzzle.
 

CARMAN

Active member
Steel Soldiers Supporter
649
86
43
Location
Broad Run VA
So am I taking off just the top “cap” off or am I taking off the top two sections off? Now that I’m staring at it I see where the split is on the cylinder. A932FE70-6842-4BC2-B63A-1B130E0DEE89.jpg
 

CARMAN

Active member
Steel Soldiers Supporter
649
86
43
Location
Broad Run VA
Now I get it. Could not get the top half to separate. Just needed a bigger hammer ��
2DDA0E0B-7623-4B09-9BD7-B70760BAEB12.jpg
 

chad496

New member
2
1
3
Location
US
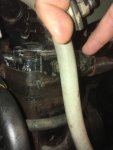
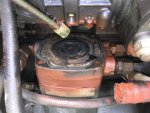
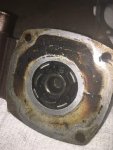
Here are some pictures of the type of failure I experienced with my air compressor M923A2


Sent from my SM-G930P using Tapatalk
 

twisted60

Well-known member
617
250
63
Location
Jupiter, Florida
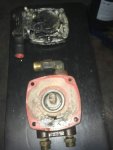
Started taking my unloader apart today to fix my air (not building) issue, here's what I found upon removing unloader section.
IMG_0831.jpgIMG_0834.jpg
I'd say the gasket is shot and she's a little dirty...
Cleaned her up today, will try to do some more cleaning/inspecting tomorrow, replace parts as needed, new gasket and then try to get her back together. Did not remove IP or compressor, it's doable but you need little spider fingers and small hands to get those rear bolts. Fingers crossed she doesn't put up a fight going back on. Had to trim down a 1/2" short socket, now it fits on rear bolt under IP with no issues, that and short and long ratcheting wrenches did the trick. I'll try to take more pic's when putting her back together, no helper so I'll try.
 
Top
AdBlock Detected

We get it, advertisements are annoying!

Sure, ad-blocking software does a great job at blocking ads, but it also blocks useful features of our website like our supporting vendors. Their ads help keep Steel Soldiers going. Please consider disabling your ad blockers for the site. Thanks!

I've Disabled AdBlock
No Thanks