• Steel Soldiers now has a few new forums, read more about it at: New Munitions Forums!

  • Microsoft MSN, Live, Hotmail, Outlook email users may not be receiving emails. We are working to resolve this issue. Please add support@steelsoldiers.com to your trusted contacts.

Turbo Rebuild 3LJ-319 (Whistler)

wsucougarx

Well-known member
6,951
67
48
Location
Washington State
Turbo Rebuild 3LJ-319 (Whistler) Step by step

WARNING! LOTS OF PICS!!!

I'm in the process of restoring my 1968 JK M35A2. After having tackled the exterior, cab, and PMCS of the engine bay, it was time to move to something that has been on the project list. Over the past 3-4 years I have owned and operated 6 deuces. Coincidentally none of them came equipped with a 3LJ-319. Every one of them had a non-whistler. Though the whistle may get annoying after awhile, I would like to have that option in my inventory;-)
At our last PNW mini-rally, I managed to find myself a nice looking 3LJ-319 (AKA the Whistler Turbo or simply as the "C" turbo). I paid $100 for this clean and free-spinning turbo (compared to $200-$300) on the internet. There was barely any free play in the shaft whatsoever. My '68 has only 5k miles since it's rebuild in 1990 at Tooele Army Depot. Rather than trusting the seals on this turbo, I didn't want to take any chances on a runaway. So I decided it was time to rebuild this turbo. This was more or less for peace of mind.
Presently I am awaiting the rebuild kit. I know I know...where did I get it etc etc etc. You guys are going to have to wait!!! The last thing I want to do is cause everyone to go out and buy a kit that may not fit. Let me get the kit and install it first. OK?
The first order of business was to break the turbo down to make sure the internals were still good to go. You need to pay close attention to the turbine wheel, compressor wheel, and shaft before among other things before going forth with this rebuild. If there is anykind of rubbing of the wheels with it's respective housing, forget it! The wheels are balanced at the factory. Any rubbing of the wheels will throw everything out of balance causing your turbo to self-destruct and empty your pocket book needlessly. Also, you need to make sure your shaft is not shot as you will have freeplay in your turbo causing premature wear.
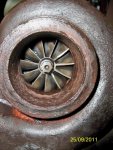
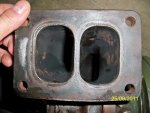
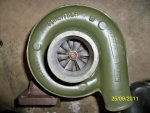
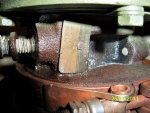
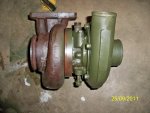
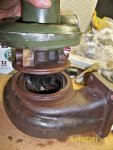
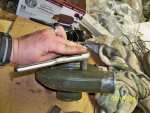
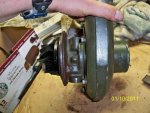
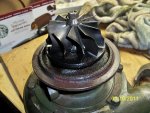
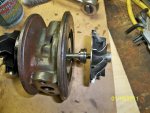
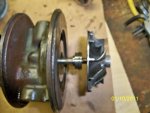
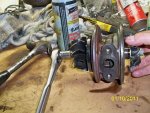
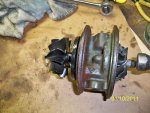
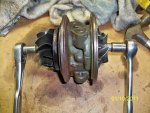
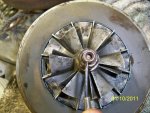
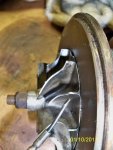
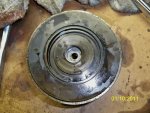
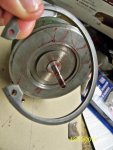
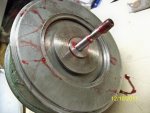
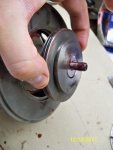
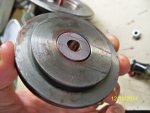
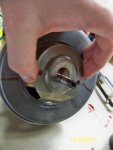
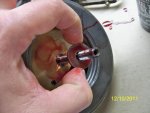
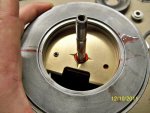
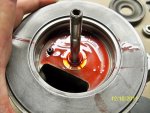
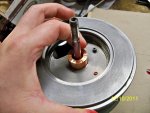
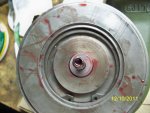
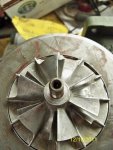
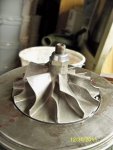
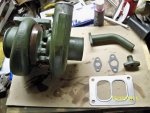
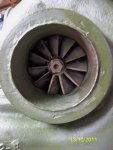
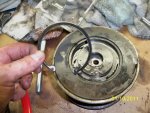
When breaking the turbo down, take your time and be careful! Here are some pics of the whistler for this project.
This is a work in progress....stay tuned.

Why rebuild a turbo?
New 3LJ-319........$650-$1200
Rebuilt by someone else.......$400-$800
Rebuilt by myself.............$235 total (including the turbo itself) and more importantly one experience point under my belt;-)

FYI Turbo Designations:

Schwitzer 4LE-354 FOR LDS-465-1A
Schwitzer 3LD-305 (old type) & 3LJ-319 (whistler) "C" FOR LDT465's
Schwitzer 3LM-319 (non-whistler) "D" Turbo LDT-465's
Schwitzer 4-456 FOR LDS-465-1
Schwitzer 4LE-456 FOR LDS-465-2
Schwitzer 4D-454C FOR LDS-427-2
Schwitzer 4D-554 FOR MACK ENDT-673

How do you know you have a Whistler Turbo for this rebuild?
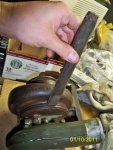
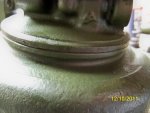
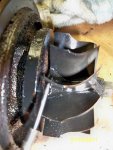
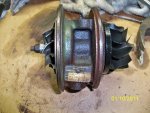
Simply look at pic #1 and pic #4 to compare it to yours. The clam shell exhaust housing is a dead give way of the Whistler.
Also the dataplate will have the following information:
Schwitzer
P/N: 11668459
MOD: 3LJ-319


DISCLAIMER:
OK guys, in this write up I try and provide as many pics as possible. I am not a turbo tech and do not claim to be. I hold a Doctorate in Pharmacy (PharmD) not in turbo technology. I do not know the technical terms of the parts so just bear with me;-). I did some research and hope to pass along some information on what I've learned. That's what we're all about right?
 

Attachments

Last edited:
wsucougarx

Well-known member
6,951
67
48
Location
Washington State
Breaking the turbo down
For me the toughest part of this process was finding the space for this project. Seems my garage is getting smaller and smaller as this hobby continues to blossom. The first order of business is removing the oil fittings, separating the exhaust and compressor halves, and removing the internals.
Pics:
1) Remove all the oil fittings
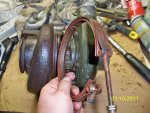
2) Remove the ring that holds the two halves together.
At this you'll want to mark the two housings to ensure you assemble it back together the same way
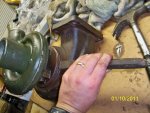
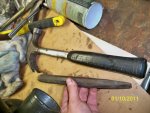
3) I used this heavy duty chisel and hammer to break the two halves from each other. Be careful and do light taps all around the joint. Once done flip the turbo on it's side
4) Once on it's side I got a little more aggressive with my strikes to separate the halves. You lessen the chance of wheel damage when it's on it's side should the exhaust side drop
5) Gently pull the two halves apart
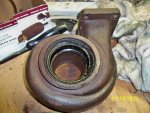
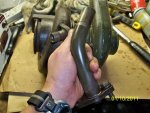
6) Exhaust housing
7) Exhaust wheel with noticeable oil
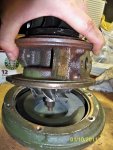
8) Now place the assy in the upright to remove the compressor housing
9) Removing the compressor housing retaining tabs. There is a total of 3 tabs and 6 bolts for this part.
8)
 

Attachments

Last edited:
wsucougarx

Well-known member
6,951
67
48
Location
Washington State
Tear down Part II

pics:
1) Separating the mid section from the compressor housing
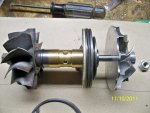
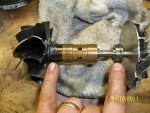
2) Middle housing showing the two different wheels
3) Pay particular attention to the wheel to see if it is rubbing against the housing. This wheel is good to go
4) Checking the compressor wheel, no rubbing found
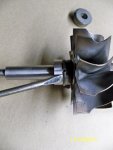
5) To keep things in balance I placed a light score mark on shaft end to correspond with the wheel. This way I can assemble the wheel in the same place it. Thus keeping the balance
6) Getting ready to remove the shaft
7) Once the nut is loosened I gently tapped the shaft with a hammer to "break" the seal out of it's groove. I put the nut on as to not damage the end of the shaft itself. LIGHT TAPS ONLY!!!
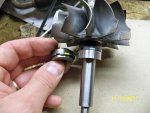
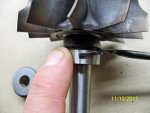
8) While holding the shaft stationary with the socket, I simply removed the compressor wheel by hand
9) The compressor side oil seal in relation to the compressor wheel
10) same as 9 ;-)
 

Attachments

Last edited:
wsucougarx

Well-known member
6,951
67
48
Location
Washington State
Breakdown III

Pics:
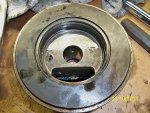
1) Compressor side of the middle housing
2) Need to remove the lockring to get the internals out
3) There's an O-ring that'll need to be replaced. There was absolutely no tension in that o-ring. That rubber was tired
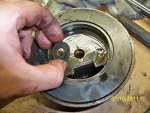
4) Pulling a this plate out
5) Pulling this spacer washer out
6) Pulling this plate thing out
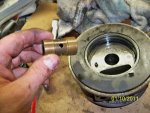
7) Pulling the bearing out
8) The bearing showing the lubrication holes
9) Naked housing, compressor side
10) Pointing to the two oil seals that need to be replaced. It is nothing more than a metal ring that simply snaps out of it's groove...simple enough

Total tear down time: 30 minutes

Now I await the arrival of the rebuild kit (ETA 10OCT11). Details to follow next week. Yes I will then provide my source if the kit is correct. I informed the sales guy to expect a bunch of orders to come in for this kit. He does have two NOS whistlers for $900...too much for me;-)
 

Attachments

Last edited:
wsucougarx

Well-known member
6,951
67
48
Location
Washington State
Now is the time to take all your parts and give them a good cleaning. Pay particular close attention to the wheels. Be careful not to distort the fins in any shape or form. Be sure you're in an area where there is ZERO chance to drop them. I just placed mine on a towel on the work bench. Most of everything just needs to be wiped down with a rag. Don't use any harsh cleaners for this process.
 
Last edited:
wsucougarx

Well-known member
6,951
67
48
Location
Washington State
Arrival of 3LJ-319 Rebuild Kit.....FINALLY! haha

11OCT11
Yesterday I got my OEM Schwitzer Turbo Rebuild kit (SCH318364). I cannot stress enough. Buy the OEM kit if you can. It is made in the USA. There are several Chinese junk kits out there. Everything looks good, everything is a match. This particular kit is a multi-turbo rebuild kit for the 3LD/J, 3LJ, 3LD, 3LDB. Just an FYI, there are a few extra parts you're not going to need. So need to panic when you have that extra bolt or nut upon full assembly...LOL.
As promised, I wanted to verify this was indeed the correct kit and it is, the seller's info is here:
J&H Turbo Service, Inc.
3401 Highway 82 E
Greenville, MS 38703
662-378-8711
www.jhdiesel.com

I paid $135 for the kit plus $16 USP shipping. I opted to buy the kit from J&H because they simply had open comms and outstanding customer service. I contacted about 12 companies and J&H was only 1 of 2 that responded. I went back and forth with emails to verify the turbo and they responded within a couple hours. After purchasing the kit, it was in the mail within a couple hours. I told J&H to have this kit in stock as this thread may increase his orders. He said no problem as he has them in stock and can get more within 3 days time. I've done the leg work for you guys. If you find a kit cheaper somewhere else then go for it. However, I have verified this is indeed an OEM kit and it is an exact match;-)

Pics:
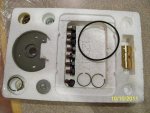
1) Parts kit unboxed
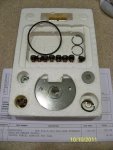
2) Parts kit with invoice to show Schwitzers part number (SCH318364)
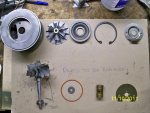
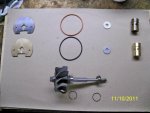
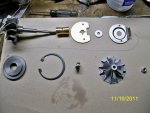
3) Turbo internals layed out for inspection. Note: the parts shown on the bottom half are the parts to be replaced with the kit (old parts)
4) Showing the "old" parts and new replacement parts.

I'm awaiting my Amazon order for my Permatex Assembly Lube so I can get started.
 

Attachments

Last edited:
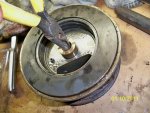
wsucougarx

Well-known member
6,951
67
48
Location
Washington State
Gather your parts and tools. It's time to get this show on the road.

Once you have cleaned all your parts thoroughly and have a clean workspace, it's time to gather all your parts and tools.

Parts you will need:
Rebuild kit
Your thoroughly clean turbo housing
Oil fitting gaskets


Tools you will need:
Small flat head screwdriver
Torque Wrench w/ 9/16" socket
Rachet with 7/16" socket and a 7/16" wrench
Long needle nose pliers

Misc items:
Assembly Lube (I used Permatex)
Rags
Rubbing Alcohol (clean up)
Loctite
 
Last edited:
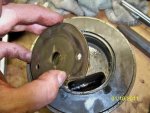
wsucougarx

Well-known member
6,951
67
48
Location
Washington State
Rebuild Process I

12OCT11
Let the REBUILD begin!!! The first thing I did was again wipe everything down once more and blew everything off with air. Keep your exhaust wheel away from the edge of the table!!! I almost dropped her 3 times. One drop and that's it for the rebuild process.
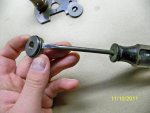
1) Removing the oil seal on the oil slinger. Just use a small flat head screwdriver for this.
2) Removing the oil seal on the shaft
3) To remove the oil seal, lift one end up and hold it in place, then just run your screwdriver down the oil seal groove to displace the seal. Just walk it out the entire 360 degrees
4) Here are new oil seals in place
5) Parts in the order of assembly
6) Parts installed during my "dry run"
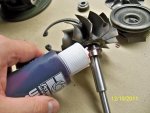
7) I used Permatex Assembly Lube during the install. Make sure you get every part that will have somekind of friction on it during initial start up! (OK to use plain 15/40 oil)
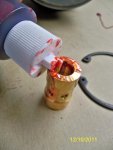
8) Lubed up shaft
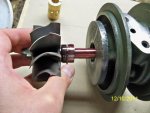
9) Placing the shaft into the middle section through the exhaust side. Push until you hear the oil seal snap into place. Check to make sure your shaft does spin freely.
10) Apply a good amount of lube on the Journal Bearing
 

Attachments

Last edited:
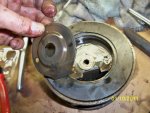
wsucougarx

Well-known member
6,951
67
48
Location
Washington State
Rebuild ii

12OCT11
The toughest part of this rebuild was the documention process...no joke. After each step, I had to wipe my hands so I could take a pic[thumbzup]. Well worth it if it at least helps out one SS. This rebuild process is pretty easy as long as you do your research ahead of time and have the patience.

1) Slide the Journal Bearing into place. Make sure you have the shaft end resting on the table b/c if you push down too hard on the bearing it will unseat the oil seal, causing the shaft to fall
2) Applied too much assy lube...oops
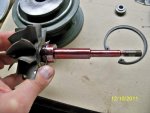
3) Applied the Thrust Bearing. Compass looking markings toward the compressor end.
4) Intalling the Thrust Ring
5) Installing the plate thing. Make sure the angled portion goes toward the inside. I think this plate helps to divert lube to the compressor side of the shaft
6) Apply the new O-ring to this plate AND push the oil slinger into place. It will snap into place. Be sure you orient this part correctly!
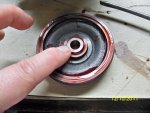
7) Compressor side of the plate with the oil slinger/oil seal in place
8) Install the plate thing
9) You need to push the plate thing into place gently. The O-ring needs to find it's home. Be a bit gentle here.
10) Now install the snap ring. The snap ring is bevelled. You want the bevelled side towards the compressor side of things
 

Attachments

Last edited:
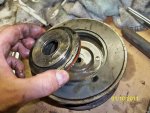
wsucougarx

Well-known member
6,951
67
48
Location
Washington State
Rebuild iii

12/13OCT11
1) Snap ring in place (Be sure to wipe up all the assembly lube off before putting the compressor housing on)
2) Lining up the compressor wheel with the shaft marking made before tear down-VERY IMPORTANT!!!!!!!!! The idea is to keep everything balanced!
3) Installing the new shaft Nut. Put some Loctite on the thread before putting the nut on. Needs to be torqued to 19.2 Nm or 170 inch/lbs(THATS RIGHT INCH/LBS...not ft/lbs)
4) Lining up the middle section with the exhaust housing and install the locking clamp.
5) Next put the compressor housing on and make sure you line it up with the score marks you placed on the housings before you broke it down. Need to keep everything alighed. Then tighten the compressor housing to middle section retaining clips and bolts on. Also a good time to put the top oil fitting on with a NEW gasket.
6) The finished rebuilt turbo, the wheels turn freely and is ready for mounting;-)

In conclusion
This turbo rebuild was actually very simple. Too simple actually compared to what this thing can do. It's really really really important you assemble EVERYTHING the same way as far as lining everything up. This is crucial with the compressor wheel with it's shaft. Turbo's can spin upto 150,000 plus RPMs at full throttle (not sure what the WOT RPM's are one these turbos). If this is out of balance by a small fraction then bad things can happen. Take your time, pay attention to detail, dry install before putting things back together, be sure to lube those high friction areas, and just have fun.
Looking at my exhaust side oil seal, it was shot.
 

Attachments

Last edited:
Vintage iron

Active member
1,123
16
38
Location
Falmouth Ma.
I thought that rebuilding a turbo would be harder than that! Great job with the pictures. You are taking the mystery out of another area of MV mechanics. Thank you
 

poppop

Well-known member
2,316
39
48
Location
Brooklet, Ga
I rebuilt one on a farm tractor and it was not a hard job. The John Deere mechanics are still amazed that ti is holding up
 

wsucougarx

Well-known member
6,951
67
48
Location
Washington State
I thought that rebuilding a turbo would be harder than that! Great job with the pictures. You are taking the mystery out of another area of MV mechanics. Thank you
Thanks guys! I too am looking forward to the rest of this write up. The motivation was spurred by the unknown and lack of greenbacks for a new turbo. I was a bit surprised there aren't many, if any, threads on repairing or rebuilding a turbo. That in itself was a good motivation for me. There were several threads questioning on where to find a rebuild kit...soon those threads just lost air and got lost in the SS archives.
I got online and after 20 min and a couple emails I got the response I was searching for. I confirmed this was a Borg-Warner/Schwitzer OEM rebuilld kit and not Chinese imitation that have flooded the market....at least not for our application that I know of. I'm not holding my breathe yet.
This is truely turning into a learning experience. It's amazing with what the turbo does, there really isn't a whole lot to it. Looks like a pretty simple design however the engineering that goes into one of these is quite involved.
 

rogersn67

New member
84
6
0
Location
Bryn Mawr, Pa
Thank you for the great information, and the great documentation so far. I hope the kit is the right one for your project. I am looking forward to seeing the rest of the rebuild!
 

wsucougarx

Well-known member
6,951
67
48
Location
Washington State
Now Im wondering if the non whistler has the same internals. Just an fyi, the non whistler is designated the 3LM-319 while the whistler is the 3LF-319. Now I need to add the non whistler to the rebuild project list..lol
 

WillWagner

The Person You Were Warned About As A Child
Super Moderator
Steel Soldiers Supporter
8,539
2,758
113
Location
Monrovia, Ca.
Good job! The onl y thing I can see that you might not have done was to mark the housings for orientation of the compressor and turbine housings when you re assemble it.
 
Top