• Steel Soldiers now has a few new forums, read more about it at: New Munitions Forums!

  • Microsoft MSN, Live, Hotmail, Outlook email users may not be receiving emails. We are working to resolve this issue. Please add support@steelsoldiers.com to your trusted contacts.

Using my SEE for real work

lurkMcGurk

Member
55
17
8
Location
Bangor,Maine
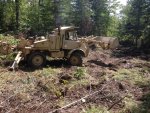
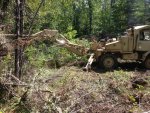
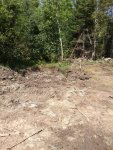
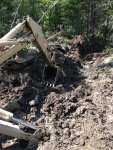
I cant speak for the customer service FLUfarm but everything is still running well on this end. Well I say everything but I mean as far as the Blue Devil is concerned. I got out to the area I flattened out a few days ago and had some 2-3 inch stone dropped off. I could not get it leveled enough before getting the stone delivered. I tried backdragging before the stone got dropped off with the mog. Backdragging was a bear and to be fair I had a ton of rock and stumpage and very little dirt to work with. Anyhow here is kind of a before without a clear view of the area behind Mog1.
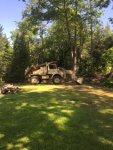
rocks.JPG
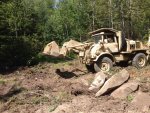
and here is kind of an after shot after 35 cu yard finished rocks finished.JPG


So the good news is I had it all flattened and the rocks moved across the area in short order. Kind of a juggling act to hit the pile and curl the bucket before the momentum wanted to choke out the engine but I figured it out in short order. All the while remembering the cartoon about not using the front as a bulldozer!

This area will be for some log milling and such and wont turn to mud as it should drain nicely.

All was going well and I was using the 4x4 switch (and making gentle K turns in rev and fwd) and then when I was about done I switched back to 2wd and to do some back dragging and then had some difficulty getting the switch to go back to 4x4. I replaced this switch as it was delivered broken and can only figure I'm probably kicking things loose inside the air lines and gumming up the works. I (like so many before me) will be diving into this in the near future. I drove over to my parking spot and shut everything down and noted this
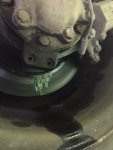
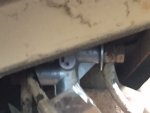
leak.JPG from the passenger side rear. I saw this the other day and have checked the brake fluid 4x since and still full. I looked in the sight hole and even added more gear oil but it was already full or only needed a few oz because the excess weeped out the sight hole. It could be brakes or gear I'm not sure. I'm wondering if because (like an idiot) I left the P brake on while repositioning the backhoe the other day I caused some leakage, dunno. Mysteries abound. Most importantly on a flat level surface I was able to engage 4x4 again but after some jostling around and NO diff Lock. I suspect the air system and possible a slow leak in the brakes.

Mog 2 (Lord Voldemort) needed a 4x4 switch as well and one of the three holes the banjo fittings connect to looked crusty in there. I'm anticipating air line work will be needed here also . It has built pressure once and I do need to change the air release valves on the tanks and possibly a "solenoid? not sure if thats the parts name" for the front hydraulics that may have been leaky in the past. LV came with "significant blow by" from Gov Planet but I presume that was from the Texarkana custom exhaust crimping service down there. Opened it up and the smoke has cleared. found the paperwork and L.Voledemort had a new engine put in just before "Mission Putaway" in 2009. IDK what that means other than new engine,,,and I like that.

So i'm going to check out this infamous "low spot" in the air lines and see if it was ever replaced or if its clogged. Then I'll do some upstream downstream checks to maybe isolate the problem.
also need to take the wheel off some time and see where the leak is coming from on Mog1. This will happen with Mog 1 as soon as Ive addressed the issues with Mog 2 / LV. Those issues are a new 4x4 switch "meritor wabco ebay $175" possible a solenoid on the front hydraulics that looks leaky and all the pressure relief valves on the tanks that leak like a sieve. Still not regretting the route I took and have to believe with a Kubota at less than half the HP and more than twice the price id still be moving those rocks.

All in all I will be prioritizing keeping atleast one running at all times. I really like using this Mog to get real work done and I'm kind of thinking it wants to work as well. Keep you all posted and feel free to send me any info tips or thoughts as you like. Im cruising the threads here as a member and benzworld as a ghost but realize I miss some stuff as it gets posted.
 

Attachments

Last edited:

The FLU farm

Well-known member
Steel Soldiers Supporter
3,342
1,328
113
Location
The actual midwest, NM.
I don't regret buying a SEE either, which I got because of the backhoe. But on the other hand, I wouldn't want to give up the Kubota. Different animals, I think, and good at different things. And for someone who like challenges, the SEE is ideal.

It sucks that you ended up with a leak, and if it's from the gear reduction, keep in mind that there's very little oil to start with in there. Maybe a dose of Blue Devil would fix it?

Keep us posted, please. I'm probably not the only one who likes to see work done by FLUs...and hear about other owners' mechanical battles with theirs.
 

tennmogger

Well-known member
Steel Soldiers Supporter
1,579
543
113
Location
Greenback, TN
Maybe I say this too much, but concerning that beginning of a leak, just ignore it and it may go away. Seriously, these trucks, and other Unimogs often sit around a lot. It is common for a seal to start leaking when the truck is used again. As FLUfarm noted, just keep the hub topped up if it needs it, and let the lubricant work it's magic. Most modern lubricants, especially the synthetics, have components to treat seals to keep they sealing. That seal is most certainly not worn out.

When you check the hub level, you might find extra lube in the hub. If it's over-full, drain it back to normal and check your differential. If it is over-full, then the transmission lube is leaking down. No real problem because the hub gets over-full, not starved, but if you drive on the road a lot consider that transmission lube is not spec'ed for hypoid gears (differential). Trans lube is not an EP lube, ie, GL5. As more lube leaks down the diff lube gets diluted. If your work is local and no long road trips, I would not worry about it. BTW, some transmission lubes have a GL-5 rating and support the diff, too.

But then you might just have a hub leak :)

Bob
 

peakbagger

Well-known member
734
360
63
Location
northern nh
My research on portal axle leaks boils down to there is no problem with a slow leak as long as you keep the hub filled. The hub doesn't hold much gear lube and its real important that you have enough in there. I haven't heard of leaks of diff fluid into the portal hubs. I have heard of the portal hubs losing oil via the portal breather tubes. It seems to be an issue with vehicles that are run at speed on the highway. Vons Mogs and EI have solutions to this potential issue which separate the oil from the breather tube and allow it to flow back into the hub. For a typical SEE application I don't envision a lot of high speed road driving. Many folks who do highway speeds get an IR gun and shoot the hubs to read the temps on trips.
 

lurkMcGurk

Member
55
17
8
Location
Bangor,Maine
Thank you gents for the info I appreciate it. Tenmogger I did see some posts about the wait and see self sealing over on benzworld. I believe Scott from Expedition Imports was talking about seals that have little current use leaking and folks were chiming in about the synthetic seal restoration angle. Sounded like a good route for MOG1 the time being. I did have a chuckle as after FluFarm mentioned maybe using the Blue Devil I actually then checked it out and the tech suggested the oil additive if it were the gear oil and not brake fluid. I will probably do the wait and see for a while and keep checking hub/brakes level as the tech said expect a full seal restoration in a hundred miles. I'm on under six acres mostly wooded and i'm making the only trail there is, 100 miles is a lot of fwd and reverse:grin: If I do use the Azul Diablo Oil additive, and it works as well as the hydraulic stop leak, I will expect either corporate sponsorship or possibly a cheerleader outfit as clearly I'll be biased in their favor from there on out.

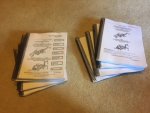
I went to Staples again and (begrudgingly) dropped 150 on two more of the exploded diagram repair manuals. Mostly for the air system and also the rear diff and hubs but they will be of more use I'm sure. Specifically I wanted to get a handle on any seals that may swell in the rear hubs if I did add the Blue devil. I can live with topping off and checking levels but don't want to kick myself in the *** for making more trouble than I had to start with. I have to double check but I feel somewhat confident none of the rubber in there would cause any blockages or flow restrictions except for the actual seal that's leaking. Still I'm going to wait a while and do more research.


Peakbagger I do know my hi/low gears air pressure switch/collar (I'm making up names here) works but I will probably never use it or not much past the 40 mph mark if I were to. I saw those rather expensive breather tubes or oil retaining tubes on E.I., I presume to run the fast axles and I'm not thinking a FLU419 needs to go that route. But if someone has 'd love to see it. Also I have been putting together a winterize plan for at least one Mog as snow duty will be upon us soon enough. More on that later.

MOG2 LV report-- spent much of last week looking for a crush washer for the air 4x4,diff lock switch. Used the manual numbers and MB numbers and didn't get very far. Also puzzled some local Autozone employees :shock:and a Tractor Trailer Place, gave up in the short term but changed my switch today and used an oversized washer. Like many things I like it looks stupid but works
4x4 switch.JPG
If you go to do this I did it by taking off the spare,,,,,,actually beating the ever loving crap out of a seized nut and liquid wrenching it to death, then take off the spare. At this point you probably already did but incase your amazing put the backhoe out straight as you'll need the space to take off and replace the switch. Take and save the black knob switch and next find a ratchet to fit the large nut holding it in place. Push the switch down and go from under the drivers door and push the switch back towards where the spare was. Take off the banjo fittings and special air screws and save ALL your crush washers also label the hoses so you can reconnect correctly to new switch, I also tied string to them so they didn't escape back under the cab. Do it all in reverse and your good. Side note WEAR KNEEPADS, there are NO good surfaces to kneel on in that area and watch the pipe that will be directly above your head as you do this operation I went to straighten my legs after being crimped up like that for a few minutes stood part way up and got a good reminder to be aware of my surroundings. Thankfully a self correcting problem.

MOG 2 also had a throttle linkage return spring I improvised and a new pressure release valve on the main air reservoir.

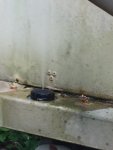
With that in mind I cleaned out (think vacuum and large pipe cleaners) MOG 2's denatured alcohol container as there was some dirtiness and then filled it. I started LV up and built pressure like a boss!!! Runs strong and I'm cycling some algaecide and clean diesel through the cleaned tanks as there was no gas cap upon delivery. One weird thing I witnessed was the alcohol reservoir doing an Old Faithful
geyser.JPG could be great for pyrotechnics but I'm at a loss here. I need to do some research. Although I did note air pressure like this from the cap on Mog1 before and also puttering air loss from the bottom of the fluid regulating valve. Not exactly sure what is normal and what is not I'll look next chance I get but wanted to share some progress. Super Jazzed about both machines and counting my lucky stars the Texarkana Iron Gods spared me some real issues so far. Thanks again Cheers 8

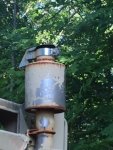
edit -my exhaust pic for no other reason than its less smokey
 

Attachments

Last edited:

The FLU farm

Well-known member
Steel Soldiers Supporter
3,342
1,328
113
Location
The actual midwest, NM.
I will probably do the wait and see for a while and keep checking hub/brakes level as the tech said expect a full seal restoration in a hundred miles. I'm on under six acres mostly wooded and i'm making the only trail there is, 100 miles is a lot of fwd and reverse:grin:
I can relate. Today I was surprised to notice that the FLU 10344 has 110 miles on it. That's 20 more than when I bought it almost two years ago, and I've even driven that one to the post office once.
I may not live long enough to get 100 miles on it...especially if going in Reverse takes away from the total instead of adding to it.

Your Old Faithful imitation cracked me up, but at least that "leak" can be fixed by closing the valve.

Oh, and you should make a Bel-Metric order and stock up on the correct copper washers.
 
Last edited:

lurkMcGurk

Member
55
17
8
Location
Bangor,Maine
These are the ones I just did
just made.JPG
these are the ones I made before with new ones
All manuals.JPG
some info is redundant but worth its weight when I need to see the pics clearly or slap a sticky note somewhere. I think they cant bind as many pages at my local Staples so they did around two hundred pages and charged me for extra spirals. Hugely helpful that those monthly cartoons Peakbagger put up in a volume format dated 09-24-2014. Pictures, cartoons and exploded diagrams oh boy!:D:p
 

peakbagger

Well-known member
734
360
63
Location
northern nh
At one point I started printing those manuals and then realized that its tough to find anything quickly so I inevitably just load them up on my laptop and use the PDF search function (Ctrl F) to find what I need and then print out the specific pages.

Glad you found the cartoons helpful. A lot of repetition but I figure if they repeat it a couple of times over the years it must be something that happens frequently. There is one missing cartoon regarding the cross body air line from the air pressure regulator to the air tank manifold, it rots out from the inside and the military recommends upgrading it to Stainless (I used copper nickel tubing as its a lot easier to bend).

I missed Ahab s questions. Several of the manuals are 900 to 1000 pages, some are around 400 and a couple are 200.
 
Last edited:

alpine44

Member
403
17
18
Location
Asheville, NC - Elkton, MD
I do know my hi/low gears air pressure switch/collar (I'm making up names here) works but I will probably never use it or not much past the 40 mph mark if I were to.
I find the pneumatically actuated intermediate reduction very useful for shifting down on a hill in a hurry. Start out in the high position and whatever gear is suitable. After releasing the clutch, slide the collar down and the next push of the clutch pedal will downshift automatically and a whole lot more reliable than doing it manually with the big 4-speed stick. (My gearbox requires pretty much double clutching if I cannot wait for the wimpy synchro rings to do their job.)
 
Last edited:

lurkMcGurk

Member
55
17
8
Location
Bangor,Maine
The High/Low shifter as a downshift eh? I would not have thought about that, good idea.

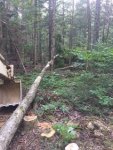
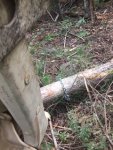
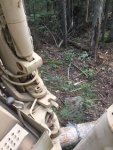
In keeping with this threads original "using my SEE for real work" I got to reverse down my trail today in search of a log. Not just any old log but a log I will use for posts and also the first log of any value or use besides firewood that needs to come down for the path. I replaced the hoses in and out of the hydraulic chainsaw (they were leaking)and headed down to the end. I will be tightening the chain but all in all just wanted to show it works. Don't get tooooo OSHA about the one handed awesomeness.

View attachment move and cut.MOV

wanted to show that I had to drag the tree back a bit to get to where I wanted the cut with the hose length , then I chained it up to the pintle after tilting the boom a bit to lift it up.
log 2.JPGIMG_0792.JPGIMG_0793.JPG and took a slow drive over to the saw spot. So imagine this 50 times over and I'm good. Hoping as a benefit the additional logs will be bigger and help smooth out the path a bit.

NOW I digress.

As a side note I spent more time with MOG2 aka Lord Voldemort. I had some trouble getting the rear switches for engine HI rev and the loader switch to engage. It worked the other day but only after some tinkering. I rode up and down in the driveway after checking the fluids and after parking and having reached 100psi the rev switch came on, after a 2 or 3 second delay. Loader switch worked fine after this. Odd that there is a delay but even odder I spent some time under the hood (all fuses good) I worked some denatured alcohol on the engine hour meter that was painted over. this is what I found.
mileage.JPG
Now its either 11K hours or 1K hours if I'm reading correctly (reds are hours not tenths) not sure if there are two 1's or an 01000 and its just the way the mechanical dial turns. I have the paperwork that denotes a new engine going into this Mog at Fort Stewart in 2009 before a mission putaway. Also a slew of hoses and other pieces. I have been checking all fluids ,gauges and oil and steering and everything else as I am going through it. I did note all the fresh hoses, belts mounts etc in the engine compartment and the newer appearing valve cover under the doghouse.

I'd like an opinion here if this is just a new engine for this SEE or if MOG2 got a reconditioned engine with an unchanged hour meter. Is there a way to tell? If it helps the swap happened at 1800ish miles and there are 1850ish miles on the ODO now.
 

Attachments

The FLU farm

Well-known member
Steel Soldiers Supporter
3,342
1,328
113
Location
The actual midwest, NM.
Yeah, the high idle switch requires (high enough) air pressure to function, but that shouldn't affect the loader switch. Odd indeed.

Even 1,000 hours sounds unusually high, let alone 11,000. Maybe someone forgot to turn the engine off on a Friday evening, before a very long weekend?
 

peakbagger

Well-known member
734
360
63
Location
northern nh
I had a fairly major project planned for the last couple of weeks to put a drainage ditch in on a logging road on my wood lot. The entire lot has quite steep slopes and at one point a main haul road was put in. It is quite steep. The original builder had dug a ditch through a part of the slope and just piled the spoils on the downslope side. The soil is mostly broken granite rocks and boulders with whatever mineral soils will fit between the voids. The mineral soil is definitely glacial and that means its very similar to clay. The ground water tends to follow the top of this soil so there is lot of groundwater on the slope which keeps this trench wet as they intercepted the ground water so I had to wait until the woods dried out to start the attempt. I had a bit of cleanup around the house with the SEE first so the prior weekend was what I hoped would be SEE weekend. I got a late start the first day but it was all loader work and ran fine. On the second day I got the SEE running and in place for its first task which involved the loader. I go to raise the bucket and the loader doesn't lift and the bucket doesn't curl. That's odd, I get out of the cab and am greeting by spraying antifreeze. It was dousing the belt that drives the hydraulic pump so it was slipping. I park the SEE and let things cool down. It was one of the few heater hoses that are not silicone rubber. There is no local sources so I give up for the day and get a length on order.

So this weekend rolls around and swap out the hose. I wasn't sure where it was leaking but find a worn out section where the hose had been rubbing on an accessory belt. I made sure to route the hose away from the belts. I have a slow leak on one of my tires so I get spend 15 minutes running the engine so I can use the compressor to inflate my tire. I then head over to the wood lot. I get lined up on the road, put it in low first, lock the hubs and figure I will drive right up the road. There is drainage ditch at the base with rocks in the bottom and as soon as I get the backtires in the ditch, all forward progress stops. The SEE is effectively on about 40 degree slope. It claws away for bit and mostly walks sidewards rotating sideways in what is a fairly tight path. First time I have seen the little ball in the pitch indicator all the way to the end of travel. I gently back down the slope and check out whats going on. Its obvious is that I have several slick boulders that the tires cant climb. I try a few more attempts and decide its time for some physics. When the SEE is nose up a lot of the backhoe weight is actually behind the rear wheels, that means the front wheels dont have lot of weight on them and thus less traction. So I decide to back up the slope. Initially it is working but soon its starting to slip but I have made it farther up the slope. I still have backward progress and and just about over the worst part and then the engine stalls. That's odd, I go to restart it and it wont start. Takes me a few tries to realize the hand throttle is in the right position but its not attached to anything. I pull the engine cover and I can manually stroke the linkage on the left side of the engine. Unfortunately this linkage is immediately adjacent to very hot exhaust manifold. I have an brush ax with a wooden handle so I use the handle to stroke the linkage open and the SEE starts right up. I then get to drive it home using a poorly fitting ax handle to run the throttle and shift by prying it in place. Not great ergonomics. It was very hot and humid day and I had warmed up the engine quite well prior to this so the drive home in second was decidedly hot. Somewhere along the way I discovered that the throttle would work as long as I kept the ax handle in place to keep the engine from stalling. I got home and parked it my driveway and took the rest of the afternoon off. I didn't do any major diagnosis but did see the hand throttle linkage flapping in the breeze.

So much for getting a lot of work done. I guess my next move it to consider skidder chains.
 
Last edited:

The FLU farm

Well-known member
Steel Soldiers Supporter
3,342
1,328
113
Location
The actual midwest, NM.
That sounds like a memorable couple of days, peakbagger.
My first thought when reading about the ditch crossing was "Ah, he needs better tires." Then I thought about using the backhoe to push the SEE up and over the ditch.
Finally, and based on experience, I thought "I'd fill in that portion of the ditch for the time being."
Ironically, on today's list is to use the HMMH to move a cattle guard over to a ditch crossing where I currently use short ramps - which are rickety, and always spaced wrong for the vehicle I'm in. My ditch can't be filled in as it's an irrigation ditch, but in your case it might work.
Also on today's list is to fill in a few hundred feet of a small ditch, so the land next to it can be "sculpted" more efficiently. Somewhat similar to your job.

So, should we both go ahead and perform our respective chores, or ditch these projects? Me filling it in is kind of a last ditch effort, and it will have to be dug up again once the dirt is leveled correctly. Oh well, it'll keep the FLUs busy.
 

The FLU farm

Well-known member
Steel Soldiers Supporter
3,342
1,328
113
Location
The actual midwest, NM.
Did get the ditch filled in and cattle guard moved as planned. To get the fluids warmed up, the HMMH was first used for something FLUs are undeniably good at; compaction.
DSCN0780[1].jpgDSCN0783[1].jpg For something like this, even the factory Michelins work well.
DSCN0786[1].jpg Mission accomplished.
 

lurkMcGurk

Member
55
17
8
Location
Bangor,Maine
So I got the area clear and started piling the poplar and wind throw wood that was laying around into two separate piles on the border of where I thought the edges would be. I worked back from one side and tried to place rock on the border and then excavate a gradual slope. The dirt was mostly clay (blue clay) which is good for water holding in a pond, sand would have been bad and thankfully I may escape the dreaded 3k for a piece of EPDM rubber!! (spent part of that on new Pirelli Pistas P22's)

As I was digging I moved some pretty big boulders and put the fresh scratches on the bucket prying a few loose.


IMG_0207.jpgIMG_0208.jpgIMG_0209.jpg

IMG_0225.jpgIMG_0224.jpgIMG_0222.jpg

the dirt I was shoveling out with the backhoe made some big piles, As I went to use the loader on these piles I was also compacting the bottom of the piles and ultimately made the far side of the pond higher than the side I left natural. It was a pain maneuvering but I had to keep the whole project to a minimum space per what the State allows homeowners to do anywhere it could be considered wetland. Many K turns, much shifting. Many half bucket fills, oh well. when I neared the end I found it easier, and a bit longer time to just reposition the backhoe and move the pile twice via hoe. Made some sweet HugulKultur beds and hope to do some apple trees on the piles. Also ran the jackhammer down into the pond to work on a boulder, Jack hammer did what it does but that rock, much like a Honey Badger didn't give a ****.

So I spent a few days working at it and have two sizeable boulders in there that may or may not get dealt with at a later date but I am pleased with my first effort and after a some on and off again rain it looks to be working pretty good. Going to straighten some things out still and hopefully it levels a bit higher but for the effort again I'm pleased.

IMG_0272[1].jpgIMG_0268[1].jpgIMG_0267[1].jpgIMG_0266[1].jpgand one of DogIMG_0270[1].jpg

I can still do some tinkering on the sides and depending where its at after the thaw next year I'll revisit this project, this Summer is winding down faster than I want it to. Might have to do some French drains but we shall SEE.

So a couple days, another blown Michelin, and now a slight leak in the boot of the clutch plus some diesel and I'd say it was worth it. Cheers
 

The FLU farm

Well-known member
Steel Soldiers Supporter
3,342
1,328
113
Location
The actual midwest, NM.
As I was digging I moved some pretty big boulders and put the fresh scratches on the bucket prying a few loose.
Hey, great job! And it looks like you might've had fun doing it.
Ask General Hood about the best remedy for the scratches, and which type of wax he favors these days.
I would think that you'll need some sort of drain pipe(s) for overflow...or you can go in a fix any damage with the SEE, having more fun.
When did you borrow our dog, by the way?
 

lurkMcGurk

Member
55
17
8
Location
Bangor,Maine
peakbagger, did you repair the throttle linkage or is the axe handle a better alternative??? I ask that as owning a machine like this makes me open to both the wonders of German engineering, and the possibility that there are mechanical solutions I have never considered before, to problems I never thought I'd have:eek:

Flufarm Also if the dog is borrowed I am willing to send her back but she cant ride in a car as she is clearly broken in some way, the path and pond made her world twice as big as it was!
 
Last edited:
Top