bigbe5678
Active member
- 308
- 27
- 28
- Location
- Pearl River NY
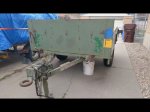
Hi That is a great looking trailer good luck with it. I like the two safety sticker in the rear do you know where I van get a couple
Steel Soldiers now has a few new forums, read more about it at: New Munitions Forums!

Thank you!Hi That is a great looking trailer good luck with it. I like the two safety sticker in the rear do you know where I van get a couple
Thanks to you Gimp!Looks real nice, glad your happy with your purchase. It looks like someone tweaked your rear landing leg mount pretty good!
I did have a little difficulty with the right-rear gate getting it onto that side rail so I could pin it. I found it a little easier if the gate was partially open when I applied liberal use of the rubber mallet. Once the pins were on, it was very stiff and removed paint and some metal when it opened/closed. I worked it back and forth and it got a little easier. If I had to guess, the right rear gate had a different manufacturer (or was an older model) as its bolts and heads were different than the rest of the racks, such as it was flat head instead of phillips.Zane, did you have to spread the flanges on the end gates at all to get them to fit? Mine are a bit tight, and will require some fitting to get them to work...
In any case, they look good and I look forward to getting them all installed.
Hi Zane,Thank you!
I know you can find those reflective stickers on eBay. They are 8" x 8" (16" x 16" are also available, but were generally used on the larger 6x6 trucks). I bought 4 of the 8" x 8" stickers for my Pioneer Tool Trailer project. See here (post #4.
Search eBay for "military delineator sign" and include searching descriptions. Or see seller "oti151surplusstore2010". They shipped from Italy, but arrived safe and sound.
Thanks to you Gimp!
Also, I'm with Mr. McGuyver, and need to figure out how to straighten that part of the frame - eventually.
I did have a little difficulty with the right-rear gate getting it onto that side rail so I could pin it. I found it a little easier if the gate was partially open when I applied liberal use of the rubber mallet. Once the pins were on, it was very stiff and removed paint and some metal when it opened/closed. I worked it back and forth and it got a little easier. If I had to guess, the right rear gate had a different manufacturer (or was an older model) as its bolts and heads were different than the rest of the racks, such as it was flat head instead of phillips.
That's an answer I'd be interested in as well.By the way, does anyone know if any of the other trailers such as the M105 or M1101 (?) Use the same surge unit as the M101A2/A3? Just trying to determine if I can widen my search options...
no, M105 is hydraulic over air. The m1101 uses a different surge unit. Only other one is the chassis m116 series flatbeds.By the way, does anyone know if any of the other trailers such as the M105 or M1101 (?) Use the same surge unit as the M101A2/A3? Just trying to determine if I can widen my search options...
Sent from my SM-G920V using Tapatalk
The 105a3 has surge brakes.no, M105 is hydraulic over air. The m1101 uses a different surge unit. Only other one is the chassis m116 series flatbeds.
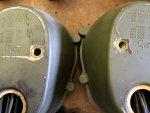
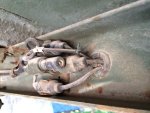
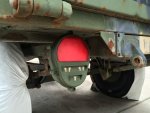
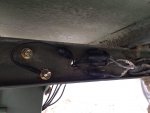
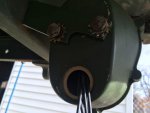
I mounted mine up-side-down so the light wasn't tucked up under the trailer too much. I'd rather be seen than run into. Just an option since you've only done one so far.I'm in the process of making sure the trailer can be towed by MV or civilian truck alike which means the 10-30V LED lights.
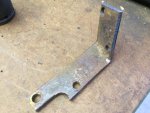
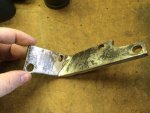
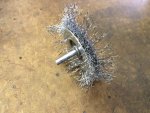
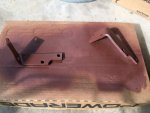
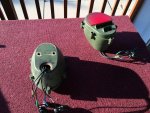
I used a can of expanding spray foam to fill the void.I'm in the process of making sure the trailer can be towed by MV or civilian truck alike which means the 10-30V LED lights (which I bought last year from a nice fellow on one of the MV Facebook groups). I've removed the tail lights and their brackets, bent the brackets straight, used a wire-wheel to remove the rust and old paint, and primed and repainted. I've only completed the one tail light so far. The LED lights have a 5th wire that the standard taillights did not, which is a ground wire. I decided the taillight bracket mounting bolt would be a good location for the ground. Now that I think about it, the star washers used to mount the light aren't necessary for grounding as it was for the standard incandescent housings. I did put anti-seize on the taillight bucket bolts.
View attachment 717637 View attachment 717636
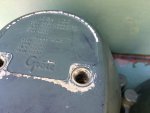
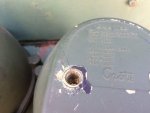
I do have some concerns about the large hole in the back of the LED buckets being an excellent home for wasps. I may have to glue a piece of rubber to the inside/outside to block their access...
View attachment 717638
We only get Yellow Jackets here, thank goodness. That doesn't make me like them any less, but faaaar less aggressive than the red wasps you and red has often described to me.I used a can of expanding spray foam to fill the void.
Trimmed flush with housing after drying and then a black silicone coating on foam surface to keep out moisture.
Worked perfect and looks Factory.
Your LEDs are sealed from behind so no issues.
No more wasps.
Yellow Jackets aren’t even remotely as evil in Oklahoma as the Red Wasps.
The Red Wasps will launch and attack without provocation.
Walking by a nest 15 feet away and the suckers will come after you.
The hotter it is, the more aggressive they are.
They will also chase you for quite some distance.
They are pure evil.
You have to intentionally, physically mess with a Yellow Jacket nest for them to attack you.
Around here anyway.
Well that's an interesting idea I hadn't thought of. You're right, the actual taillight is tucked up under the cargo body of the trailer, though I would think it'd have to be an awfully tall vehicle or be driving far, far too close already to not see the taillight.I mounted mine up-side-down so the light wasn't tucked up under the trailer too much. I'd rather be seen than run into. Just an option since you've only done one so far.

