• Steel Soldiers now has a few new forums, read more about it at: New Munitions Forums!

  • Microsoft MSN, Live, Hotmail, Outlook email users may not be receiving emails. We are working to resolve this issue. Please add support@steelsoldiers.com to your trusted contacts.

Valence's M66 Gun Ring

Valence

Well-known member
Steel Soldiers Supporter
2,112
555
113
Location
Davis County, UT
I'm not te fastest with this project but I've also included restoring my hard top as part of this. Basically, I don't want to have to take the gun ring off again ;)

I've been working on the section of the hard top with the sliding rear window. Like most folks, my rear sliding window is in pretty sorry shape, but I think it could still be worse. I had to cut off all the exterior screws holding the water channel on (above and and outside from the sliding window. (sorry, no pics!)

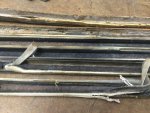
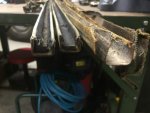
After that water channel was out I was able to unscrew the little #6 screws on the inside that held the windows in place and remove all the window channels. The bottom runs were decimated, but the top ones not so terrible for 44 years (they had less water to deal with I'm sure).
2016-05-10 20.42.40.jpg 2016-05-10 20.42.58.jpg 2016-05-10 20.43.10.jpg

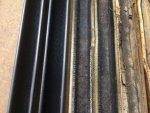
FYI, the side door window channel is not the same as the rear sliding glass channels. New side door window channel is seen on the left. Note, it is felt lined on all 3 sides while the sliding window uses a felt bottom with pile sides.
2016-05-10 20.46.25.jpg2016-05-10 20.46.46.jpg

I began a multi-day hunt trying to find an exact match - I had difficulty in even knowing the right words to search for ("Window Channel & Felt Run" or "pile & felt window channel"). To the best of my measuring capabilities, the stock deuce rear window channel is 3/4" wide, but I absolutely could not find channels that wide. So I gambled and ordered 5/8".

The dimensions of my window channels:
  • Top and bottom (4 total)
    • 29-3/4" long x 3/4" wide x 1/2" tall
  • Sides (2 total)
    • ~12-3/8" long x 3/4" wide x 1/2" tall
The sliding windows measured about 3/8" thick.

The best match I found was a product designated across multiple vendors as "8A1":
61koh5WZ2tL.gif

The cheapest I found:
http://www.cpidivisions.com/product/unbeaded-glass-channel-96-9/
(CPI was awesome enough to call me and tell me it was back ordered and it'd probably be 2 weeks before it arrived)

So I actually ordered two 72" strips from here (Yay for natural 2-day shipping from Southern California to Utah):
http://www.jjautofabrics.com/8a1-unbeaded-window-channel-72/
(Note: JJ Auto Fabrics told me they did have 96" channels but due to shipping charges they would have been cut in half.)

Ordering 2 of the 72" strips leaves me with exactly zero to spare, and might make the sides 12-1/4" long when accounting for the cut (unless I can just use tin snips). No mistakes now!
(29.75 + 29.75 + 12.375 = 71-7/8")

----------
Update: 05/17/2016

See post #52 below for pictures of a test fit with the windows.
 
Last edited:

Valence

Well-known member
Steel Soldiers Supporter
2,112
555
113
Location
Davis County, UT
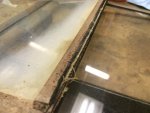
The rear sliding glass windows kind of look like they just need to be replaced. But I think for the time being all I'm going to do is carefully sand and paint the frame. With my cargo cover on (almost always) I can't see out of the window anyway, and it's just used for air flow and temperature control.
2016-05-10 21.09.31.jpg

The pile window sweep between the two glass panes appears to be held in a sort of 'z' bend. I doubt it would go very well trying to replace that.
2016-05-10 21.09.23.jpg 2016-05-10 21.08.54.jpg

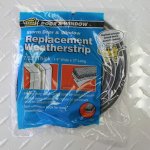
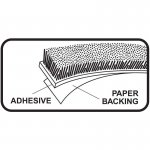
I think after a careful sand and repaint I'll just put some adhesive backed pile weatherstripping on the flat part next to the original sweep:
http://www.amazon.com/M-D-Building-Products-04267-Weather-strip/dp/B000CSK5N2
71PhT7FORnL._SL1200_.jpg 71r96ZtVE8L._SL1200_.jpg 71KiU-owgPL._SL1344_.jpg
 
Last edited:

Valence

Well-known member
Steel Soldiers Supporter
2,112
555
113
Location
Davis County, UT
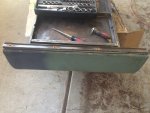
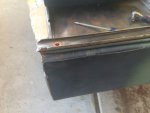
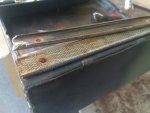
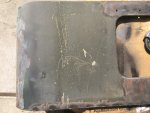
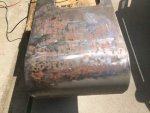
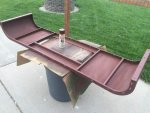
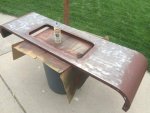
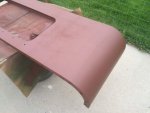
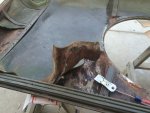
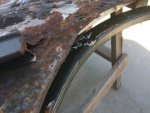
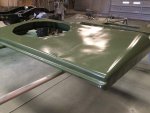
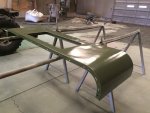
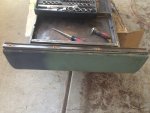
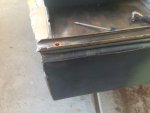
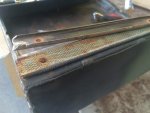
And here are some pictures of the very tedious sanding, wire wheeling, and initial painting of the lower hard top section:

FYI: this wire wheel for a grinder is awesome, and a dirt cheap price too ($8.19 at the time of this writing)
http://www.amazon.com/gp/product/B00004RHAO/

Interestingly enough, on the driver's side where the door glass weatherstripping attaches to the hard top back, there was a canvas webbing isolator there. It appears to be identical to the webbing/isolator used on the fuel tank (thanks to a fellow on Facebook for pointing that out for me). I think I'd like to put a new one on both sides.
2016-05-13 19.50.57.jpg 2016-05-13 19.51.03.jpg 2016-05-13 19.51.16.jpg

More:
2016-05-13 12.47.10.jpg 2016-05-13 12.47.15.jpg 2016-05-13 12.54.18.jpg 2016-05-14 16.14.52.jpg 2016-05-13 12.30.31 HDR-2.jpg 2016-05-14 15.09.33.jpg 2016-05-14 15.09.40.jpg 2016-05-14 15.09.53.jpg 2016-05-14 18.35.16.jpg 2016-05-14 18.35.35.jpg 2016-05-14 18.48.47.jpg 2016-05-14 19.48.30.jpg 2016-05-14 20.15.09.jpg


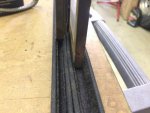
I'm going to be honest here, and say while these pictures make it look amazing, an actual sand blast would have gotten all the corners better than a 4" wire wheel and my Dremel 1" wheel. There was probably more I could have done for the rust in-between the lower sliding window channel and the exterior sheet metal panel (where the 4 holes are for water drains) - like some rust converter spray. But I was just so tired and I didn't want to deal with any problems or clean up of it being tacky on non-rusted portions. I stuck the Dremel in as best I could with my current attachments...
 
Last edited:
Scar59

Active member
Steel Soldiers Supporter
2,811
41
38
Location
Mt. Eden, KY
Valance.
What is the part number for the side window channels?? -and the vendor source for them.
Thanks
JC
 

Valence

Well-known member
Steel Soldiers Supporter
2,112
555
113
Location
Davis County, UT
Valance.
What is the part number for the side window channels?? -and the vendor source for them.
Thanks
JC
I purchased mine from Erik's. He sells them as a set but can sell individually. One set is ONE side window.
Item #'s: 7373286 and 7373298 (7373286 short & 7373298 long)
http://www.eriksmilitarysurplus.com/wislchindofo.html


For you Central and East coast fellows, shipping may make it cheaper from Big Mike's:
Short and long pair:
http://www.bigmikesmotorpool.com/pr...t-side-m35a2-m35a3-m54a2-m809-7373286-7373298

Individually:
http://www.bigmikesmotorpool.com/pr...ndow-long-side-m35a2-m35a3-m54a2-m809-7373298
http://www.bigmikesmotorpool.com/pr...dow-short-side-m35a2-m35a3-m54a2-m809-7373286


There's also a bottom rubber channel from Erik's, but I haven't torn apart the side door/window to see how or where this one fits, or if it's only applicable as an internal window part...
Item# 7373301
http://www.eriksmilitarysurplus.com/siwibosuruch.html
 
Last edited:
red

Active member
1,988
25
38
Location
Eagle Mountain/Utah
And here are some pictures of the very tedious sanding, wire wheeling, and initial painting of the lower hard top section:

FYI: this wire wheel for a grinder is awesome, and a dirt cheap price too ($8.19 at the time of this writing)
http://www.amazon.com/gp/product/B00004RHAO/

Interestingly enough, on the driver's side where the door glass weatherstripping attaches to the hard top back, there was a canvas webbing isolator there. It appears to be identical to the webbing/isolator used on the fuel tank (thanks to a fellow on Facebook for pointing that out for me). I think I'd like to put a new one on both sides.
View attachment 623222 View attachment 623223 View attachment 623224

More:
View attachment 623235 View attachment 623236 View attachment 623247 View attachment 623228 View attachment 623234 View attachment 623225 View attachment 623226 View attachment 623227 View attachment 623229 View attachment 623230 View attachment 623231 View attachment 623232 View attachment 623233


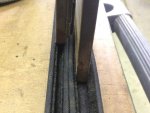
I'm going to be honest here, and say while these pictures make it look amazing, an actual sand blast would have gotten all the corners better than a 4" wire wheel and my Dremel 1" wheel. There was probably more I could have done for the rust in-between the lower sliding window channel and the exterior sheet metal panel (where the 4 holes are for water drains) - like some rust converter spray. But I was just so tired and I didn't want to deal with any problems or clean up of it being tacky on non-rusted portions. I stuck the Dremel in as best I could with my current attachments...
Yea, Saturday wasn't your most fun day working on projects lol

Sent from my XT1585 using Tapatalk
 

Valence

Well-known member
Steel Soldiers Supporter
2,112
555
113
Location
Davis County, UT
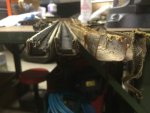
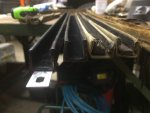
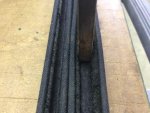
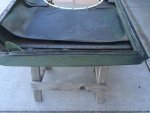
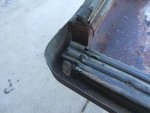
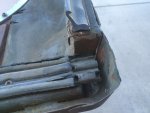
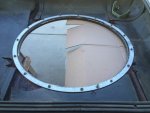
I received the window channel runs yesterday. They did not fit as well as I had hoped.

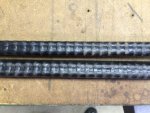
However, I put the run upside down on the corner of the work bench and hit down the length of it with a hammer. This spread the channel wider and should now work okay. Having a smooth painted window frame (instead of abrasive rust) will also go a long way in helping them fit and slide better. The channels are designated as "flexible" so this was easily done. It honestly should work just fine. Maybe they'll become too loose as they wear? (But then, we know where and how to find yet another replacement years down the road.) These narrower window channels might have a little bit of gap between them in the hard top opening when mounted, but we'll see.

The channel run on the left (and top in the last picture) has been unmodified by me, and the one on right (and bottom) has been spread open a bit more. The window on the left would not enter the channel proper, and is actually only sitting on top. You could force it in, but then it would be too tight to slide. I guess tight is fine and you can control how tight you want it.
image.jpg image.jpg image.jpg image.jpg
 
Last edited:
Valence

Well-known member
Steel Soldiers Supporter
2,112
555
113
Location
Davis County, UT
Interestingly enough, on the driver's side where the door glass weatherstripping attaches to the hard top back, there was a canvas webbing isolator there. It appears to be identical to the webbing/isolator used on the fuel tank (thanks to a fellow on Facebook for pointing that out for me). I think I'd like to put a new one on both sides.
2016-05-13 19.50.57.jpg 2016-05-13 19.51.03.jpg 2016-05-13 19.51.16.jpg
So an update here. This webbing is 1" wide, and takes about 40" to do both sides of the lower portion of the hard top.

At first i was searching for the original webbing that went here, and forum member bigmike suggested Kevlar webbing. After a bit of internet research and comparisons (probably tainted with various product seller's preferences), I've found that Kevlar webbing actually has a low UV tolerance. Here's a couple of websites I found decently informative (not meant to be a comprehensive comparison):

http://www.shockstrap.com/blog/which-tie-down-webbing-is-better-polypropylene-nylon-or-polyester
http://community.makeyourgear.com/2016/02/15/all-about-webbing/
Chart-2.jpg

So I've settled for a Polyester webbing as the most appropriate isolator for my use. My main concerns were: heat, UV, and water absorption.

I think I'll add it as an isolator to the upper portion of the hard top too. I estimate needing 8-10 feet.

At the time of this writing, what cost me about $10.50 shipped, here is 25 feet of 1" wide, black polyester webbing:
https://dutchwaregear.com/3000-pound-webbing.html
 
Last edited by a moderator:

Valence

Well-known member
Steel Soldiers Supporter
2,112
555
113
Location
Davis County, UT
I'm going to be honest here, and say while these pictures make it look amazing, an actual sand blast would have gotten all the corners better than a 4" wire wheel and my Dremel 1" wheel. There was probably more I could have done for the rust in-between the lower sliding window channel and the exterior sheet metal panel (where the 4 holes are for water drains) - like some rust converter spray. But I was just so tired and I didn't want to deal with any problems or clean up of it being tacky on non-rusted portions. I stuck the Dremel in as best I could with my current attachments...
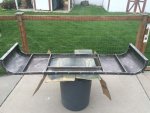
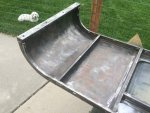
This statement really ate on me. So even though I've already spent all that time clean it up, and 2 cans of Red Ruddy Brown Rust Stop primer, I hauled this lower and the upper hard top sections to Affordable Sandblasting in Ogden, UT. I'm having him blast them and primer. It'll be done a LOT better with more appropriate tools.

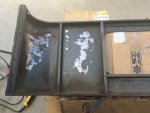
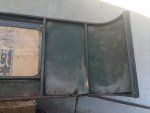
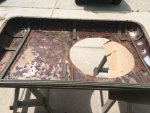
But here's some pictures of the upper hard top section as I stripped the insulation and disassembled the gun ring cut out. Exterior was a fiberglass ring with an interior aluminum backing.

2016-05-19 09.24.13.jpg 2016-05-19 09.24.36.jpg 2016-05-19 09.24.42.jpg 2016-05-19 09.25.08.jpg 2016-05-19 10.45.58.jpg 2016-05-19 11.56.18-1.jpg 2016-05-19 14.03.46.jpg
 

Valence

Well-known member
Steel Soldiers Supporter
2,112
555
113
Location
Davis County, UT
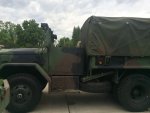
I drove the deuce today without the top! That was a first for me. What an experience! I LOVED being able to see so much sky (it was heavily overcast). It was a very liberating experience. Though, I don't think I'd like it as much under a hot, bright sun. Today was perfect day to drive, a slight chill in the morning (50's). Perfectly comfortable later (70's). If a bit windy. With the top off and cargo cover on, the air circulated such that I felt a suction on the front of me. Kind of weird.
2016-05-20 09.22.24.jpg 2016-05-20 09.22.44 HDR-2.jpg


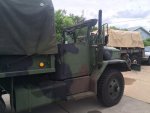
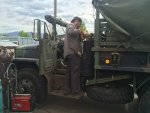
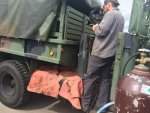
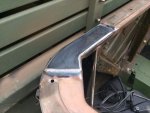
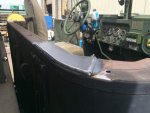
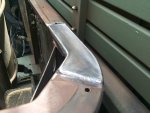
The drive was to go down to The Iron Works to have Scott weld on the cab corner reinforcement brackets (not the big lower plate, but the small flat bars on top of the back cab lip). I asked Scott to duplicate the original because I wanted both corners reinforced. Such quality welds!

2016-05-20 10.09.03 HDR.jpg 2016-05-20 10.27.40 HDR-2.jpg 2016-05-20 10.32.47.jpg 2016-05-20 10.33.02.jpg 2016-05-20 10.33.19.jpg

PS:
In the second to last picture you can see the NEW 18" steering wheel that red helped me install. Oh man, with air-assist steering, that wheel is great. The deuce was SUCH a pleasure to drive today. It felt peppier too which I credit to fixing leaking fuel lines. Except, the brakes locked up at the hardware store 1 mile from home. Now it's time to rebuild the air-pack and install a new master cylinder while I'm at it --- which I should have done last year when I rebuilt all wheel cylinders and installed the peashooter flexible brake lines. *shrug*
 
Last edited:
USAFSS-ColdWarrior

Chaplain
Super Moderator
Steel Soldiers Supporter
18,550
5,917
113
Location
San Angelo, Tom Green County, Texas USA
I drove the deuce today without the top! That was a first for me. What an experience! I LOVED being able to see so much sky (it was heavily overcast). It was a very liberating experience. Though, I don't think I'd like it as much under a hot, bright sun. Today was perfect day to drive, a slight chill in the morning (50's). Perfectly comfortable later (70's). If a bit windy. With the top off and cargo cover on, the air circulated such that I felt a suction on the front of me. Kind of weird.

As i often ask Dianna (my bride and "Soldier B"), "Do you want to go for a ride in my CONVERTIBLE?"

After all, it IS the ONLY convertible I have ever owned.

I love feeling the wind over my balding head - LOL

https://www.youtube.com/watch?v=fUTFWqkFf98
 
277
4
18
Location
Belton, SC
PS:
In the second to last picture you can see the NEW 18" steering wheel that red helped me install. Oh man, with air-assist steering, that wheel is great. The deuce was SUCH a pleasure to drive today. It felt peppier too which I credit to fixing leaking fuel lines. Except, the brakes locked up at the hardware store 1 mile from home. Now it's time to rebuild the air-pack and install a new master cylinder while I'm at it --- which I should have done last year when I rebuilt all wheel cylinders and installed the peashooter flexible brake lines. *shrug*

So what happened? The air pack piston stuck?
 

Valence

Well-known member
Steel Soldiers Supporter
2,112
555
113
Location
Davis County, UT
So what happened? The air pack piston stuck?
Not to derail this Gun Ring thread, but it's the situation where the brake pedal gets more and more stiff until the brakes start dragging and eventually prevent the truck from moving. I believe it's air pressure that builds up in the air pack and isn't properly purging. It may just be a clogged port in the master cylinder. But a new master cylinder and a whole air-pack rebuild kit (at the time of this writing) are ~$150 for critical parts of my single circuit brake system (which means, every part is critical - lol).

More info here:
http://www.steelsoldiers.com/showthread.php?73202-Help-Brakes-Stuck-on!
 
Last edited:
Valence

Well-known member
Steel Soldiers Supporter
2,112
555
113
Location
Davis County, UT
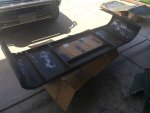
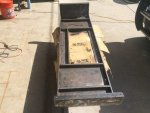
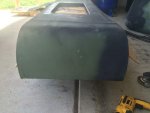
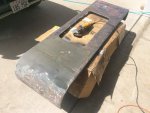
Three weekends until my truck has to be ready and I'm having problems with the sandblaster/painter. Guess I should have done it myself. I've also made unnecessary trips to his shop because he got his customers confused and him forgetting on times we discussed and agreed to before hand (he needs to retire).

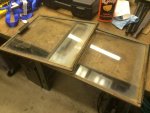
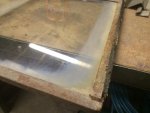
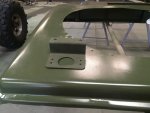
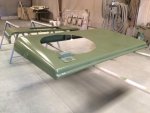
I took time time off from work yesterday and here's the matched paint job. He didn't do the paint matching but he should have stopped long before he finished as it's obviously no where near flat (which I had asked for - to match the part, even if it wasn't as chalky).

image.jpg image.jpg image.jpg image.jpg

I've now found a local (though expensive at $180+ per gallon) source for actual CARC paint which would have been perfect - but it's not compatible with the existing enamel on the parts and would require to be re-sandblasted. (I could have bought a NEW hard top for the expense sunk at that route...) :(

Updated: for CARC source contact info:
2016-06-19 10.05.50.jpg
Card says:
Marissa Skiby
Inside Sales Aerospace Manager
marissa@aisdirect.com
Toll Free: 1-800-926-6160
Office: 801-732-1500 EXT: 12
Fax: 801-732-1700
AIS (Automotive & Industrial Supply)
2507 S. 1900 W.
Ogden, UT 84401

Aerospace Division
http://aisdirect.com


So I ordered a gallon of Rapco 383 matching CARC substitute and am having it shipped directly to the fellow. I hope he gets it by Friday so it can dry all weekend (actually saved $10 shipping directly to a business). Ignoring the CARC option, this is the route I should have done from the beginning but I didn't realize how difficult it was to match paint and I thought it'd be faster (written with much contempt as I can muster).

To top it off, the sandblaster/painter complained of a hand injury (he guesses possibly a fractured bone(s) from some automotive work). He then inquired about what I did for a living (which isn't law enforcement) and then actually solicited from me if I had any leftover painkiller medication at home and he'd give me a big discount on the hard top work.

He's actually a really nice fellow, and I'm not judging anyone, but I just want my hard top correctly painted and back...
 
Last edited:
Valence

Well-known member
Steel Soldiers Supporter
2,112
555
113
Location
Davis County, UT
Second, the powder coated parts (legs, adapter plate and etc) will supposedly be ready for pickup Friday morning. The Powder Works in West Valley, UT was recommended to me by Scott at the Iron Works in Woods Cross, UT (who I have the utmost respect for) so I have high hopes on the results of the powder coating.

Yes, honestly, I've wondered if I shouldn't have just had the truck's hard top powder coated, but it didn't seem like the correct route for body panels. Sure would have been cheaper now. :-|
 
Last edited:
Top
AdBlock Detected

We get it, advertisements are annoying!

Sure, ad-blocking software does a great job at blocking ads, but it also blocks useful features of our website like our supporting vendors. Their ads help keep Steel Soldiers going. Please consider disabling your ad blockers for the site. Thanks!

I've Disabled AdBlock
No Thanks