• Steel Soldiers now has a few new forums, read more about it at: New Munitions Forums!

  • Microsoft MSN, Live, Hotmail, Outlook email users may not be receiving emails. We are working to resolve this issue. Please add support@steelsoldiers.com to your trusted contacts.

What have you done to your 5 ton this week?

Jakelc15

Active member
718
37
28
Location
Hanover Pa
Replaced the shoe string type material on the Jumper port cap, with 6" of tan para cord. Used a couple of electrical connectors, ground the plastic off of them, spread them, put in the cord and crimped them with the electrical crimpers. It made for a nice clean up of something that has been an irritation since I got the truck.
Thanks for the good idea
 

155mm

Chief and Indian
Steel Soldiers Supporter
1,181
397
83
Location
Guymon, OK
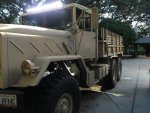
Got the retrofit done today, had overcast weather until the last 2 tires. Only lost 4 mph going from 14.00/20's to 11R24.5's. The truck has a new name now though, Rock Chucker.
IMG_0450[1].jpg

If you wish to delete the wheel end CTIS items, either permanent or temporary, the plug that I used is Gates G60250-0010. Its a solid plug with oring gasket. Cost less than $5 each

IMG_0451[1].jpg IMG_0452[1].jpg
 

simp5782

Feo, Fuerte y Formal
Supporting Vendor
12,131
9,415
113
Location
Mason, TN
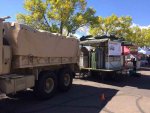
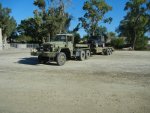
Hauled this for someone. Sitting at 13'5.87" tall. Just under. Had to deflate the tires to 60psi to get em down some. JD 650G weighing around 19k.
 

Attachments

Amer-team

Well-known member
1,710
38
48
Location
Centralia/WA
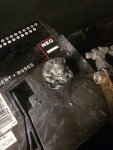
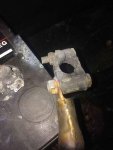
Rooster, looks like you took a picture of my battery, but mine took out the alternator too. The good thing is that I probably won't make that same mistake again soon.
 

Amer-team

Well-known member
1,710
38
48
Location
Centralia/WA
3 Way light switch woes.

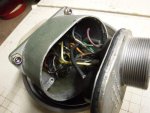
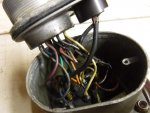
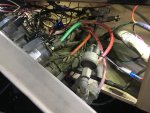
Pulled the 3 way light switch. Obviously a short, but why? we went on a mission today to a parade in Quilcene. 190 round trip from my house. On the way back, the 1SG asks why my lights aren't on. I couldn't get the switch levers to move, so we kept on heading for home. Had running lights but no headlights. Pulled it when I got home and this is what I found inside.

Was it a defective switch or is there something else in the circuit that caused this overheating. Would like to rectify if you guys can think of something that needs attention.
 

Attachments

simp5782

Feo, Fuerte y Formal
Supporting Vendor
12,131
9,415
113
Location
Mason, TN
Pulled the 3 way light switch. Obviously a short, but why? we went on a mission today to a parade in Quilcene. 190 round trip from my house. On the way back, the 1SG asks why my lights aren't on. I couldn't get the switch levers to move, so we kept on heading for home. Had running lights but no headlights. Pulled it when I got home and this is what I found inside.

Was it a defective switch or is there something else in the circuit that caused this overheating. Would like to rectify if you guys can think of something that needs attention.

Vibration, time, moisture, heat. Yeah and prob a few other things.
 

Amer-team

Well-known member
1,710
38
48
Location
Centralia/WA
The switch was dated 2005 and the truck went through rebuild in 2006, so am hoping the vibration and heat were it. there is a lot of wire in there for a very small area. I had been smelling an electrical smell every once in awhile for some time and couldn't see anything going on. An uncle once told me if there is something going wrong and you can't find it, eventually if it is bad, you will find it. This seems to be the case.
 

Swamp Donkey

The Engineer
Steel Soldiers Supporter
1,450
121
63
Location
Gray, GA
The switch was dated 2005 and the truck went through rebuild in 2006, so am hoping the vibration and heat were it. there is a lot of wire in there for a very small area. I had been smelling an electrical smell every once in awhile for some time and couldn't see anything going on. An uncle once told me if there is something going wrong and you can't find it, eventually if it is bad, you will find it. This seems to be the case.
If you look at the connector on the switch all the pins are labeled. There is a wiring diagram in the back of the -23-5 manual that'll tell you where those wires go. You could check on down the line for problems but I tend to agree that the switch just shorted internally.

I have new switches listed in the classifieds.
 

TwistedOaks

Member
Steel Soldiers Supporter
204
9
18
Location
Odessa, Florida
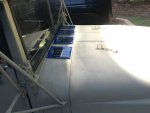
Started this week by finishing the install of my solar system and Marinco 24v wipers (Removed the whole air driven system, including the switches).

IMG_4940.jpg
5200 epoxy holds the four posts to the hood area, then ran two of them through the factory holes for the washer fluid (since those never worked anyway) then grommeted, and used gutter seal under the dash and under each panel.

Then finally got around to putting in some LED bars. Was really disappointed in my supplier ( I guess my Mandarin is a little rusty) since I ordered 60 inch single row 300w CREE LED and got 230w 48". Still came out good, and it is bright... I mean... REAL bright. Then added 6 40w rock-lights under the body (AKA breakdown lighting).
IMG_4934.jpg

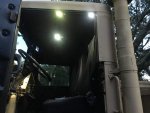
Then worked on the cab lighting.

IMG_4933.jpg

Then I started teaching myself to weld (this was yesterday). (Thanks to everyone here that encouraged me to try it... And yes, it's like a hot glue gun - only melting steel!) Started by making a bracket to mount the evaporator for the AC install! Very excited about this.
IMG_4970.jpg
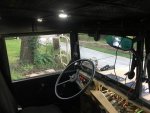
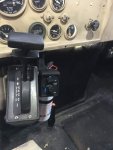
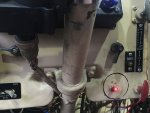
Relocated the electrical system service port up under the dash, cleaned out all the old vent system piping, disconnected the defroster vents, removed the hot water system (it's florida, and the new system has optional electric heat).

Removed the Defroster/Fresh Air/Heater pull handles, epoxied the holes, sanded and Rapco'd the dash panel (then got it completely grubby again because I can't sit still for a minute). Gonna work on a way to still get the fresh air vented into the cab to work with the AC. Yes, I installed lighting under the dash and behind because I can't stand wiggling around with flashlights.

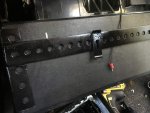
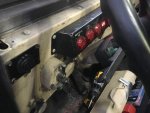
Relocated the power and starter switches out of the panel and into the old windshield washer holes (because I find myself taking the dash off so often, it's annoying to undo those two EVERY time).
IMG_4973.jpgIMG_4972.jpgIMG_4971.jpg

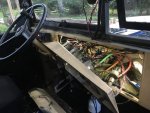
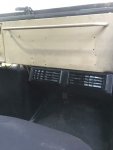
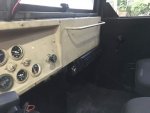
Then installed the underdash evaporator and hoses. Ran the hoses for the condensor and compressor (now if I can just find a bracket :roll:). REALLY wanted to shover the evaporator up under the dash, but it fit so nice and still has a ton of foot space in this location (and is still very serviceable). Ran the electrical and control box for it, and mounted. Very happy with the controls and location.
IMG_4983.jpgIMG_4974.jpgIMG_4976.jpgIMG_4980.jpg


Here's the location I'm thinking for an additional vent for driver. As it is, the vents blow so strong in the current location, I could almost do without, but I know I'm going to want it.
IMG_4985.jpg

Ran out of time, but hoping that next week(end) I can finish the AC system up, then work on a second winch (only a little 12k) for the top of the bed to help load ... stuff...

Snip20160918_1.jpg
 

Ford Mechanic

Active member
1,805
7
38
Location
Edenton, NC
Started this week by finishing the install of my solar system and Marinco 24v wipers (Removed the whole air driven system, including the switches).

View attachment 644604
5200 epoxy holds the four posts to the hood area, then ran two of them through the factory holes for the washer fluid (since those never worked anyway) then grommeted, and used gutter seal under the dash and under each panel.

Then finally got around to putting in some LED bars. Was really disappointed in my supplier ( I guess my Mandarin is a little rusty) since I ordered 60 inch single row 300w CREE LED and got 230w 48". Still came out good, and it is bright... I mean... REAL bright. Then added 6 40w rock-lights under the body (AKA breakdown lighting).
View attachment 644603

Then worked on the cab lighting.

View attachment 644602

Then I started teaching myself to weld (this was yesterday). (Thanks to everyone here that encouraged me to try it... And yes, it's like a hot glue gun - only melting steel!) Started by making a bracket to mount the evaporator for the AC install! Very excited about this.
View attachment 644605
Relocated the electrical system service port up under the dash, cleaned out all the old vent system piping, disconnected the defroster vents, removed the hot water system (it's florida, and the new system has optional electric heat).

Removed the Defroster/Fresh Air/Heater pull handles, epoxied the holes, sanded and Rapco'd the dash panel (then got it completely grubby again because I can't sit still for a minute). Gonna work on a way to still get the fresh air vented into the cab to work with the AC. Yes, I installed lighting under the dash and behind because I can't stand wiggling around with flashlights.

Relocated the power and starter switches out of the panel and into the old windshield washer holes (because I find myself taking the dash off so often, it's annoying to undo those two EVERY time).
View attachment 644611View attachment 644610View attachment 644609

Then installed the underdash evaporator and hoses. Ran the hoses for the condensor and compressor (now if I can just find a bracket :roll:). REALLY wanted to shover the evaporator up under the dash, but it fit so nice and still has a ton of foot space in this location (and is still very serviceable). Ran the electrical and control box for it, and mounted. Very happy with the controls and location.
View attachment 644615View attachment 644612View attachment 644613View attachment 644614


Here's the location I'm thinking for an additional vent for driver. As it is, the vents blow so strong in the current location, I could almost do without, but I know I'm going to want it.
View attachment 644621

Ran out of time, but hoping that next week(end) I can finish the AC system up, then work on a second winch (only a little 12k) for the top of the bed to help load ... stuff...

View attachment 644622
So where did you get those ramps? What's the length on them?

Sent from my SM-G900V using Tapatalk
 

TwistedOaks

Member
Steel Soldiers Supporter
204
9
18
Location
Odessa, Florida
titanramps.com (also one of my favorite suppliers for farm toys). They're 10'. I'm planning on putting some Zeus fittings in the deck of the tailgate to help keep things in place.
 

kungfu dave

Member
68
2
8
Location
Charlotte, NC
I have been wondering about securing a ramp myself. How do you plan to use the zeus fittings you mentioned. I am not familiar with them. I like the solar set up! 1 for each battery?
 

TwistedOaks

Member
Steel Soldiers Supporter
204
9
18
Location
Odessa, Florida
I have been wondering about securing a ramp myself. How do you plan to use the zeus fittings you mentioned. I am not familiar with them. I like the solar set up! 1 for each battery?
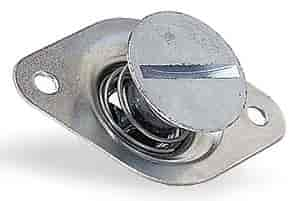
Zeus fittings are common in racing hoods, and aviation hatches. Something like this... but I'm finding they're not made in a size that's study enough. So I might go to a ball lock dowel pin, or something similar that can go all the way through the tailgate ends (roughly 3 1/4" with the ramp ears)


The solar system is amazing. Yes, it is one to each battery. I am running 4 batteries with an isolater on each set, so I can run basic accessories (like interior lighting or dash panel/running lights which I forget - a lot), and always be able to switch over to a fully charged set for starting purposes if needed. Then I run both sets on longer hauls to give the alternator a chance to do it's job. But really, they're so efficient in the Florida sun, I'm not sure I'd know if I had an alternator beginning to fail.
 
Last edited:

simp5782

Feo, Fuerte y Formal
Supporting Vendor
12,131
9,415
113
Location
Mason, TN
Why? Something wrong with your air clutch fan? You going to upgrade the alternator also?

Sent from my SM-G900V using Tapatalk
You save alot of horses by using these fans to keep the fan clutch off. 72k gross on 7 percent grade for 4 miles and mine never comes on. I have 2 of these fans on my 923. Plus no roar. I also have them set on a timer to cool down after shut down

Sent from my SM-G860P using Tapatalk
 

Amer-team

Well-known member
1,710
38
48
Location
Centralia/WA
Got the lights working again. I had two NOS switches sitting on the shelf. Took switch number one, a nice CARC green color. Plugged it in and nothing except the light behind the shifter was lit up. So was thinking what else have I done to this truck. Got to the Troubleshooting in the manual, ran a jumper from 15 to the running lights. Didn't want to blow up the headlights if there was something else. The running lights lit up fine, so bad switch. Put on switch number two and everything worked fine. Of course switch two had dinged threads, so out with the needle files and anti seize, finally got it to go. After much contemplation, discussion, hanging upside down under the dash, and laying across the back adjuster in the door, it popped into place and works.
 
Top
AdBlock Detected

We get it, advertisements are annoying!

Sure, ad-blocking software does a great job at blocking ads, but it also blocks useful features of our website like our supporting vendors. Their ads help keep Steel Soldiers going. Please consider disabling your ad blockers for the site. Thanks!

I've Disabled AdBlock
No Thanks