• Steel Soldiers now has a few new forums, read more about it at: New Munitions Forums!

  • Microsoft MSN, Live, Hotmail, Outlook email users may not be receiving emails. We are working to resolve this issue. Please add support@steelsoldiers.com to your trusted contacts.

What have you done to your 5 ton this week?

MyothersanM1

19K M1 Armor Crewman
Steel Soldiers Supporter
1,958
427
68
Location
Culver City, CA
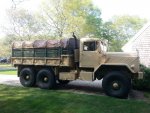
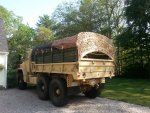
Looks nice. What was your source for the "netting" you string across your bows. Looks cool and would be a great add on for when I remove cargo cover for the summer but want some shade when hanging out or camping.
I got that particular netting from eBay. It's Camo Unlimited MS02B. It's green/brown woodland and is roughly 10' x 20'.
Also try Camo Netting Store
http://www.camonettingstore.com/. Lots of good stuff there.
It does take a beating in the sun though. This one is less the two years installed and is showing wear.
 

Cape Coastie

CWO4 ENG/MSS, USCG, RET.
528
124
43
Location
Sandwich, MA
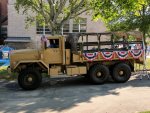
Hey Carman, I use a cargo netting I got from Sportsmans Guide. Don't remember what size but think it is 12' x 20'. You can roll up the sides for better view for riders in the back. I use it for the same reason, remove the cover in the summer but still want some shade. I included a few pics.
 

Attachments

Cape Coastie

CWO4 ENG/MSS, USCG, RET.
528
124
43
Location
Sandwich, MA
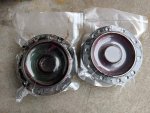
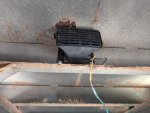
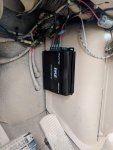
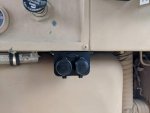
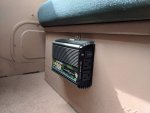
So I completed some additions to the truck for convenience and also safety in preparation for the convoy to NJ on April 19. I installed a 24 volt to 12 volt converter with a duel socket under the dash. I also added a backup alarm. I switched it along with the LED back up lights to a marine navigation light switch so when I pull it to the first position I get alarm and lights and pull to the next position I get just lights. That way if I want the lights for trailer hook up or whatever I won't have to listen to the alarm the whole time. I also installed a 24 volt to 110 volt AC inverter. This one and the 24 to 12 are just for charging items while underway. When I went to test the inverter I was only getting 84 volts so something is wrong with it internally and have had it too long to return so I ordered a different unit. I also vacuum packed my splined front hub to keep them clean and dry. I keep them in the truck in military map boxes and they aren't water tight. I want to keep them handy in case I need them. More to come soon.
 

Attachments

sandcobra164

Well-known member
3,005
317
83
Location
Leesburg, GA
I turned my pump back up! When I had it rebuilt 2 years ago they put blue tamper paint on every bolt. They even put a plastic "tamperproof" dab of gray plastic inside of the throttleshaft. I didn't know it was plastic until today. They also put blue locktight on the throttle screw. Blue wrench with 3 minutes of torch time sorted that out. I hesitated going that route again but now that I have Dual Fueled my truck, Injection Pump tweaks and air flow modifications are next on the list. I did a 1/8 turn counterclockwise on the throttleshaft screw which should raise rail pressure with throttle applied. 8.3's have a turbo, 250's are 24 valve engines.
 

Tinstar

Super Moderator
Super Moderator
Steel Soldiers Supporter
4,292
1,779
113
Location
Edmond, Oklahoma
1C488532-42CF-413F-91DF-98913EB86425.jpg
Washed it.
Plus put bows and cargo cover back on.

It’s been off quite a while and truck was very dusty from county dirt roads.
No mud, just dust.
 

vvwilkins

Active member
106
117
43
Location
Riverside CA
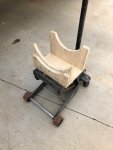
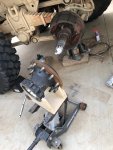
Started on replacing the CTIS hub seals. After pulling off the drum I decided to make a "hub dolly" to facilitate smooth (non-back breaking) removal. Hopefully it will provide a trouble free installation too. Will find out next weekend :)
Also, removing the coil-snap ring was a pain in the ... any suggestions others have are greatly appreciated. About the only thing I can think of currently is to put a slight bend on the tip of a blade screwdriver.
hubDolly.jpghubOnDolly.jpg
 

sandcobra164

Well-known member
3,005
317
83
Location
Leesburg, GA
Replaced the leaking driver's rear glad hand air valve. Next air leak to fix will be the pressure relief valve on the inlet that feeds the wet tank. Also installed the correct transmission modulator cable bracket where it connects to the bracket on the driver's side of the engine. No more Zip Tie holding it in place. Now I need to drive it and see where it shifts, before it would shift at around 1,900 rpm at wide open throttle. Hopefully we're shifting near 2,100 at wide open but if not, it's adjustable. Never wanted to adjust it before since it didn't have a solid mounting point.
 

sandcobra164

Well-known member
3,005
317
83
Location
Leesburg, GA
Pretty simple trick, remove tamper proof ball from throttle shaft. If it's original, it's almost harder than the drill bit you're using. Once out, use a flat tip screwdriver to turn the screw in the throttle shaft counter clockwise. 1/8th of a turn makes a big difference so start there. If you want to turn it up more than that, be prepared to plumb in a rail pressure gauge and do a "snap test". Pretty easy to do, there is a plug at the shutoff valve that you can plumb into. Truck warmed up and running at idle, snap the throttle wide open and observe the peak pressure on the gauge. You need to stay under 200 psi on these Small Cam engines and ideally around 180 psi at the high end of the spectrum.
 

Buffalobwana

Well-known member
Steel Soldiers Supporter
1,394
178
63
Location
Frisco Texas
SC, are you talking about the A2’s? Or the 250’s?

I turned mine up and it made a big difference off the line. It was a danger trying to go from a stop into traffic. It was a slug! I blow smoke, but it’s worth it to get some movement.
 

simp5782

Feo, Fuerte y Formal
Supporting Vendor
12,130
9,409
113
Location
Mason, TN
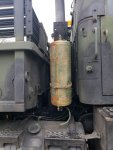
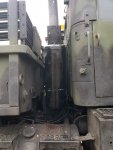
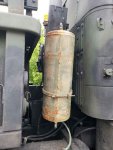
Installed a bigger air tank off a 915 into a pretty empty spot I had. I was going to try to put two smaller tanks but the bigger one just looked better plus the clamp mounts were the same size as the muffler clamp mount that is already there so it took about 2 minutes to install it. I will run off my wet tank thru this tank then to the push/pull trailer control valve so this will give the trailer greater air supply then I will use the 3/4" port on here for an air tool port so it will be good use for my 1/2" air line.

This tank had a little angle foot welded to the back of it so I used that and welded the top to the muffler bracket

Sent from my SM-G965U using Tapatalk
 

Attachments

Last edited:

sandcobra164

Well-known member
3,005
317
83
Location
Leesburg, GA
Found my bad air leak, now I need to fix it. Treadle Valve replacement time soon. It leaks into the intake anytime the truck has air pressure. Just can't hear it over the engine. If you press slightly on the brake pedal, leak is gone and it will hold air pressure until the morning.
 

simp5782

Feo, Fuerte y Formal
Supporting Vendor
12,130
9,409
113
Location
Mason, TN
Found my bad air leak, now I need to fix it. Treadle Valve replacement time soon. It leaks into the intake anytime the truck has air pressure. Just can't hear it over the engine. If you press slightly on the brake pedal, leak is gone and it will hold air pressure until the morning.
Do you need one? free of charge.
 

sandcobra164

Well-known member
3,005
317
83
Location
Leesburg, GA
Sure thing, drop it off next time you're down this way. I'm really not in a hurry, we can swap it at the Rally in October if our paths don't cross before then.
 

simp5782

Feo, Fuerte y Formal
Supporting Vendor
12,130
9,409
113
Location
Mason, TN
I can put it in the mail to you. Not a big deal. fits in a medium box. It came out of one of those Honeywell rebuild trucks that blew the motors.
 
Top