• Steel Soldiers now has a few new forums, read more about it at: New Munitions Forums!

  • Microsoft MSN, Live, Hotmail, Outlook email users may not be receiving emails. We are working to resolve this issue. Please add support@steelsoldiers.com to your trusted contacts.

What have you done to your 5 ton this week?

plode

Member
270
3
18
Location
South Jersey
That explains the marker light on the passenger side for sure, but the corrosion is pretty serious on that one. I cleaned a few up and they work fine now, but this one looks like it was sitting in the ocean for a few years :D

But the parking light on the drivers side looks brand new inside. Not even a hint of corrosion on the socket there. I cleaned the paint away and used new star washers...they dug in and the other lights that share the ground are working just fine, so I need to trace the positive wire more...or just run a new wire over from the passenger side marker light and cap the stock wire. Easier to do that than dig through the 20 wires in that harness looking for issues with just one wire(and they are all black wires).
 

BigDawg41

Member
63
6
8
Location
Springville NY
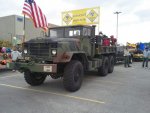
Nothing too exciting here but I did my first oil change,changed the fuel filter and flushed the dirty cooling system about 20 times on my new truck this week.I took it out to my first show today at a local Oktoberfest and met up with a few new friends with their military jeeps.
 

Amer-team

Well-known member
1,715
47
48
Location
Centralia/WA
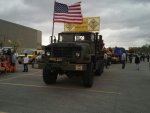
Took the 923 in for a front end alignment. Was getting some wear on the front tires. He said it was about 1/2 inch out. Maybe wishful thinking but it seemed to not wander now and I was not having to herd it home. Also last weekend we went to a parade, 190 miles round trip for me. Got 8 MPG. I keep a log book and checked it twice and am still in shock. We were traveling at 40 to 50 MPH.
 

shadowdd

Member
107
0
16
Location
College Station, TX
Seat mount pictures


Pics of how you mounted them as well please! Thank you very much!

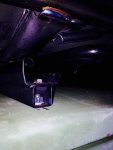
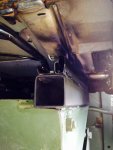
The two passenger seats have a 1" square tube welded to the bottom rails of the seat and those rails are bolted to the battery box lid with 3/8" grade 8 bolts. The drivers seat has a 2" square tubing welded to the rails of the seat and those are actually welded to the top of the springer seat base. I use the different size square tubing to get the seat all to be the same height in the truck. the OEM belts from the truck are a match for the buckles built into the seat but I did order three new three point shoulder belts along with a should guide that will be installed next. Here are a couple pictures of the square tubing mounts that were made.


Thanks, Bryan
 

Attachments

Swamp Donkey

The Engineer
Steel Soldiers Supporter
1,450
123
63
Location
Gray, GA
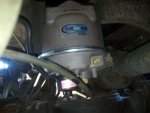
Replaced my old air dryer with a new MRAP Haldex unit. I was just going to disassemble the old one, clean it and replace the filters but I found the little plastic heater box was shattered. It was easier to just replace the whole thing.

IMG_20141002_181035_971.jpg
 

MyothersanM1

19K M1 Armor Crewman
Steel Soldiers Supporter
1,958
427
68
Location
Culver City, CA
Last week, with installation of my new drop side bed last month, I repainted the inside of the bed with the help of my son. We just rattle canned the corners and rolled the rest...no fuss and little mess. I decided not to apply bed liner coating as paint is easier to fix up if you get rust.

Today, I re-installed the staves, bows and corners on the bed then covered it all with camo netting. I reconnected the grounding strap from the frame to the bed. I also installed a pair of block bumper blocks on the tailgate.
 

Ddmk18

Member
272
2
18
Location
James Creek PA
Installed a new Purair dryer from an mrap. And had a perfect working ctis until the other day I got 5 flashing lights. I tracked it down to the air hoses on the intermediate axle and replaced those. She's good as new now!!!!
 

rhurey

Member
Steel Soldiers Supporter
737
14
18
Location
Bothell, WA
Suddenly boring I am.

Checked brakes.
Removed hard top, sand blasted, bondo on rust / mounting holes.
prime / paint / install. Need to fit better.
Replaced axle vents with line routed to cab. See if that fixes the leak in the front axle.
Noticed one front boot cracked. Ordered new boots.
Got supplies & spin on adapter for oil change.
Greased most zerks. Ordered adapter for ones couldn't get to.
 

Carlo

New member
1,364
21
0
Location
palazzago italia
Last week, with installation of my new drop side bed last month, I repainted the inside of the bed with the help of my son. We just rattle canned the corners and rolled the rest...no fuss and little mess. I decided not to apply bed liner coating as paint is easier to fix up if you get rust.

Today, I re-installed the staves, bows and corners on the bed then covered it all with camo netting. I reconnected the grounding strap from the frame to the bed. I also installed a pair of block bumper blocks on the tailgate.
Working on these trucks with our sons changes everything doesn't it? It does with me! Sorry to side track again moderators of SS.
 

JarheadMtn

New member
356
2
0
Location
Anaconda Montana
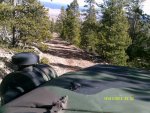
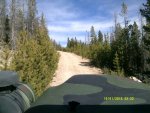
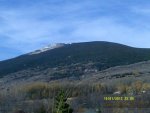
I drove the 813 down the mountain BEFORE the snow hits. There I a little snow right above me and water is freezing and staying frozen all day long. I made the mistake a few years ago waiting too long and drove down the steep trail on ice. Not a fun trip as we slipped and skidded. I parked at a lower elevation where I have access to electricity and a level wide place so I can do some work on it this winter.
 

Attachments

Piper Cub

Member
649
2
18
Location
Palmdale, Ca / Flagstaff, Az
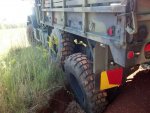
I finished grading a road with my M925. The skiploader blew a tire and I didn't have time to go get a new one, but the road was still a huge mess. Kilroy the 5 ton to the rescue! A couple passes back and forth over the gravel and it's almost as good as the tractor would have been.
 

Attachments

Plugugly

New member
116
1
0
Location
Iowa
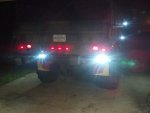
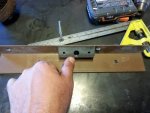
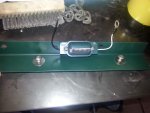
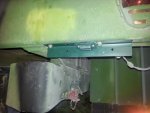
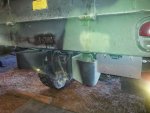
I did three things today, got my title and plates from the DOT, built and installed a licence plate bracket/light, and fixed the leak on my rear axle. I built the license plate bracket to use the existing bolts on the bumper, and used a 24v LED light. I ordered a pre-made license plate light kit just for the Y connector so I can tap into the marker light wiring to power the light. The bracket was made of two different pieces of angle, big one to attach the plate to the bumper and a smaller one I drilled then welded on to hold the light. I'm not much of a Steel soldier, I only had "hunter green" spray paint on hand so it doesn't match really well, but you can't see much of it and it will be dirty soon.

The rear propeller shaft seal, I wrote up in a thread about that: http://www.steelsoldiers.com/showth...al-on-a-M939&p=1620176&viewfull=1#post1620176
 

Attachments

Top
AdBlock Detected

We get it, advertisements are annoying!

Sure, ad-blocking software does a great job at blocking ads, but it also blocks useful features of our website like our supporting vendors. Their ads help keep Steel Soldiers going. Please consider disabling your ad blockers for the site. Thanks!

I've Disabled AdBlock
No Thanks