• Steel Soldiers now has a few new forums, read more about it at: New Munitions Forums!

  • Microsoft MSN, Live, Hotmail, Outlook email users may not be receiving emails. We are working to resolve this issue. Please add support@steelsoldiers.com to your trusted contacts.


What have you done to your 5 ton this week?

hgun

Well-known member
Steel Soldiers Supporter
180
306
63
Location
Leechburg, PA
Hello everyone hope everyone is staying warm. I got a question. I’m trying to remove the PTO from my parts truck, I can get most of the nuts off the studs except for one it’s right behind the transmission I can get a open end wrench on it but can’t turn it with out hitting the tranny. Do I need a special 9/16 wrench or some other tool. Hope you can help me thanks.
 

Wreckclues

Well-known member
Steel Soldiers Supporter
157
434
63
Location
Jefferson, Massachusetts
Installed a Diesel Parking Heater in my M813 and it works...so far.
I went with an 8KW Voyocht, 12 Volt for a few reasons. First it's all metal construction, most of these are made of plastic. Second, the kit came with parts I would have had to purchase separately and finally it had fewer negative comments than the others I was considering.
Installed it in the driver's side Tool box, which I had to remove from the truck as it's winter here and all I have for shelter is a tent. Bolted a shelf in the box so the unit would sit about an inch from the top.
The construction part of the manual was less instructive and more intuitive, just a picture. But to their credit there was no way to mess up the wiring harness, each component had a unique plug. Rigged the power directly to my 12V , 30 amp inverter. The unit comes with a 20 amp inline fuse. The control LCD will be velcroid to the dash between the throttle and ignition, over that pesky alarm sign warning of low brake pressure.
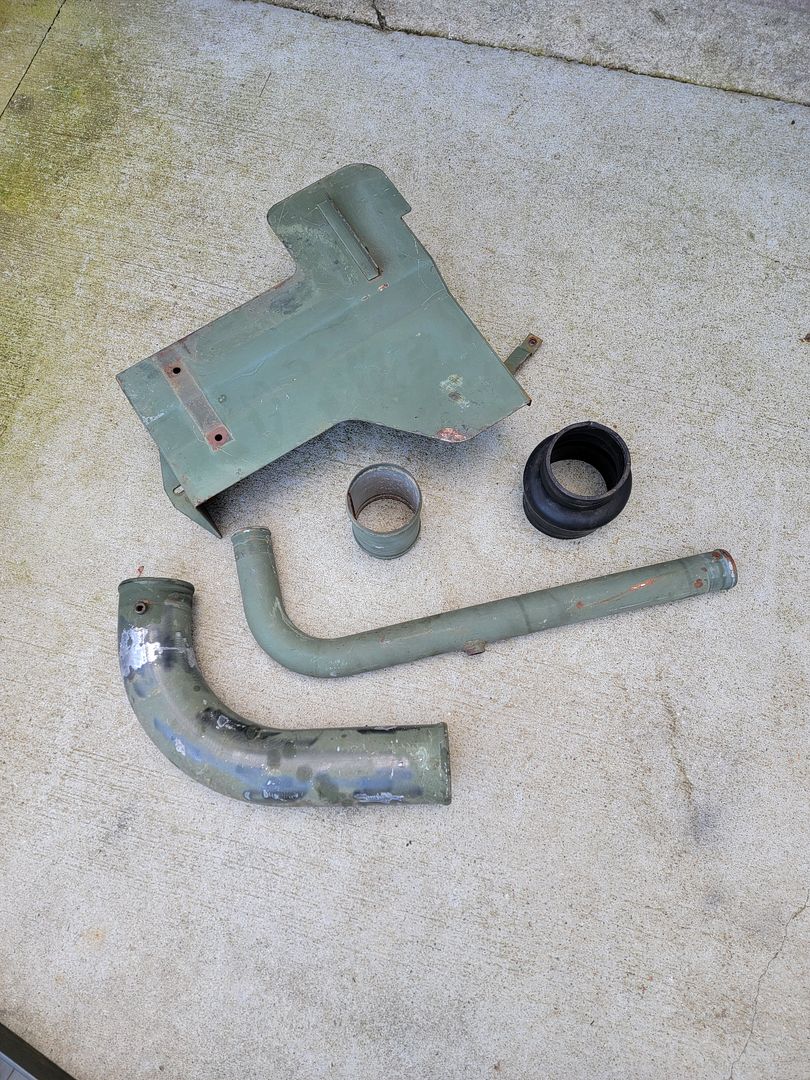
Attached the 5 liter tank to the front face of the bed opposite the cab, this is a temporary installation as the kit comes with a main tank fuel pick up penetrator that I'll install when I replace the old tank sometime this year. Ran the fuel line and wiring harness through remnant of airhose to protect them from chaffing where they run through metal surfaces. Eventually the cabin air will be recirculated through the unit, have all the holes drilled, just need to run the ducting. Drilled the holes with a bi-metal keyhole saw, snapped three HSS bits.
The heated air ducting penetrates the cab just above the high beam dimmer switch. Had to reorient this to allow for the ducting while not obstructing the clutch pedal. From here the first stop is a T fitting with two valves, one penetrating the firewall and the other to cabin heat and defroster. With the cabin heat valve closed and the engine bay valve open I can preheat the engine bay. Opened the hood to see if it was working and got a blast of hot air. Will still have to rig up an insulated blanket to cover the hood and sides and experiment to see if it's worth the effort.
The cabin heat-box is made up of a T fitting attached to a Y fitting with built in valves on the legs. Mounted it to the lip under the dash so as not to interfere with shifting, yet still have access to the valve knobs.
The defrost valve is controlled by a push-pull rod cobbled together with all thread and a lawn mower throttle linkage...it aint pretty, but it works.
Used too much ducting to the defrost input under the dash, will have to take it in some, only get a little heat on the passenger side. May have to install a variable speed fan here, things to think about.
But, hey the cab heats up fast, even with the ducting uninsulated. Can't take her on the road right now for a test drive, need to caulk some seams and make the door windows tight and get her inspected and rebuild the parking brake and patch a hole in the exhaust and buy 7 new tires and wheels and....
Didn't have the instructions for the first test, but was able to prime the pump and start the unit. Only downside is everything is in Celsius.

1 Screenshot_2024-01-24 Amazon com VOYOCHT Diesel Heater 8KW, Aluminum Housing, Diesel Heater ...png2 20240123_104555.jpg2b 20240107_114136.jpg2d 20240123_104602.jpg2e 20231223_130123.jpg2f 20240123_104711.jpg2g 20231121_135027.jpg4 20240124_084736.jpg4a 20240124_084441.jpg6 20240124_084853.jpg6a 20240123_104401.jpg9 20240124_084816.jpg12 20240119_104734.jpg12a 20240124_084828.jpg13 20240123_104650.jpg14 20240124_084713.jpg
 

hgun

Well-known member
Steel Soldiers Supporter
180
306
63
Location
Leechburg, PA
Hi guys after watching some videos and looking at TM, I got a question about my winch I have it installed on my truck M818 minus the drive shaft. I got the engage and drum lock to move. But with the drum lock out out and lever in the engage should the drum move backwards as to wind itself in if I turn the yoke wear the drive shaft connects? It will unwind as if you were pulling it out but not back. Does it need to spin at a certain RPM that I cannot do with a pipe wrench? I would like to know before I go install the pto and all that work. If it’s broken I will not install the pto or driveshaft. And just leave it on for decoration. Thank you
 
Last edited:

Ajax MD

Well-known member
1,571
1,420
113
Location
Mayo, MD
Took the M813 for a maintenance jog yesterday.

I ended up stuck behind an elderly couple in a Mercedes SUV. They were poking along at speeds well under the speed limit. I watched traffic piling up in my rearview mirror and I'm dead certain that everyone was "blaming the ugly military truck at the head of the line." As we rounded a gentle curve in the road, I drifted intentionally close to the edge of the pavement so that everyone could see the vehicle in front of me. ;) Anyway, the truck ran and drove perfectly.

Oh- I installed a 30 amp, 24v/12v converter and a 12v cigarette outlet. I found a handy adapter with 2 USB ports and a female cigarette port. This will allow me to charge phones and USB devices and run a radio.
 

msgjd

Well-known member
Steel Soldiers Supporter
892
2,791
93
Location
upstate ny
As we rounded a gentle curve in the road, I drifted intentionally close to the edge of the pavement so that everyone could see the vehicle in front of me. ;)
done that many times ... but sometimes it is the big ugly military truck holding them up , thus I have never had any qualms whatsoever about using the breakdown, errr i mean "slowpoke lane" :LOL: to let others by when it's me.. Even back whenever we were in convoy long ago we would give the public an easier time leapfrogging us whenever it was safe for all parties involved .. And here i will insert my pet peeve, those who insist on staying tight to the yellow line under the limit and lets nobody by .. I have a saying they can go as slow as they want to but nobody has a right to intentionally hold up the rest of the world ;)
 
Last edited:

Wreckclues

Well-known member
Steel Soldiers Supporter
157
434
63
Location
Jefferson, Massachusetts
Installed an Arctic Radiator Cover sports bra on the old gal. Purchased from Memphis Supply on E-Bay. Appears to be new, although the instructions were photocopied from the manual.
Think I installed it correctly. Couldn't drill one part of the brush guard to install supplied attachment "loops" but there was enough strap to run through the guard and back out to the clamp. Swapped out two springs for a better fit.
Kit came with two 1/4 inch flat bars to replace a curved flat bar in the brush guard, I'm assuming for a flush fit against headlight glass frame. Will wait to install when my welding skills improve and I get a machine with more than 2 settings...Not Enough and Vaporize.

Arctic1a.jpgArctic1a.jpgArctic2a.jpgArctic3a.jpgArctic4a.jpg
 

US6x4

Well-known member
Steel Soldiers Supporter
1,182
2,067
113
Location
Wenatchee, WA
What part number was that listed under? My heater kit came with the M35 cover which doesn't quite fit and I've been wanting to get the 809 version.
 

Wreckclues

Well-known member
Steel Soldiers Supporter
157
434
63
Location
Jefferson, Massachusetts

hgun

Well-known member
Steel Soldiers Supporter
180
306
63
Location
Leechburg, PA
Good morning. I installed the In cab heater in the 818. But I can’t figure out what to power the switch too what number the TMs I looked at didn’t show it. And the old truck wires were cut. I saved what looks like a 2 way splitters from the old truck. I don’t think I can just pick one and hope for the best. I was hoping one of you guys could look at your truck and let me know thank you.
 

G744

Well-known member
Steel Soldiers Supporter
1,585
3,457
113
Location
Hidden Valley, Az
Mounted up a good 14.00-20 AT-2A on a new wheel, new tube & flap. 5 hours for that job, including modding the wheel.

The price one pays when you get a flat whilst going down the road at 20 MPH...
 

US6x4

Well-known member
Steel Soldiers Supporter
1,182
2,067
113
Location
Wenatchee, WA
Good morning. I installed the In cab heater in the 818. But I can’t figure out what to power the switch too what number the TMs I looked at didn’t show it. And the old truck wires were cut. I saved what looks like a 2 way splitters from the old truck. I don’t think I can just pick one and hope for the best. I was hoping one of you guys could look at your truck and let me know thank you.
I hooked into the inboard breaker using a splitter to get power back to the wire that originally was connected to the breaker and then the other wire went to the heater.

20240302_121847.jpg
 

kendelrio

Well-known member
Steel Soldiers Supporter
2,628
8,411
113
Location
Alexandria, La
Checked my MRAP light to find out why the fronts weren't working. Turns out the plug was almost out.... I found that out AFTER I had dismounted two of the front top ones.

The center top just buzzes, so on a other day ill pull it, open it and figure out why, so right now its the only inop one, whichbisnt a big deal as that is a HORRBILE place to mount it. (Just glares on the hood)

Took her in for her spring bath...

20240302_141220.jpg

20240302_142030.jpg

20240302_144507.jpg

20240302_144756.jpg

20240302_145413.jpg

And a photoshoot for MVOTM

20240302_163209.jpg

20240302_163222.jpg

20240302_163455.jpg

20240302_163442.jpg

And about 100 miles of driving to limber her up.
 

US6x4

Well-known member
Steel Soldiers Supporter
1,182
2,067
113
Location
Wenatchee, WA
@Wreckclues inspired me to finally pick up the correct grill cover for my truck. It's an NOS cover that has that lovely canvas smell we all enjoy! 3 of the upper anchor loops on the grill guard did not match up with the cover so I ground off the old screws, drilled and tapped new holes and relocated the loops to match since this cover now belongs to my truck. This is the first work I've done on the truck this year and it feels good to start checking off the projects again.

20240306_154641.jpg
 

US6x4

Well-known member
Steel Soldiers Supporter
1,182
2,067
113
Location
Wenatchee, WA
Today I tackled the plugged up grease pot on the clutch cross shaft as I worked my way through the Lube Order with my grease gun. Also got the winch side rollers to move and take grease. From the tranny forward is done.

20240310_132402.jpg
 

US6x4

Well-known member
Steel Soldiers Supporter
1,182
2,067
113
Location
Wenatchee, WA
...Kit came with two 1/4 inch flat bars to replace a curved flat bar in the brush guard, I'm assuming for a flush fit against headlight glass frame...
Do you happen to know what year your truck was built?

Mine's an '81 and it shows that at some point they revised the grill guard design to incorporate the straight flat bar:

20240315_160135.jpg
 

Wreckclues

Well-known member
Steel Soldiers Supporter
157
434
63
Location
Jefferson, Massachusetts
Installed a Dead Bolt lock on the drivers side door.
Went with a keyed Schlag which was caged into a couple of rack rails cut to fit. The holes in the rails lined up with the lock cylinder and angle iron mounts. Installed it into the bottom of the door which is about waist height on me.
Had to trim the knob off the assembly to make space for the lock cylinder, very tight. Routed the hole through the door with a pyramid drill to the shape of the key cylinder which is held in the door with a hose clamp. Over-cut the deadbolt hole to adjust fitment. I'll eventually replace the door frame step and fine tune the dead bolt fit, for now it's roughed in but works fine.

Lock1a.jpgLock2a.jpgLock3a.jpgLock4a.jpg
 
Top
AdBlock Detected

We get it, advertisements are annoying!

Sure, ad-blocking software does a great job at blocking ads, but it also blocks useful features of our website like our supporting vendors. Their ads help keep Steel Soldiers going. Please consider disabling your ad blockers for the site. Thanks!

I've Disabled AdBlock
No Thanks