• Steel Soldiers now has a few new forums, read more about it at: New Munitions Forums!

  • Microsoft MSN, Live, Hotmail, Outlook email users may not be receiving emails. We are working to resolve this issue. Please add support@steelsoldiers.com to your trusted contacts.


What have you done to your CUCV today/lately - Part 2

richingalveston

Well-known member
1,715
120
63
Location
galveston/Texas
I do not know the thread size but it is not the best location to install a sensor. in this location it is reading the temp coming directly from the radiator to the engine instead of the water leaving the engine.
 

Rutjes

Well-known member
Steel Soldiers Supporter
359
272
63
Location
Amersfoort, The Netherlands
I consider rear disc brakes one of the best improvements I have made on my M1028. It was the first thing I did when I got the truck in 2010. I bought my kit from TSM in Colorado. It included the 1978 Cadillac El Dorado calipers which have the emergency brake option. My truck will stop on a dime going forward or backward, wet or dry.

https://www.tsmmfg.net/general-motors-8-lug-14-bolt-semi-complete-rear-disc-brake-kit-2631e.html

While you are at it, you should also consider removing the rear proportioning valve. GM issued a Bulletin in 1988 to remove the thing. 88-320-5 dated August 3, 1988 should be available from any GM dealership. If not, let me know and I will see if I can find it. I removed mine and now I have equal brake pressure to front and back discs.
Thanks for that link. I did not come across that store yet. My favorites list is getting longer and longer... I really need to start organizing them...

I have read about removing the rear proportioning valve before and I already planned on doing so. When I do install rear discs I will replace the front proportioning valve with a disc/disc proportioning valve.
 

CivilEGR

Member
70
20
8
Location
Detroit, MI
Well the plug in the water pump is just a 3/8" hole and was an absolute PITA to get out.

However, a bigger PITA happened when I put the probe in. I put the proper adapter in the pump housing, then I screwed the probe into it. And when I did, the top of the adapter broke off. So now I have a broken brass adapter in the housing with no idea how to get it out. I'm afraid of drilling it out and getting all those filings into the pump. Any ideas?
 

cucvrus

Well-known member
11,263
9,554
113
Location
Jonestown Pennsylvania
Change the water pump and put the sending unit in the head where it should be. The temeparature of the coolant in the head is the best place to accuratly measure the coolant temperature. And the water pump will never warp or crack from being too hot. You have to think. Why did GM put the coolant sensor in the heads. Because it is the place that is affected first from high temperatures. Same as oil presure being at the farthest point from the oil pump. Good Luck. I agree about getting the drillings into the water pump. Doubt you will get it out with a large easy out but still worth a try. Use a torque wrench. Brass does not like a lot of torque.
 

True Knight

Active member
665
167
43
Location
San Pedro, CA
I was just thinking about the gear ratios. Will have to check that.

Ever since coming across disc brake conversion kits I have been kinda interested in them... Now even more so... What do you guys think about those? If I do get one it will be with e-brake option.
Just a heads up for the Cadillac calipers with the e-brake- the e-brake sucks. I ran those calipers for a few years. Swapped them out a number of times for new or rebuilt calipers, all had the same problems. The design of the e-brake is supposed to be self adjusting- when you apply the brakes while moving in reverse they are supposed to take out the slack. However it didn’t work well in the real world. The e-brake would either not adjust and be too loose to hold the truck at all, or self adjust too tight and the brakes would drag- and not evenly on both sides. I took them apart a few times and self adjusted them to the proper tightness but it wouldn’t last long before they were out of whack again. Eventually I got sick of the problems when one started dragging and got pretty hot while I was driving, causing the wheel seal to start leaking gear oil which turned into quite a bit of white smoke.

Doing some research it was a very common problem with those e-brake calipers and apparently even the newer truck calipers with integrated e-brakes had a lot of issues.

I went with normal Chevy front calipers and eventually will get a double caliper bracket so I can have a stand-alone e-brake caliper. (https://www.tsmmfg.net/mb-7-mechanical-caliper-mb-7.html)
 

richingalveston

Well-known member
1,715
120
63
Location
galveston/Texas
I have the TSM transfer case brake on my 1009 and it does not work very well. It is tough to get the adjustment right and the assembly rattles pretty bad. I think I will change to the duel calipers like you have sugested in the near future.
 

mike634

Member
Steel Soldiers Supporter
91
33
18
Location
Sussex New Jersey
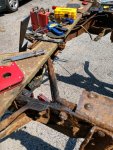
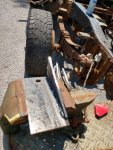
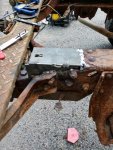
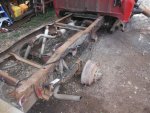
Got to work doing some frame repairs and knocking the rust off the frame. After a coat of KBS coating it should be back on the road.

Also found my welding skills are not what the used to be.

frame1.jpgframe 2.jpgframe 3.jpg
 

n8roro

Member
141
5
18
Location
IL
I installed new seat foams and upholstery on the front seats. It was not as hard as I was expecting it to be. The wost part was finding the correct parts to order, and building the confidence to tear the old ones apart. There is a lot more support now, and I sit a couple inches higher. No more ripped seats!
 

Another Ahab

Well-known member
17,815
4,139
113
Location
Alexandria, VA
I installed new seat foams and upholstery on the front seats. It was not as hard as I was expecting it to be. The wost part was finding the correct parts to order, and building the confidence to tear the old ones apart. There is a lot more support now, and I sit a couple inches higher. No more ripped seats!
I hear you, n8roro!

The scary part of any project, the "leap of faith", the moment you get underway, hoping that it all works out like it's supposed to.


AAAA.jpeg
 
Last edited:

cucvrus

Well-known member
11,263
9,554
113
Location
Jonestown Pennsylvania

Tinstar

Super Moderator
Super Moderator
Steel Soldiers Supporter
4,254
1,687
113
Location
Edmond, Oklahoma
E1638C63-DB7B-41CA-AA72-D547F79766FD.jpg6E37C3CC-664B-496A-9E37-862AF6573D93.jpgFD789B15-D11A-4987-ACE9-6E29167F7627.jpg

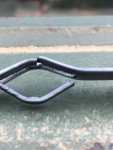
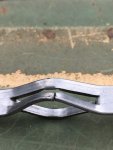
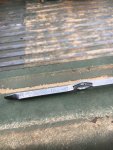
Broke my transmission dipstick or just now noticed it busted.
I think I would have noticed this earlier.

cucvrus I sent you a PM
 

Recovry4x4

LLM/Member 785
Super Moderator
Steel Soldiers Supporter
34,014
1,813
113
Location
GA Mountains
Well, I finally brought my SECM back home. It's been at church for 4 months waiting on me to buy batteries. It's home and running great.
 

Another Ahab

Well-known member
17,815
4,139
113
Location
Alexandria, VA
Just proves anything on a CUCV can and will break.
ANYTHING with moving parts is going to need them replaced sooner or later.

Might just be a story, but apparently Henry Ford testified to the U.S. Congress way back that if they'd grant him a nationwide monopoly on automotive service, then he'd GIVE a car (at no cost) to any American that wanted one.

The idea being, that he knew where the BIG money in the automobile really was.

Not sure it's a true story, but it's a story. The End
 
Last edited:

Assel

Member
197
7
16
Location
Germany Schwarzwald-Baar
some time gone since the last post...But the CUCV is still doing well, today the M1009 got some service , engine oil & filter, greasing driveshafts and joints and I decided its time to fix the t-case output seal..sat in there like welded, 15 minute job took an hour atleast o_O anyone ever experienced that? I almost wanted to torch it out :shock: IMG_20190808_180922.jpgIMG_20190808_155716.jpgIMG_20190808_142844.jpg
 

cucvrus

Well-known member
11,263
9,554
113
Location
Jonestown Pennsylvania
some time gone since the last post...But the CUCV is still doing well, today the M1009 got some service , engine oil & filter, greasing driveshafts and joints and I decided its time to fix the t-case output seal..sat in there like welded, 15 minute job took an hour atleast o_O anyone ever experienced that? I almost wanted to torch it out :shock: View attachment 772776View attachment 772775View attachment 772774
Very nice. I have had the rear output seal kick me in the butt a few times. Now I just use a vise grips clamp it on the flange and strike the vise grips with the hammer. Done. That easy. Looks good under there. I would expect nothing less.
 
Top
AdBlock Detected

We get it, advertisements are annoying!

Sure, ad-blocking software does a great job at blocking ads, but it also blocks useful features of our website like our supporting vendors. Their ads help keep Steel Soldiers going. Please consider disabling your ad blockers for the site. Thanks!

I've Disabled AdBlock
No Thanks