-
Steel Soldiers now has a few new forums, read more about it at: New Munitions Forums!
What have you done to your CUCV today/lately - Part 2
- Thread starter Warthog
- Start date

More options
Who Replied?chevymike
Well-known member
- 613
- 485
- 63
- Location
- San Diego, CA
Great! Thanks for the info.Group 31 batteries, I didn't extend the tray. I just let the batteries overhang a bit.
chevymike
Well-known member
- 613
- 485
- 63
- Location
- San Diego, CA
So far fairly simple but getting to those rear ports is a PITA. I was literally laying on top of the engine.Chevymike, looking forward to doing the same Paradox by Design upgrade, have a Humvee crossover and already had the radiator re-cored a while back. Really waiting on dryer weather to do the work, do appreciate your photos as it lets me visually walk thru the install.
A couple notes for ya. The driver rear sender, if you remove the sender with the adapter bushing from the plate, it will screw right into one of the upper ports on the new crossover. Then just extend the wires for that plug.
The bypass hose (that connected the crossover to the pump) fitting is 1/2" NPT but the port on the Humvee crossover is 3/4" NPT. You will need an adapter bushing for that. I ordered this one,, https://www.amazon.com/gp/product/B07D2GZ6TC/ref=ppx_yo_dt_b_asin_title_o01_s01?ie=UTF8&psc=1
Because of the ports on top of that crossover, on the driver side, the hard line for the injector return line will interfere, you will need to tweak it. I removed the nut holding the clamp on the driver valve cover, which allowed me to move it some. I will make a tab that will allow me to bolt that clamp back up.
I'll post pics once I get everything back together.
- 1,725
- 1,827
- 113
- Location
- Nova Laboratories, WA
Got released. Staying at a friend's place for a little bit.
Hagerty, which is my insurance for the vehicle, has been amazing. I paid to keep my truck that's part of my insurance policy, and they're going to tow it from Vancouver to Tacoma.
I was able to go to the tow yard and find my glasses and my wallet which came off during the accident.
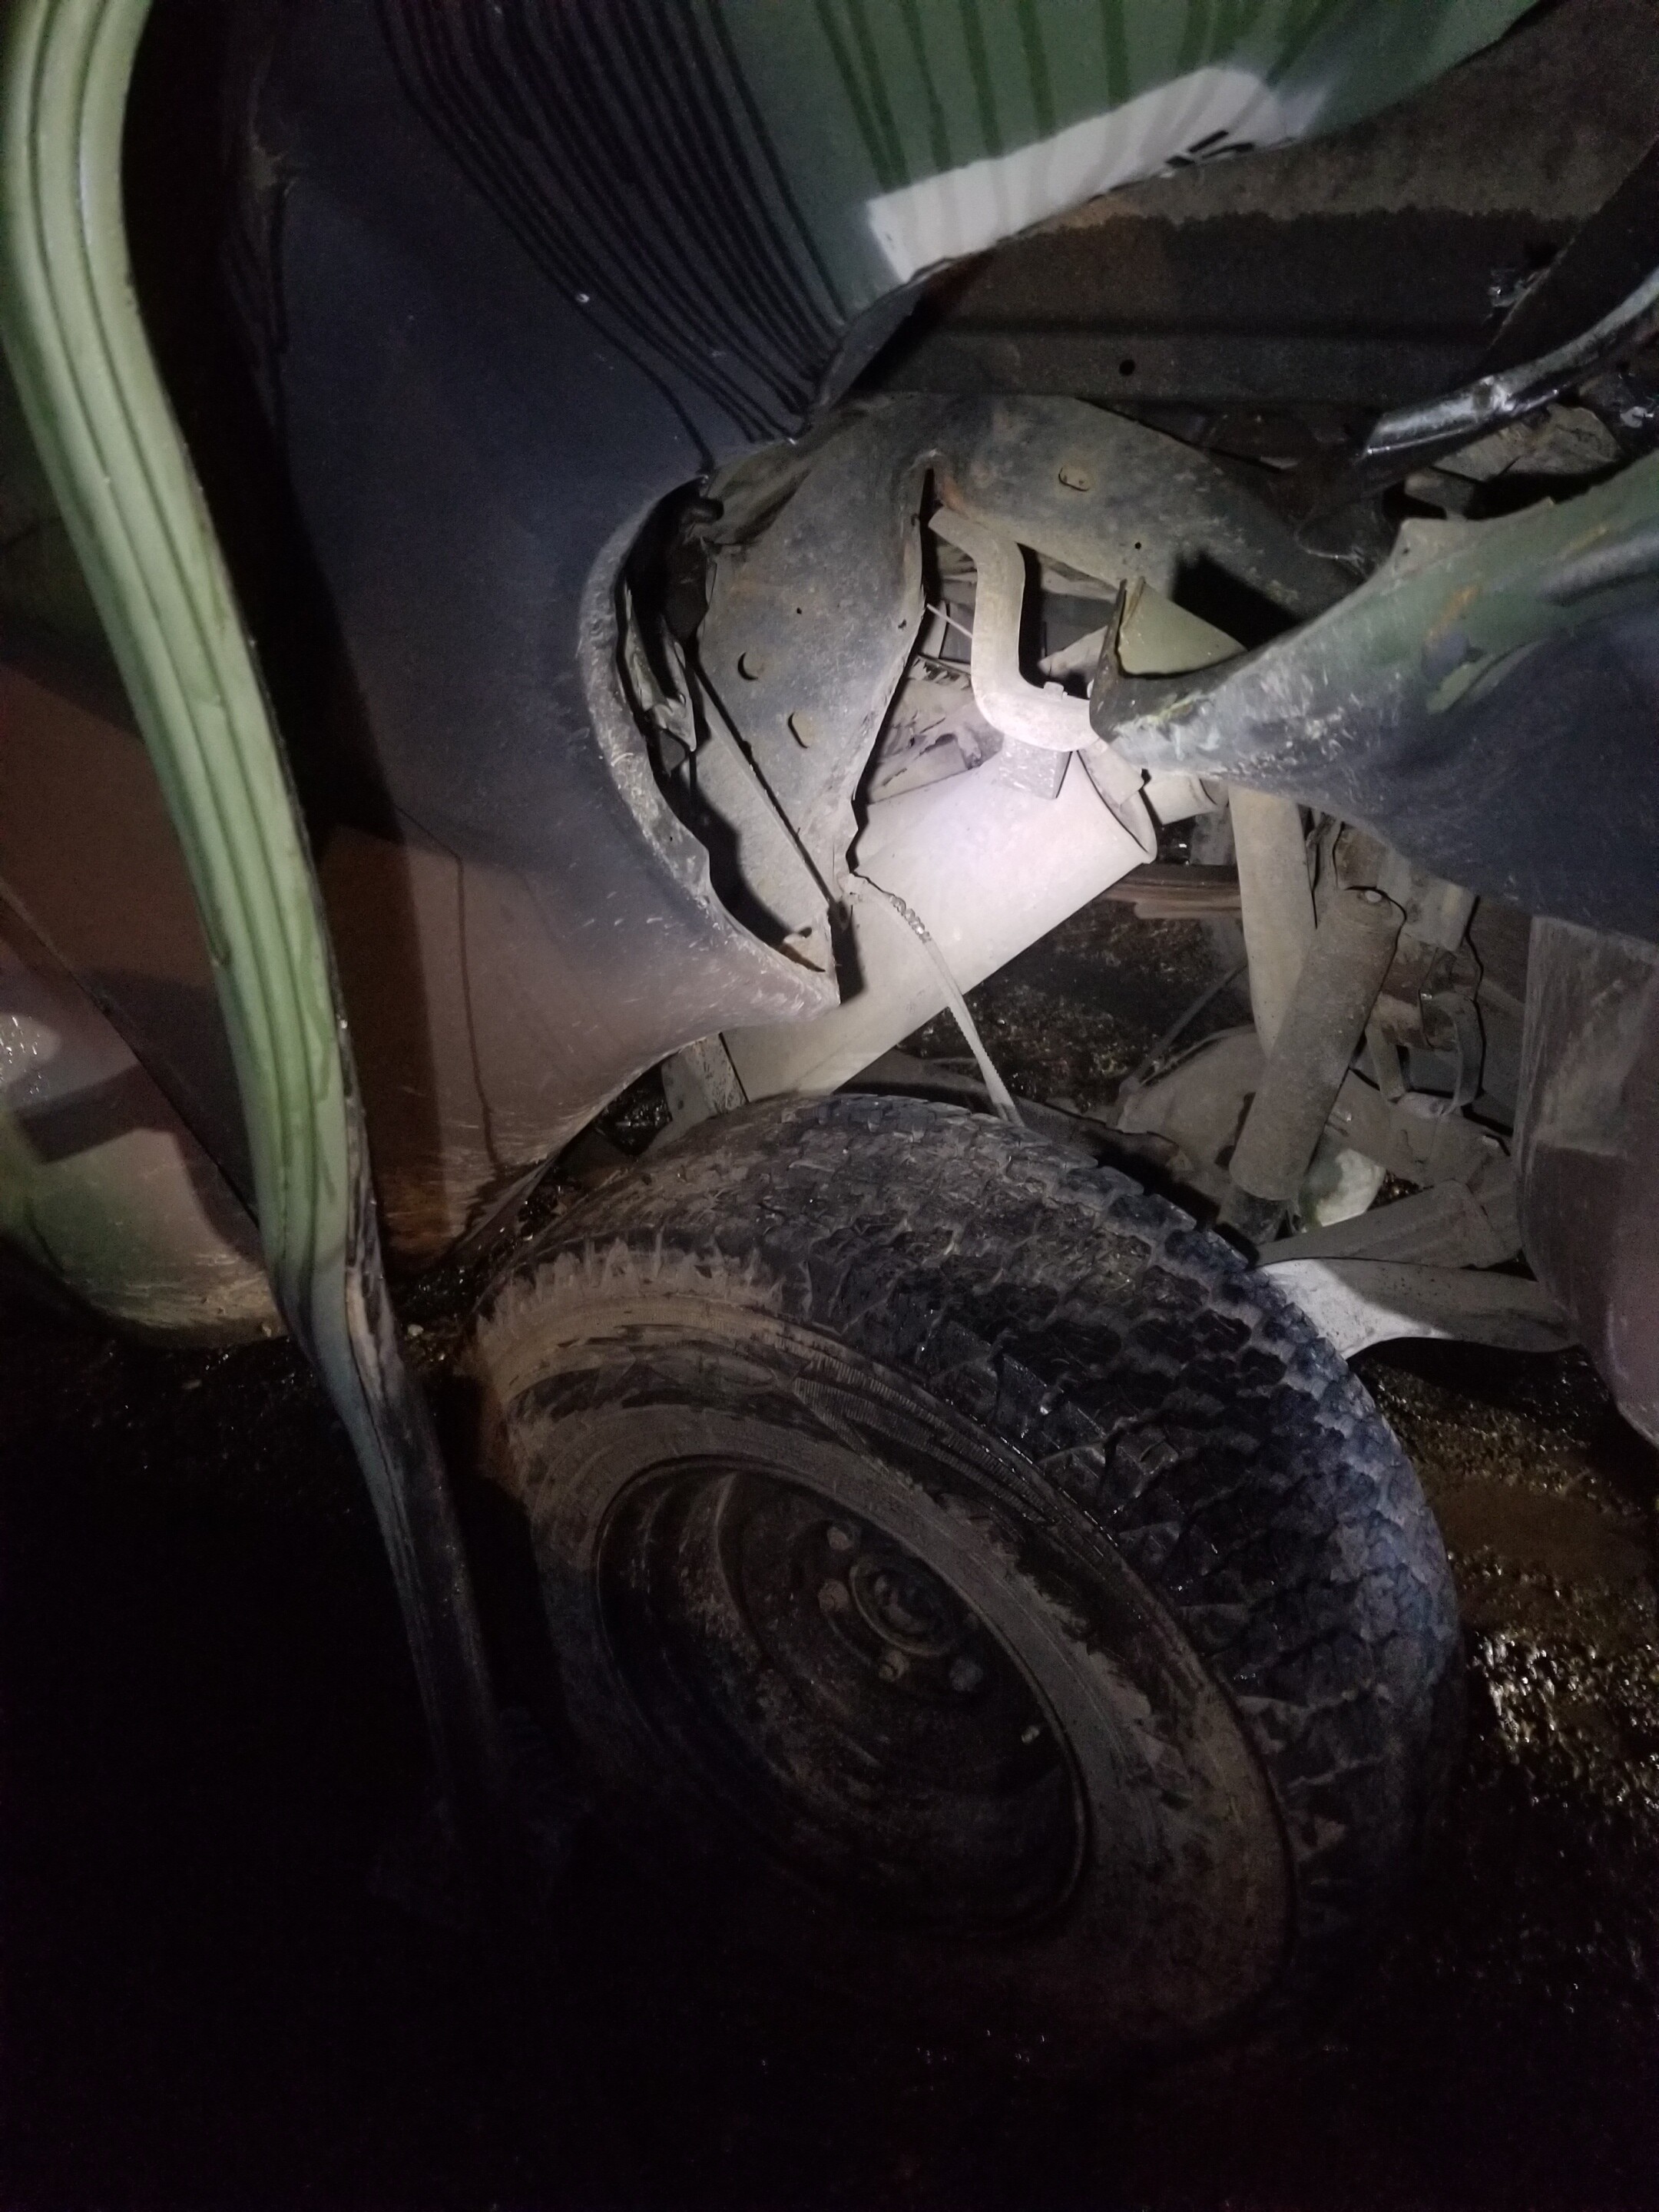
The rear axle was pushed through the bottom of the vehicle and separated the frame from the body. The frame where the axle is attached was pushed a couple feet forward and up from its original position.
Now I understand why it took 40 minutes to extricate me. I also understand where I got my fractured ribs from. Look at the steering wheel.


Hagerty, which is my insurance for the vehicle, has been amazing. I paid to keep my truck that's part of my insurance policy, and they're going to tow it from Vancouver to Tacoma.
I was able to go to the tow yard and find my glasses and my wallet which came off during the accident.
The rear axle was pushed through the bottom of the vehicle and separated the frame from the body. The frame where the axle is attached was pushed a couple feet forward and up from its original position.
Now I understand why it took 40 minutes to extricate me. I also understand where I got my fractured ribs from. Look at the steering wheel.
chevymike
Well-known member
- 613
- 485
- 63
- Location
- San Diego, CA
Holy crap!!! You are lucky to be alive after looking at those pics.
- 134
- 15
- 18
- Location
- Battle Ground/WA
I'm in Vancouver WA if I can be of any assistance , just let me know.Got released. Staying at a friend's place for a little bit.
Hagerty, which is my insurance for the vehicle, has been amazing. I paid to keep my truck that's part of my insurance policy, and they're going to tow it from Vancouver to Tacoma.
I was able to go to the tow yard and find my glasses and my wallet which came off during the accident.
The rear axle was pushed through the bottom of the vehicle and separated the frame from the body. The frame where the axle is attached was pushed a couple feet forward and up from its original position.
Now I understand why it took 40 minutes to extricate me. I also understand where I got my fractured ribs from. Look at the steering wheel.
- 889
- 708
- 93
- Location
- Cooperstown NY
Damn LuckyGot released. Staying at a friend's place for a little bit.
Hagerty, which is my insurance for the vehicle, has been amazing. I paid to keep my truck that's part of my insurance policy, and they're going to tow it from Vancouver to Tacoma.
I was able to go to the tow yard and find my glasses and my wallet which came off during the accident.
The rear axle was pushed through the bottom of the vehicle and separated the frame from the body. The frame where the axle is attached was pushed a couple feet forward and up from its original position.
Now I understand why it took 40 minutes to extricate me. I also understand where I got my fractured ribs from. Look at the steering wheel.
MarcusOReallyus
Well-known member
- 4,524
- 820
- 113
- Location
- Virginia
a Comcast/xfinity truck/van according to the trooper
Hey, I call foul! This thread is about what YOU did to your CUCV! No what Comcast did to it!!!

Wow. I realize he's got some mass on you, but with all that damage, he wasn't doing 35 mph, that's for sure.
Sad to see. Hope you heal fast. You'll be hurting for a while. Look into collagen. I get a brand called, "Zint" on Amazon. Really helped with healing when I T-boned a Suburban almost 2 years ago.
- 244
- 69
- 28
- Location
- San Antonio, TX
Installed off-road design's crossover steering (including new steering box) and kingpin spring eliminators.
Steering previously was super loose and crooked. (Think 80s truck driver movies)
These kits fixed it right up. It's a world of difference. Very little slop now on the steering, and it's very firm, can't move the steering wheel with just a finger anymore.
Had bad deathwobble, looked at the kingpin springs and one of them was completely destroyed. Glad that's fixed.
Can feel the road much more through the steering wheel. Might need a new steering damper. That's probably next on the list. Hydro assist steering for next black Friday maybe
It all took about 2 days in the diy garage here on post. Glad I did it there. Lots of weird tools it turned out I needed: 11mm 12-point socket, side grip wrenches (forgot the name but grabs the sides of the nut instead of the tips), giant vise, pickle fork (thought he was yanking my chain on this name), giant 3/4 drive sockets, other odd socket sizes and different size screws attaching the steering box to the steering shaft - thanks GI-bubba had me freaking out over lost screws for a while.
Only complaints really are that some of ORDs parts came as bare unfinished metal. 1 day after install it's already rusting. And not really a complaint but only way drag link would fit without the engine support getting in the way is the reverse way from the directions.
Gonna take a while for this new steering to feel like it's normal. Too used to the crappiness from before.
Sent from my LM-G710 using Tapatalk
Steering previously was super loose and crooked. (Think 80s truck driver movies)
These kits fixed it right up. It's a world of difference. Very little slop now on the steering, and it's very firm, can't move the steering wheel with just a finger anymore.
Had bad deathwobble, looked at the kingpin springs and one of them was completely destroyed. Glad that's fixed.
Can feel the road much more through the steering wheel. Might need a new steering damper. That's probably next on the list. Hydro assist steering for next black Friday maybe

It all took about 2 days in the diy garage here on post. Glad I did it there. Lots of weird tools it turned out I needed: 11mm 12-point socket, side grip wrenches (forgot the name but grabs the sides of the nut instead of the tips), giant vise, pickle fork (thought he was yanking my chain on this name), giant 3/4 drive sockets, other odd socket sizes and different size screws attaching the steering box to the steering shaft - thanks GI-bubba had me freaking out over lost screws for a while.
Only complaints really are that some of ORDs parts came as bare unfinished metal. 1 day after install it's already rusting. And not really a complaint but only way drag link would fit without the engine support getting in the way is the reverse way from the directions.
Gonna take a while for this new steering to feel like it's normal. Too used to the crappiness from before.
Sent from my LM-G710 using Tapatalk
Last edited:
rustystud
Well-known member
- 9,402
- 3,394
- 113
- Location
- Woodinville, Washington
I bought the "King Pin Spring" eliminator kit too. Just haven't installed it yet. I think most of theInstalled off-road design's crossover steering (including new steering box) and kingpin spring eliminators.
Steering previously was super loose and crooked. (Think 80s truck driver movies)
These kits fixed it right up. It's a world of difference. Very little slop now on the steering, and it's very firm, can't move the steering wheel with just a finger anymore.
Had bad deathwobble, looked at the kingpin springs and one of them was completely destroyed. Glad that's fixed.
Can feel the road much more through the steering wheel. Might need a new steering damper. That's probably next on the list. Hydro assist steering for next black Friday maybe
It all took about 2 days in the diy garage here on post. Glad I did it there. Lots of weird tools it turned out I needed: 11mm 12-point socket, side grip wrenches (forgot the name but grabs the sides of the nut instead of the tips), giant vise, pickle fork (thought he was yanking my chain on this name), giant 3/4 drive sockets, other odd socket sizes and different size screws attaching the steering box to the steering shaft - thanks GI-bubba had me freaking out over lost screws for a while.
Only complaints really are that some of ORDs parts came as bare unfinished metal. 1 day after install it's already rusting. And not really a complaint but only way drag link would fit without the engine support getting in the way is the reverse way from the directions.
Gonna take a while for this new steering to feel like it's normal. Too used to the crappiness from before.
Sent from my LM-G710 using Tapatalk
"Death Wobbles" come from this defective part.
riggermedic
Active member
- 175
- 31
- 28
- Location
- Phoenix AZ
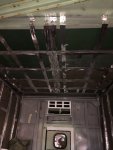
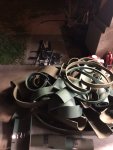
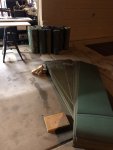
What do you do with 65 used PT mats? Insulate your M1010 of course. Walls are 3 thick, roof is 6 thick for the center 40 inches, 5 thick for an additional 10 inches per side, and 3 thick for the remaining 8 inches. I wrapped a Mylar blanket around the middle layers just for giggles. All of this over a layer of general dynamics “thermal insulation panels” on the inside of the outer skin. I have no idea what the R value is but it should be pretty good. Next is to put some foam or rubber on the face of the z channel studs and figure out what to use for the inner skin.


Attachments
-
 588.5 KB Views: 31
 -
 599 KB Views: 28
 -
 558.9 KB Views: 28


rustystud
Well-known member
- 9,402
- 3,394
- 113
- Location
- Woodinville, Washington
Remove the sending unit from the fuel tank. It probably has a ton of corrosion on the sliding contact. Usually GM tank sending units only last ten years tops before acting up. I just replace them.Cleaned and wire brushed the factory ground strap from the fuel tank sending unit to the frame and replaced the ring terminal at the sending unit. Fuel gauge still reading past full. Will continue testing tomorrow.View attachment 787152View attachment 787153
Kaiser67M715
Member
- 699
- 26
- 18
- Location
- NH
Where's the pink sender wire? Fuel gauge reading past full could mean a break in the pink wire, ground it to chassis and see if gauge reads empty. If it does, then the issue is sender, if not, could be faulty fuel gauge.Cleaned and wire brushed the factory ground strap from the fuel tank sending unit to the frame and replaced the ring terminal at the sending unit. Fuel gauge still reading past full. Will continue testing tomorrow.View attachment 787152View attachment 787153
Sent from my SM-S920L using Tapatalk
cucvrus
Well-known member
- 11,478
- 10,506
- 113
- Location
- Jonestown Pennsylvania
I would have to agree with Rustystud. That sending unit looks a bit rough. Clean the contact for the pink wire also. But dropping that tank and doing a through cleaning is going to be a major task. Can be done but cleaning and painting/coating as you go is the right way to do it. Good Luck. Be Safe.Cleaned and wire brushed the factory ground strap from the fuel tank sending unit to the frame and replaced the ring terminal at the sending unit. Fuel gauge still reading past full. Will continue testing tomorrow.View attachment 787152View attachment 787153
- 134
- 15
- 18
- Location
- Battle Ground/WA
Russm, is the vehicle you installed the crossover steering on "lifted"? I have been looking at that and can't determine if it needs to be lifted or not to install it.Installed off-road design's crossover steering (including new steering box) and kingpin spring eliminators.
Steering previously was super loose and crooked. (Think 80s truck driver movies)
These kits fixed it right up. It's a world of difference. Very little slop now on the steering, and it's very firm, can't move the steering wheel with just a finger anymore.
Had bad deathwobble, looked at the kingpin springs and one of them was completely destroyed. Glad that's fixed.
Can feel the road much more through the steering wheel. Might need a new steering damper. That's probably next on the list. Hydro assist steering for next black Friday maybe
It all took about 2 days in the diy garage here on post. Glad I did it there. Lots of weird tools it turned out I needed: 11mm 12-point socket, side grip wrenches (forgot the name but grabs the sides of the nut instead of the tips), giant vise, pickle fork (thought he was yanking my chain on this name), giant 3/4 drive sockets, other odd socket sizes and different size screws attaching the steering box to the steering shaft - thanks GI-bubba had me freaking out over lost screws for a while.
Only complaints really are that some of ORDs parts came as bare unfinished metal. 1 day after install it's already rusting. And not really a complaint but only way drag link would fit without the engine support getting in the way is the reverse way from the directions.
Gonna take a while for this new steering to feel like it's normal. Too used to the crappiness from before.
Sent from my LM-G710 using Tapatalk
- 244
- 69
- 28
- Location
- San Antonio, TX
@emeralcove
It is lifted, 4" on the front and 5" on the back.
Offroaddesign sells the kit configured for any amount of lift (or none). If you have specific questions to their kit you can call them, they'll talk you through it.
Sent from my LM-G710 using Tapatalk
It is lifted, 4" on the front and 5" on the back.
Offroaddesign sells the kit configured for any amount of lift (or none). If you have specific questions to their kit you can call them, they'll talk you through it.
Sent from my LM-G710 using Tapatalk
Kaiser67M715
Member
- 699
- 26
- 18
- Location
- NH
Crossover steering requires at least 2 inches of lift, other wise there is interference with the frame and engine crossmembers.Russm, is the vehicle you installed the crossover steering on "lifted"? I have been looking at that and can't determine if it needs to be lifted or not to install it.
Sent from my SM-S920L using Tapatalk
chevymike
Well-known member
- 613
- 485
- 63
- Location
- San Diego, CA
Been getting some more work done on the M1010. Finished up the Paradox kit. Got some adapters to use my new water temp sender and the crossover bypass port to the water pump. Because the angle of the Humvee bypass port is different than the stock crossover, I found I needed to use a molded 45* hose. Also swapping the harmonic balancer to a Fluidampr unit, I got the old one removed. Glad I did since the rubber ring has split and is just starting to work its way out. Waiting on an installer that has the 16x1.5mm crank adapter to show up. Also swapped out the glow plug relay.


Grounded the pink fuel tank lead with the ignition on and the gauge read empty, which confirms the bad sending unit. Decided to look into the non working votlmeter while I was doing electrical work today. Took the voltmeter out and hooked it to the battery with some alligator clips and got no needle movement so I'll be getting a new one soon.
- 114,396members
- 167,283threads
- 2,354,850posts
- 4,074online users