• Steel Soldiers now has a few new forums, read more about it at: New Munitions Forums!

  • Microsoft MSN, Live, Hotmail, Outlook email users may not be receiving emails. We are working to resolve this issue. Please add support@steelsoldiers.com to your trusted contacts.

What have you done to your CUCV today/lately - Part 2

83k30

Member
63
38
18
Location
Jax, Fl
I thought the volt meters only got their grounding through the steel mounting bracket to the back side of the dash plate.
I believe the relay is triggered by ignition on, and ground then completes through the harness at the six position ground terminal.

Fixed my gen2 light and voltmeter by tracing the ignition circuit that was lacking voltage at both relays. They are powered by a .8 pink and black wire, 139F and 139G with the key in the on position. No power at the 4 terminals at the fuse block either. And no fuse where there should have been a 20amp.

All the head scratching and it was something simple.
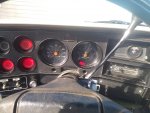
IMG_20200110_095254982.jpg

The bright new yellow 20 amp was MIA so the ignition power was not bridging over to the 4 terminals on the left side, and not tripping the relay at Gen2 or the voltmeter.
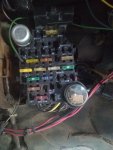
IMG_20200110_095352618.jpg

With all the celebrating, I took it out for a drive only to find my Gen2 light flashing/flickering. Turning on my 24v LEDs make the flashing stop. More electrical work yet to do.
 

german m1008

Well-known member
Steel Soldiers Supporter
890
1,332
93
Location
Rhein-Main Area, Germany
I believe the relay is triggered by ignition on, and ground then completes through the harness at the six position ground terminal.

Fixed my gen2 light and voltmeter by tracing the ignition circuit that was lacking voltage at both relays. They are powered by a .8 pink and black wire, 139F and 139G with the key in the on position. No power at the 4 terminals at the fuse block either. And no fuse where there should have been a 20amp.

All the head scratching and it was something simple.

View attachment 787637

The bright new yellow 20 amp was MIA so the ignition power was not bridging over to the 4 terminals on the left side, and not tripping the relay at Gen2 or the voltmeter.
View attachment 787638

With all the celebrating, I took it out for a drive only to find my Gen2 light flashing/flickering. Turning on my 24v LEDs make the flashing stop. More electrical work yet to do.
there was something ....... GEN2 ...... the circuit does not work with LED, if I remember correctly.
All lights are 12V.
 

Russm

Active member
244
69
28
Location
Ft. Wainwright, AK
Don't think I posted this yet. But made a diy control/gauge cluster a few months ago. Mostly to have the tachometer in my line of sight while driving.
It's a 1/8" aluminum sheetmounted with some fat washers through the dashboard.
Its labeled so wifey can drive the truck properly when she needs to.


Sent from my LM-G710 using Tapatalk
 

chevymike

Well-known member
603
468
63
Location
San Diego, CA
More work yesterday. My balancer installer came in. I actually used to install the new front seal. Got the balancer installed but still need to torque it. Got the re-cored radiator back and it's nice. Got it installed and then new hoses. I had picked up a NOS lower M1010 specific hose. It has the correct inside spring too. Need to pick up some hose clamps, then fill it up with ELC coolant.

0112200956_HDR.jpg

0112201016_HDR.jpg

0112201124a_HDR.jpg

0109201620.jpg

0112201440_HDR.jpg

0112201509_HDR.jpg

0112201509.jpg

0112201622.jpg

0112201622a.jpg
 

cucvrus

Well-known member
11,474
10,441
113
Location
Jonestown Pennsylvania
I see lots or opportunity for cleaning and painting on that CUCV M1010. I would start by getting the battery boxes attached properly and the correct batteries. Them ratchet straps still have all the weight riding on the inner fenders. Tring to help you out and I see the inner fenders and battery boxes all tore up many times. Good Luck. Be Safe. Just a helpful hint.
 

johnjr

Member
33
2
8
Location
hammonton n.j.
Thanks CUCVRS for your tip about the 10 amp fuse at the bottom of the fuse panel! I have owned my blazer for about 10 years and the gen 1&2 lights nor the voltmeter ever worked. I read your tip the other day, and went out in the garage and looked and no fuse. Put one in and both lights and gauge work now! I was like a kid on Christmas! Thanks again.
 

83k30

Member
63
38
18
Location
Jax, Fl
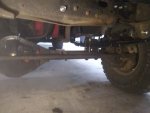
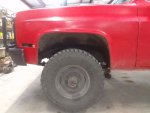
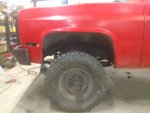
Installed ORD steering brace, 2 inch Tuff Country springs, ORD greasable shackles/bushings. Still need brake lines and shocks. Truck had a two inch sag on the driver's side before installing the new suspension. Upon disassembly I found the driver's side center pin broke, and the bushings worn considerably. The new lift and relocating my toolbox to the passenger side leveled out the truck within a half inch, so I'm happy with it.

Suspension installed
IMG_20200117_201645841.jpg

Driver side before
IMG_20200114_164429648.jpg

Driver side after
IMG_20200117_201459659.jpg

Steering brace
IMG_20200115_195044704.jpg
 

chevymike

Well-known member
603
468
63
Location
San Diego, CA
Spent time yesterday modifying the alternator adjusting bracket, since the "Plan B" alts are shaped a little different than factory. You could not rotate them all the way inwards, which made trying to get a belt that was short enough to not max out the adjustment but still be able to go over the pulleys almost impossible. I modified the bracket to extend the adjustment slots and then beefed them up by adding a second stiffing brace. Just need to finish a little clean up and paint it. Should work out well.

0120201133.jpg

0120201221~2.jpg

0120201558.jpg

0120201559.jpg

0120201626.jpg

0120201627_HDR.jpg
 

charlesmann

Well-known member
700
713
93
Location
Temple, Tx
View attachment 736521View attachment 736520

This is the stuff I use.
Benefits of being in aviation.
Creeps extremely well into all the nooks and crannies.
Sprayed it all inside CUCV cab floor and corners and just refreshed a few months ago.
I use it on my M101A2 trailers and pretty much everything.
Never worry about rust again, unless it comes from bottom to top.
Stops and prevents corrosion and repels moisture.

Expensive but cheap insurance.
Each spray treatment last about two years.
$15-18 per spray can.

I know there are plenty of other products that do roughly same thing.
It’s what I use since I have access to it.
that stuff is the cats meow.
its also good for electrical connectors. i just ran out and need to get some more.
 

gajol

New member
16
4
3
Location
Oberpleichfeld/Germany
My fuel gauge only shows half full when the tank is full. I have tested the fuel gauge 0 - 90 Ohm, works. I have renewed the mass.
At the fuel gauge the 0 - 90 Ohm also arrive, think that the fuel gauge is defective and look now for a new one.
 

chevymike

Well-known member
603
468
63
Location
San Diego, CA
My fuel gauge only shows half full when the tank is full. I have tested the fuel gauge 0 - 90 Ohm, works. I have renewed the mass.
At the fuel gauge the 0 - 90 Ohm also arrive, think that the fuel gauge is defective and look now for a new one.
Many times fuel gauge reading incorrectly but the sender ohms out okay can be traced to bad/missing/dirty grounds. Because fuel gauge relies on the resistance, if you have a bad/dirty ground, it will cause more resistance and hence read incorrectly. You should be able to verify the gauge is sweeping fully by removing the sender wire with the key on and it should sweep fully one way. Then ground the sending wire and it should sweep fully the other way.
 

gajol

New member
16
4
3
Location
Oberpleichfeld/Germany
Many times fuel gauge reading incorrectly but the sender ohms out okay can be traced to bad/missing/dirty grounds. Because fuel gauge relies on the resistance, if you have a bad/dirty ground, it will cause more resistance and hence read incorrectly. You should be able to verify the gauge is sweeping fully by removing the sender wire with the key on and it should sweep fully one way. Then ground the sending wire and it should sweep fully the other way.
Yeah, that works. When I disconnect the cable from the sender the display shows full, when I connect this cable to ground the display shows empty.
Thanks for the advice.
 

83k30

Member
63
38
18
Location
Jax, Fl
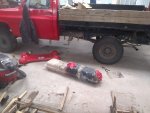
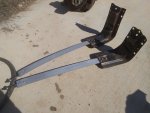
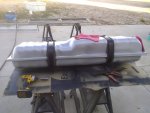
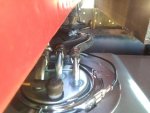
Installed a new fuel tank, staps and sending unit/lines. The fuel tank frame brackets were in poor shape, so cleaned them up with new hardware and fresh paint. Drove the truck out of the shop and when I later went to fire the truck up for fuel, the starter wouldn't engage. Pulled starter and found the stud that the bracket is attached to was completely loose! Cleaned the housing and tightened the bolt/stud and proceeded to test the starter out of the truck. All was well and reinstalled it today. Truck runs good again

IMG_20200127_115208158.jpg
 

Attachments

Sharecropper

Well-known member
Steel Soldiers Supporter
1,836
989
113
Location
Paris KY
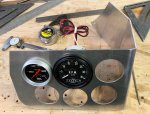
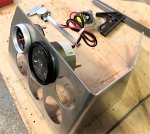
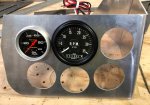
Built a mock-up of my new gauge cluster for my M1028. Everything fit as designed, so actual metal fabrication will start next. All gauges will be mechanical - Oil Pressure, Water Temperature, Transmission Temperature, Fuel Pressure, and Oil Temperature. In the middle will be a brand new HMMWV 3500 rpm Tachometer. The factory pop-down ashtray and housing will be removed and all wiring and thermocouples will traverse from the rear of the gauge cluster through the hole where the ashtray was. I am going to do away with the OEM transfer case shifter/linkage and replace it with a custom cable shifter mounted on the driver's side of the tunnel closer and more convenient. The cable shifter will operate the new NP241 transfer case I just ordered from Mark Bendler at Kodiak Trucks. The flat space on top of the gauge cluster will be where my iPhone holder will go. USB ports and switches for the heated seats will be on the side facing the passenger seat.

View attachment 787331
Guage cluster is coming together. Got the shape drawn in Autocad and sent it to the water jet guy. Then got the 1/8" aluminum shape cut and bent to the correct angles on my finger brake. Test-fit the HMMWV tach and 1 gauge to make sure everything was going to fit. Next, will fabricate the dash brackets and test-install the cluster to make sure it fits. One step at a time.

IMG_3547.jpgIMG_3549.jpgIMG_3551.jpgIMG_3550.jpg
 

Mainsail

Well-known member
Steel Soldiers Supporter
1,512
1,696
113
Location
Puget Sound, WA
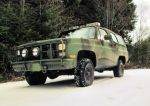
The second of the two landing lights burned out, so I replaced it with my last spare.

I bought them on here, forget who was selling them. They'd been on the truck for almost 10 years now- use them sporadically. The first one burned out about a month ago, so the timing was interesting.M1009Snow01a.png
 
Top
AdBlock Detected

We get it, advertisements are annoying!

Sure, ad-blocking software does a great job at blocking ads, but it also blocks useful features of our website like our supporting vendors. Their ads help keep Steel Soldiers going. Please consider disabling your ad blockers for the site. Thanks!

I've Disabled AdBlock
No Thanks