• Steel Soldiers now has a few new forums, read more about it at: New Munitions Forums!

  • Microsoft MSN, Live, Hotmail, Outlook email users may not be receiving emails. We are working to resolve this issue. Please add support@steelsoldiers.com to your trusted contacts.

What have you done to your HMMWV today/lately

NormB

Well-known member
1,220
72
48
Location
Cloverly,MD
The cable in the casing is probably lacking lube. Doorman makes an adapter that you screw on the bottom of the cable and pump a few rounds of chassis grease through the adapter with a zerk fitting. Also the universal speedometer cable kits are cheap to just replace the cable if the outer casing is good.
You measure the length, cut and swag on the new square tip. One side of the cable is already squared.

Because I like "gadgets", I looked for the Dorman part you mentioned. I found a PATENT for such a device with drawings I thought was interesting. Did the usual websearches, amazon's jungle search engine, epay, even the dorman site itself. Nada. Nada darned thing.

[edit: THIS, on the evil auction site, [FONT=&quot]322613726483 [/FONT]MAN did that take some sleuthing]

Just out of curiosity, do you have a link somewhere for the part? a little less pricey? Temporary fitting even?

Inquiring minds and all that.[FONT=&quot]322613726483[/FONT]
 
Last edited:
Bravojmc

New member
512
5
0
Location
Palisade, Colorado
Looks good. The NSN stamped on the bracket is for the HMMWV pioneer tool tray with the extensions and all that. Yours doesn't have them. Did you cut them off or is it a different kit/NSN?

I picked up a Deuce tool tray, which should bolt up if I make some brackets, though it will be crowding things back there.

Bulldogger
Yes I started out with that kit. The angle brackets just unbolt and then you can bolt the latches right into the same spot. And yes I did start out with a pioneer kit but cut all the flimsy pieces off of it and reinforced the main tray. Then I attached the Smitty built axe and shovel mount to the reinforced tray.
 

juanprado

Well-known member
Steel Soldiers Supporter
5,635
2,953
113
Location
Metairie/La (N'awlins)
Because I like "gadgets", I looked for the Dorman part you mentioned. I found a PATENT for such a device with drawings I thought was interesting. Did the usual websearches, amazon's jungle search engine, epay, even the dorman site itself. Nada. Nada darned thing.

[edit: THIS, on the evil auction site, 322613726483 MAN did that take some sleuthing]

Just out of curiosity, do you have a link somewhere for the part? a little less pricey? Temporary fitting even?

Inquiring minds and all that.322613726483
Well, Maybe they don't make them anymore after dorman bought out motormite. Originally offered by Motormite. I found on epay for ford motormite 46345 or dorman 486-951 but I can't seem to find the gm one.

UPDATE-Contacted their cust support. Discontinued. Probably because everything now is electronic speed sensors.

This gizmo screwed on the lower cable after removal and had a zerk fitting on end. A few pumps and done. Cable would be happy sitting in fresh grease. Worked well.
 
Last edited:

Bravojmc

New member
512
5
0
Location
Palisade, Colorado
Some of you may hate the limb risers but I live an a area that's got alot of heavy trees on our trails
and I don't need to replace another windshield! What's nice is I can just unclip the limb risers
and I'm on my way!
IMG_8685.jpg
 

gottaluvit

Well-known member
Giving my 2-man a good go over today I see the transfer case (NP-218) rear output leaking slowly, but a leak is not good regardless. The seal is fine and I read somewhere that the yoke needs replaced as it is letting fluid seep past the splines and out the hole in the end of the yoke. I come up empty on finding a rear output yoke for the 218 transfer case. Does anyone know a good source for these, or is there some other gasket/seal that I am missing? Any help greatly appreciated.
 

NormB

Well-known member
1,220
72
48
Location
Cloverly,MD
I've almost been hit - twice - in my Humvee. Lights on, a-holes ran stop signs, never even looked. Thank God my brakes work. Military horn goes "meep" so I replaced it. Now it sounds like a BMW or other Euro-car and about 139 dB loud.should get people's attention.


Sent from my iPhone using Tapatalk
 

gottaluvit

Well-known member
Brake warning light was stuck on from parking brake switch. Took it out, shot some WD-40 under the ball bearing and got it working by pushing the bearing in a bunch of times. Put dexron 3 under the ball bearing and put the switch back in and switch functions normal now and brake light goes out with release of parking brake. Broke free the fresh air slider that feeds air into the heater. Adjusted both cables. Put all heater hoses on correctly/completely. Straightened the divider tarp's metal bar that snaps into bed/cab divider, replaced one of the buckles, and attached it snugly. No more of that tarp trying to come into the cab. Took the cargo cover and bows off. Now it looks pretty sharp. Need to paint the troop seats and racks soon.

1503617984124245992317.jpg
 

Ksmokeater

New member
1
0
1
Location
Port Saint Lucie, FL
Built a ground harness connection between the engine, generator, body, chassis,& starter. This fixed my glow plug , wait to start issue. I had an intermittent problem where the wait to start light would flash and the glow plugs would not ignite.
 

3jacks

Active member
153
39
28
Location
Near Jackson, MO
Turned up the fuel (1/4 turn) and put in a less restrictive air filter. The person who invented the 15mm fuel pump wrench needs an award. The person who designed the throttle cable bracket mounting for this engine (6.2) needs to be dropped from an airplane though. On the "this job might suck a little" scale this ranks pretty high up there if you do it through the side access cover and don't remove the intake, but it's done. How does it run you ask? I don't know...the throttle cable nuts on mine were so rusted when I went to loosen them the threaded part snapped in two. Ordered new throttle cable.

cheers to the guys who suggested notching out the bottom of the bracket for easier reinstallation...great suggestion.
 

Attachments

orgnal

Member
285
4
18
Location
Denver, CO
Brake warning light was stuck on from parking brake switch. Took it out, shot some WD-40 under the ball bearing and got it working by pushing the bearing in a bunch of times. Put dexron 3 under the ball bearing and put the switch back in and switch functions normal now and brake light goes out with release of parking brake. Broke free the fresh air slider that feeds air into the heater. Adjusted both cables. Put all heater hoses on correctly/completely. Straightened the divider tarp's metal bar that snaps into bed/cab divider, replaced one of the buckles, and attached it snugly. No more of that tarp trying to come into the cab. Took the cargo cover and bows off. Now it looks pretty sharp. Need to paint the troop seats and racks soon.

View attachment 696365
I am having a similar situation. Do you have pictures? I am not sure where the ball bearing and the switch are for brake warning light.

McReddy
 

gottaluvit

Well-known member
I am having a similar situation. Do you have pictures? I am not sure where the ball bearing and the switch are for brake warning light.

McReddy
Sorry, no pics. Oily hands at the time. From underneath the switch is directly below the parking brake lever/handle. There is a rubber cover over the part of the mechanism underneath and the switch is clearly visible on the right (passenger) side of the mechanism, protruding through it. You cant miss the wires coming from it. The wires were a bear to get unplugged but persistance pulled through. The switch is screwed into the mechanism (again, underneath) and it takes a wrench slightly bigger than 3/4. That was the biggest in the tool set I had out and I had to resort to the large crescent wrench. Once you have the switch out, you will see the ball bearing that protrudes. The bearing pushes in and is supposed to make contact with the actual switching part of the switch. I just pushed it in (spring loaded ball bearing) and got the oil(s) under the bearing. Once you dig in it is pretty simple. Hope this helps. Not near truck now or I would take a pic from underneath.
 

orgnal

Member
285
4
18
Location
Denver, CO
Sorry, no pics. Oily hands at the time. From underneath the switch is directly below the parking brake lever/handle. There is a rubber cover over the part of the mechanism underneath and the switch is clearly visible on the right (passenger) side of the mechanism, protruding through it. You cant miss the wires coming from it. The wires were a bear to get unplugged but persistance pulled through. The switch is screwed into the mechanism (again, underneath) and it takes a wrench slightly bigger than 3/4. That was the biggest in the tool set I had out and I had to resort to the large crescent wrench. Once you have the switch out, you will see the ball bearing that protrudes. The bearing pushes in and is supposed to make contact with the actual switching part of the switch. I just pushed it in (spring loaded ball bearing) and got the oil(s) under the bearing. Once you dig in it is pretty simple. Hope this helps. Not near truck now or I would take a pic from underneath.
Thank you! This write up helps a lot!

McReddy
 

gottaluvit

Well-known member
Sorry, no pics. Oily hands at the time. From underneath the switch is directly below the parking brake lever/handle. There is a rubber cover over the part of the mechanism underneath and the switch is clearly visible on the right (passenger) side of the mechanism, protruding through it. You cant miss the wires coming from it. The wires were a bear to get unplugged but persistance pulled through. The switch is screwed into the mechanism (again, underneath) and it takes a wrench slightly bigger than 3/4. That was the biggest in the tool set I had out and I had to resort to the large crescent wrench. Once you have the switch out, you will see the ball bearing that protrudes. The bearing pushes in and is supposed to make contact with the actual switching part of the switch. I just pushed it in (spring loaded ball bearing) and got the oil(s) under the bearing. Once you dig in it is pretty simple. Hope this helps. Not near truck now or I would take a pic from underneath.
Here's a photo of the rubber boot that covers the parking brake lever assembly underneath. You can see the brake light switch as it is clean from handling and oil.

20170825_221706.jpg
 

General Hood

Member
712
2
18
Location
Fort Towson, OK
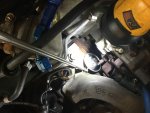
Replaced the fan clutch solenoid, bled the system, cranked the engine up and instantly blew the main seal on the fan clutch. Hyd. fluid everywhere.
I'm guessing I have to remove the oil cooler and radiator to access the fan clutch. How difficult of a job is this?
 
Top