• Steel Soldiers now has a few new forums, read more about it at: New Munitions Forums!

  • Microsoft MSN, Live, Hotmail, Outlook email users may not be receiving emails. We are working to resolve this issue. Please add support@steelsoldiers.com to your trusted contacts.

What have you done to your HMMWV today/lately

Gear Report

Active member
265
45
28
Location
Nc
That's why the factory upper mounts adjust so you can use the lower bracket and still adjust for different weapons.

If the butt stock of the gun is still touching the floor it is still in the foot well.
And the closer it is to the door opening the harder it is to get your foot in around it.
And if it's not secured and you kick it with your foot what keeps it secured? just the top bracket?
So when driving down a bumpy road I'm guessing the optics and finish are going to take a beating on the side next to the sidewall or bounce over into your legs with no butt stock base plate.
But then I guess there would be nothing to write about .
This is why we test and experiment. It may work out just as you say... or it may work perfectly. So far it is going great. Time will tell.
 

chickenbutt

Member
64
2
8
Location
New Jersey
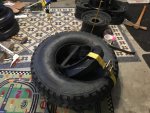
With the proper runflat compressor tool, you can remove and install one in about 15 minutes.
That would have been nice. By myself I was at about 1 1/2 hours, with help we did one in 1 hr.
The ratchet strap just can't get it small enough, so I had to fight it. Like the monkey and football analogy.
If I ever have to do it again, I'm getting the runflat compressor tool!!
 

ari

New member
233
3
0
Location
dacula Ga
fitted new set of front half doors sanded and primed too. I under estimated the weather stripping anyone got a 6 inch piece? IMAG0259.jpgIMAG0258.jpg
 

Retiredwarhorses

Well-known member
Steel Soldiers Supporter
4,400
4,182
113
Location
Brentwood, Calif
With the proper runflat compressor tool, you can remove and install one in about 15 minutes.

yea, sure you can....LOL I have a compressor, have for years and done more then my fair share, like once a month.
there is no getting one in and out in 15mins. They are a PITA, but AFAIC, they are a must have.
 

Another Ahab

Well-known member
17,999
4,556
113
Location
Alexandria, VA
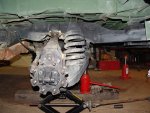
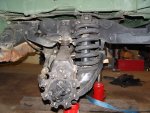
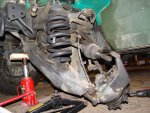
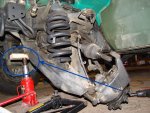
Swapped out all the springs and rear spring mounts. It's about 2" higher in front and 2 1/2" in rear.
That's a major project.

I'm wishing you'd shore up the chassis with a solid jack-stand or something.

You know how it is:

- 99.99% of the time making the bottle jack do double-duty as a jack stand works just fine.

But it's that 0.01% chance of trouble that makes a body antsy to see that.
Just take me with a grain of salt. :popcorn::beer:


jack.jpg
 

MarkM

CODE BROWN...It's all going to sh~t !
Steel Soldiers Supporter
1,081
1,972
113
Location
WOBURN. MA.
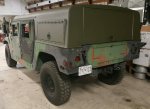
Painted my top with Rapco's Forest Green (not CARC 383). Thinking of doing the whole machine this color.

I like the color as it is close to mine with a Pinzgauer green.

Mark

HMMWV-REAR-SIDE.jpg

HMMWV-FRONT-SIDE.jpg
 
Last edited:

Carrera911

Active member
138
31
28
Location
Cumming, Georgia
HMMWV Stereo

I'm sure this isn't what most people have in mind when they talk about putting a radio in their Humvee. To some this is blasphemy but having some music really makes those long off road commutes more bearable:wink:. My plywood in the center was rotten anyway so I went ahead and made this setup.
IMG_3073[1].jpgIMG_3070[1].jpg
I used marine grade components so it will stand up to the wet between all the leaks and when I hose out the interior. I traced the old wood as a template and sprayed it down with the Behr exterior latex in 383 green. Used a HVLP gun at 100 psi and thinned the paint with approx 1 ounce water to 12 ounces paint. These 4 speakers with 45 watts each are easily heard while cruising at 60 at half volume. At full it's unbearably loud for any length of time. The amp is inside the box which is sealed with glue all around and has adhesive foam weatherstripping around the removable top piece to make it water tight.
IMG_3071[1].jpgIMG_3072[1].jpg
Mounted these two ammo cans to a radio tray. The left one has the radio with the power switch, volt gauge and power outlet. The right is for storage and lined with 1/4 inch thick neoprene adhesive foam. I sleeved the cables for a more professional look.
IMG_3069[1].jpg
For power I used a Sure Power 40 amp battery equalizer. I removed the bracket next to the battery compartment (not sure what it's for) and placed the converter there with some spacers I made due to the battery hold down hook. Used 2 100 amp fuses for protection and also have a 4 way fused distribution block which will allow for future accessories too.
IMG_3068[1].jpgIMG_3067[1].jpgIMG_3066[1].jpg
 

Videris

New member
148
0
0
Location
San Diego CA
I'm sure this isn't what most people have in mind when they talk about putting a radio in their Humvee. To some this is blasphemy but having some music really makes those long off road commutes more bearable:wink:. My plywood in the center was rotten anyway so I went ahead and made this setup.
View attachment 657761View attachment 657760
I used marine grade components so it will stand up to the wet between all the leaks and when I hose out the interior. I traced the old wood as a template and sprayed it down with the Behr exterior latex in 383 green. Used a HVLP gun at 100 psi and thinned the paint with approx 1 ounce water to 12 ounces paint. These 4 speakers with 45 watts each are easily heard while cruising at 60 at half volume. At full it's unbearably loud for any length of time. The amp is inside the box which is sealed with glue all around and has adhesive foam weatherstripping around the removable top piece to make it water tight.
View attachment 657762View attachment 657763
Mounted these two ammo cans to a radio tray. The left one has the radio with the power switch, volt gauge and power outlet. The right is for storage and lined with 1/4 inch thick neoprene adhesive foam. I sleeved the cables for a more professional look.
View attachment 657764
For power I used a Sure Power 40 amp battery equalizer. I removed the bracket next to the battery compartment (not sure what it's for) and placed the converter there with some spacers I made due to the battery hold down hook. Used 2 100 amp fuses for protection and also have a 4 way fused distribution block which will allow for future accessories too.
View attachment 657765View attachment 657766View attachment 657767
I like it bro. You did a good job of fab work.
 

rhinob

Member
429
0
16
Location
Ijamsville, MD
Installed the ground kit and the horn started working. :-D A must-do IMO. It was very easy.

Installed a new heater valve control cable.

Installed locking door handles.

Also removed the boxes from inside the ATTBAR top. Mucho space reclaimed without losing any rigidity! The kids seem to dig it too!
 

Attachments

Last edited:

rhinob

Member
429
0
16
Location
Ijamsville, MD
yea, sure you can....LOL I have a compressor, have for years and done more then my fair share, like once a month.
there is no getting one in and out in 15mins. They are a PITA, but AFAIC, they are a must have.
So you're saying that the run-flat addition is a must-have IYO? I have two more tires to install.
 
Top
AdBlock Detected

We get it, advertisements are annoying!

Sure, ad-blocking software does a great job at blocking ads, but it also blocks useful features of our website like our supporting vendors. Their ads help keep Steel Soldiers going. Please consider disabling your ad blockers for the site. Thanks!

I've Disabled AdBlock
No Thanks