• Steel Soldiers now has a few new forums, read more about it at: New Munitions Forums!

  • Microsoft MSN, Live, Hotmail, Outlook email users may not be receiving emails. We are working to resolve this issue. Please add support@steelsoldiers.com to your trusted contacts.


What have you done to your HMMWV today/lately

tokarev

Member
Steel Soldiers Supporter
243
4
18
Location
Safety Harbor Florida
The Holes......they saw it necessary to add these butes anywhere water might stand - there will be a patching/riveting party soon. There is a real bullet hole 9mm in the windshield frame going forward just below the top. FL Nat Guard truck.
 

jabreo

New member
2
0
1
Location
Sacramento
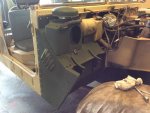
Got the dash panel LED upgrade done and, while I was at it, installed the poosh-button lightswitch.

Took a little time to ensure I had as good a ground as I could get using a 1/4-20 bolt through the dash - I'd already installed the Kascar grounding kit, testing my ground out with a test light to the hot side of the battery and then hooked up the switch.

I'd taken the box up to a local hardware store and couldn't for the life of me figure out the threat pitch. Tried all kinds of 10-24, 10-32, M6 and others, even the stock bolts wouldn't fit, so what the heck, I took a 10-24 tap to it and used some black oxide panhead screws to hold it in place. Now I need to replace all the panhead screws on the dash. :?

It'll take a bit of getting used to but I like it.

I'm young enough I appreciate technology but old enough that I'm getting to resent it.
Where did you get the push button lightswitch? I've been looking for a while now.
Thanks!
 

NormB

Well-known member
1,221
77
48
Location
Cloverly,MD
Where did you get the push button lightswitch? I've been looking for a while now.
Thanks!
Dr. Evil Porkchop ran an ad a while back, I came across it while scrolling through the ads.

It may or may not last, but it's how I remember the last HMMWV I drove, late '90s, IIRC (maybe early 2000s). I kept the switch unit for a spare - you never know.
 

NormB

Well-known member
1,221
77
48
Location
Cloverly,MD
replaced screws holding tunnel boards with 8-32 nutserts and 8-32 screws today. Eight all told, now I'm thinking about replacing ALL the screws holding down padding/insulation/cowling with same. A little time-consuming, but a little zen-like, too. Nice feeling of accomplishment as I know over the next couple months/years one or more of them is likely to strip out anyway, but the nutserts, held in place with some red threadlock, may outlive the truck.

did some measuring for laying down similar panels in back, will work on cardboard template first with cutouts for tie-downs and hold-downs for the "drape" separating passenger compartment with the bed. Should be fun. I'd post pictures when I'm done.

Also discovered I have to keep T/L in low lock to get the hydraulic winch to operate. Makes appropriate clicking/hissing noises but doesn't run without it. Discovered this AFTER packing it in for the day (MAN was it cold this afternoon, snowing a little outside now), I'll try it again tomorrow. Check steering fluids again, set everything up, do it by the numbers.
 

NormB

Well-known member
1,221
77
48
Location
Cloverly,MD
Finally plugged a home built switch box in to panel/gauge lighting, haven't wired/routed power line yet, next warm day I'm off. It was almost 55F today, no wind. Helped son with one of his headboard projects, he helped with the winch - works great.

IMG_0001.jpg
 

Another Ahab

Well-known member
17,825
4,157
113
Location
Alexandria, VA
Finally plugged a home built switch box in to panel/gauge lighting, haven't wired/routed power line yet, next warm day I'm off. It was almost 55F today, no wind. Helped son with one of his headboard projects, he helped with the winch - works great.

View attachment 664539
That box is plenty slick; including the graphic stickers. [thumbzup]

How did you come up with the components?
 

NormB

Well-known member
1,221
77
48
Location
Cloverly,MD
That box is plenty slick; including the graphic stickers. [thumbzup]
How did you come up with the components?
I looked for a switch panel - found on amazon, for marine use, 24V - once I got it home, measured and cut out sides/back from 0.090" aluminum 12x12" sheet (chop saw with a carbide blade), used 1/2" aluminum angle for corners, lots of 1/8" aluminum pop rivets. Should've drawn up plans, did it off the top of my head and came up about 0.180" too wide but it's hardly noticeable and it's square within a tenth of an inch and I'd already put several hours into it.

Switch on top I'm still considering dismantling/painting with the same deep RAPCO deep forest green as the box and radio deck. Box wires in hot - direct from batteries - at 24V so I can run the cigarette lighter (for charger/adapters), and there are two USB charging ports on the right. I decided to run the top circuit off 12V so the big aluminum block underneath is a 10A 24-12V buck converter. I've fused the 12v links internally. Only thing left to do is figure out where I need to route the wiring from the backup lights, interior lights and fog/driving lights. I've got a box of 1/4" neoprene on rubber aluminum adel clamps for that.

Already have another piece of aluminum coming to make a box for a tachometer/hour meter I bought.

Keeps me off the streets at night.
 

tokarev

Member
Steel Soldiers Supporter
243
4
18
Location
Safety Harbor Florida
The idler /pitman arm replacement was pretty straight forward - you need a puller to remove most parts. I used a gear puller from harbor freight. The cv boot replacement was easy - once the half shaft is removed cut the old boot off. The outside joint will slide off the axle shaft after a couple hits with a hammer (brass or dead blow hammer would be ideal). Replace parts or boots re grease and slide joint back over the spring clip on the end of the axle shaft. Tighten boot clamps. At first I did not know how the joint was removed from the shaft - I watched a couple how to videos on Youtube and saw how the hammer was used to remove the joint from the outer end of the shaft. Once the hammer came into play the repair didnt take long to complete.
 
Top
AdBlock Detected

We get it, advertisements are annoying!

Sure, ad-blocking software does a great job at blocking ads, but it also blocks useful features of our website like our supporting vendors. Their ads help keep Steel Soldiers going. Please consider disabling your ad blockers for the site. Thanks!

I've Disabled AdBlock
No Thanks