After some calling around trying to find a local shop I trusted an would be willing to work on a Humvee I was able to talk a shop into it-barely.
")
So I replaced the pitman arm an one CV shaft just in time to make my appointment. I had them mount 2 rear tires an wrestle the run flats in them, balance all 4 tires, and do a 4 wheel alignment. I dropped off alignment specs an new wheel o-rings for them also.
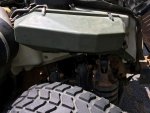
They had the thing all day an I was getting nervous to what the bill was going to be. So I went there right before they closed an it was just getting done. He said he had 2 to 3 guys on it at various times, wrestling the tires, heating up bolts on the control arm mounts to remove/add shims, heating up the adjustment sleeves on the tie rods, prying on this or that, etc. He said he isn't sure if he is ready to tell people he will work on them as this is their first one and it was a real learning curve. Lol. He was kinda worried about the bill I think (so was I) as he kept going on about how much time they had in it but couldn't charge me for everything since they had never worked on one before an were learning at the same time. Finally, he goes the total for everything is $244. I couldn't pay it fast enough! I think for what they did it was a very fair price. It goes down the road straight an smooth and handles a lot better.


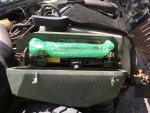
 Lots of work. Use stripper, sand, fill small cracks/dents/holes with bondo/ re-sand/ prime and paint. Will post pics. when finished. So far not to bad, just very time consuming!!!


.jpg")