• Steel Soldiers now has a few new forums, read more about it at: New Munitions Forums!

  • Microsoft MSN, Live, Hotmail, Outlook email users may not be receiving emails. We are working to resolve this issue. Please add support@steelsoldiers.com to your trusted contacts.

What have you done to your HMMWV today/lately

NormB

Well-known member
1,220
72
48
Location
Cloverly,MD
Question:
I know the truck is a 24volt system but when purchasing battery maintainers such as the above are you wanting to buy a 12volt or 24volt charger ?
I plan to run a charger to each so am I looking at two 12volt chargers (one per battery) ?

Hey, Joe.

Pays your money, takes your chances.

I posted a few months ago about one of my Optima batteries dying. I had them connected to a 24volt charger which only ever showed them charged. This despite one cell dying (or however the heck it is the newer AGM batteries are arranged internally) and further testing showed ONE battery was toast.

I got some feedback from some of the members here that charging each battery separately was the way to go, so I did.

One charger per battery is how I’ve got it wired, each charger sees only one battery when connected to a positive and a negative terminal on one battery no matter how many batteries are lined up in series.

Seems to be working well so far. I just wanted a more convenient, dust/dirt-proofed connection.
 

JoeJrTheBarber

New member
268
20
0
Location
Chicago, IL
Hey, Joe.

Pays your money, takes your chances.

I posted a few months ago about one of my Optima batteries dying. I had them connected to a 24volt charger which only ever showed them charged. This despite one cell dying (or however the heck it is the newer AGM batteries are arranged internally) and further testing showed ONE battery was toast.

I got some feedback from some of the members here that charging each battery separately was the way to go, so I did.

One charger per battery is how I’ve got it wired, each charger sees only one battery when connected to a positive and a negative terminal on one battery no matter how many batteries are lined up in series.

Seems to be working well so far. I just wanted a more convenient, dust/dirt-proofed connection.
Makes sense to me, thanks bud....
 

MIDDLEMAN

Member
52
8
8
Location
Arlington/Washington
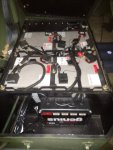
I use the Noco GEN4 on my M925A2. It has the as issued, 4 hawkers. Knowing the cost of replacements I wanted to find the best way to care for them. I called Noco and talked to their engineer.....he said get the GEN4. He told me its onboard, vibration sturdy, marine rated and connects to the 4 battery bank, yet see's them and cares for them individually. It senses the battery design such as wet or AGM etc., even though they are all tied together. I power it up by a port I installed under the cab that they sell as well. I will post pics next.
 

Attachments

riderdan

Member
313
20
18
Location
Central Kansas
No pics, but I got a lot done this weekend.

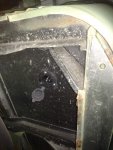
The radio tray was squeaking when the truck hit a bump, so I pulled it. The little mounts that hold the tray legs were loose--the rivnuts were about to give way. So I pulled them and the aluminum of the tunnel was cracked, so I couldn't install new at the moment. So it's bolted on for now... next spring I'm taking an advanced sheetmetal class, so I'll be TIGing some repairs to the floor and I'll patch that spot, too.

I also finally got my speedometer replaced. It wasn't hard and now I don't need to use an app to track my speed through town. While I had the dash open I replaced my very dim wait light with an LED version.

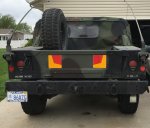
Mounted my new in-the-bed spare tire carrier (pictures later) so I could put the deliniator panels on the tailgate. Back in the day we didn't actually carry a spare (in Europe we called a recovery vehicle and the issue never came up in the sandbox) so this is my (removable) solution.

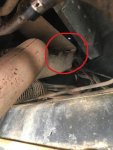
One thing I haven't fixed is this little plate/heat shield under the tunnel...
borked-heat-shield.jpg
It's too tight a squeeze to get at with pliers to bend the tabs back. Also not room to get the end of my MIG welder in there to tack it back together... Other suggestions?
 

NormB

Well-known member
1,220
72
48
Location
Cloverly,MD
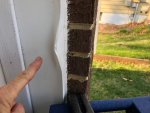
It was a long difficult job, but I replaced the broken driver's side door handle today....

View attachment 725697

View attachment 725698

(New handle sourced from SSG Gibb, endorsed)

Your sense of sarcasm comes through loud and clear.

I learned the hard way I need to take my doors OFF before pulling the truck into my garage:

6B6CCFDE-1BB3-4153-A109-6032FBB7E583.jpg

I ordered a set of handles but wound up using a 2-1/2” or 3” (I forget) deck screw to hold the broken one together. Drilled a pilot hole, assembled the two pieces, drove the deck screw home.

Now I have a spare set of handles.

I’ll get that ding fixed eventually. We’re going to put the house on the market in about 4 years (maximum).
 

Bulldogger

Well-known member
Steel Soldiers Supporter
1,328
585
113
Location
Quantico VA
Your sense of sarcasm comes through loud and clear.

I learned the hard way I need to take my doors OFF before pulling the truck into my garage:

View attachment 725703

I ordered a set of handles but wound up using a 2-1/2” or 3” (I forget) deck screw to hold the broken one together. Drilled a pilot hole, assembled the two pieces, drove the deck screw home.

Now I have a spare set of handles.

I’ll get that ding fixed eventually. We’re going to put the house on the market in about 4 years (maximum).

Dont feel bad. I think many of us have done something to break handles. I knocked one silly on a tree while trail riding at Graves Mountain rally one year. Fixed it about the same way. Still holding up.

Bdgr
 

juanprado

Well-known member
Steel Soldiers Supporter
5,605
2,898
113
Location
Metairie/La (N'awlins)
Dont feel bad. I think many of us have done something to break handles. I knocked one silly on a tree while trail riding at Graves Mountain rally one year. Fixed it about the same way. Still holding up.

Bdgr

My truck had short pieces of paracord tied to the door strikers. I learned why. Very effective way to tie door closed when handle failure occurs :)
 

Wire Fox

Well-known member
1,252
161
63
Location
Indianapolis, Indiana
Dont feel bad. I think many of us have done something to break handles. I knocked one silly on a tree while trail riding at Graves Mountain rally one year. Fixed it about the same way. Still holding up.

Bdgr
My handle was missing as-delivered, so I bought a new one, installed it, wasn't satisfied with the way the door was sealing on the truck, removed the door, pressed the door to correctly align the frame, and promptly snapped the brand new door handle from not realizing that it was contacting the flat surface I was using to bend the door....

I ended up buying a mending plate from the hardware store, drilled a couple pilot holes, applied epoxy to the broken edges, then pressed it all together and drove the screws home with the mending plate in-place. After leaving it sit, clamped, for about a day, I came back and installed it again and found it to be rock solid, plus my handle has some cool, chrome bling on it from the mending plate.
 

98G

Former SSG
Steel Soldiers Supporter
6,063
4,410
113
Location
AZ/KS/MO/OK/NM/NE, varies by the day...
Now that I have a functional door handle, I took the doors off and drove it to sonic.

The rusted brushguard, headlight bezels, and other assorted tan nastiness is bothering me. So I took the brushguard and headlight bezels off and got after them with a powered wire brush. Then I painted them deep forest green.

There's just no way to match faded CARC. The deep.forest green looks pretty good with CARC, but I may end up going back and painting them black. (Comments?)

I'm really not inclined to paint the whole truck, but painting one piece is like trying to eat just one peanut...

edit- pictures posted in reverse chronological order
 

Attachments

Top