• Steel Soldiers now has a few new forums, read more about it at: New Munitions Forums!

  • Microsoft MSN, Live, Hotmail, Outlook email users may not be receiving emails. We are working to resolve this issue. Please add support@steelsoldiers.com to your trusted contacts.


What have you done to your HMMWV today/lately

TNDRIVER

Well-known member
Steel Soldiers Supporter
279
392
63
Location
Cleveland,TN
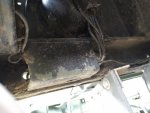
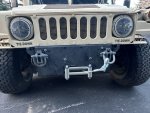
I continued the winch install on truck #2.

The winch is a 24 volt 17K Sherpa brand "Steed" model. I opted for wire rope to keep the military look as much as possible even though it's not 100% correct.

The ECV-compatible winch plate is Sherpa specific and is from Military Truck Works in Mundelein, IL.

I had previously sandblasted and painted the winch plate with 2 coats of zinc primer and 2 coats of Rapco matte black. The winch plate is pretty solid and is nearly 1/4" thick.

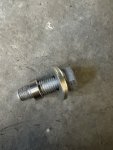
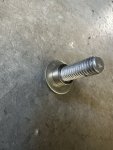
Of course it goes in fits and starts. Got everything together for a dry fit and discovered that Sherpa supplies the winch with ultra high strength Class 12.9 size M10 bolts (10mm). Unfortunately the winch plate is drilled for a 9/16" bolt with a 0.59" hole (that's 14.9mm).

That means the holes for the bolts are about 50% larger than the supplied hardware. The Sherpa winch will not accept larger bolts, not even 7/16".

I thought about the setup - and got very nervous having the approximately 90 pounds of winch, plate and cable possibly bouncing up and down every time the HMMWV hits a bump. Seems like a bad way to have a lot of shear force hitting the bolts in a transverse axis and would cause a failure.

So I've ordered some spacers from a machine shop that are the thickness of the plate and will take up the slack space around the bolt. I have everything loose for now and will do a final assembly when the spacers arrive.

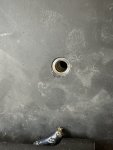
And very frustratingly one of the original nuts that was welded to the back of the frame extension will no longer accept the bolt from the old front bumper. I will run a tap through it and see if it's a thread issue, otherwise I have to figure a solution as those 4 frame extension bolts are the main support strength for the winch plate.

As an aside, my buddy bailed at the last minute to come over to help install which led me to discover that it is pretty easy to have one person install a winch with the aid of Harbor Freight lift and some ratchet straps.

View attachment 903091

View attachment 903092

View attachment 903093

View attachment 903094
For future reference, the Mile Marker 12000 hydraulic winch works great on the rear mount, motor mounts to the right side and the "factory hoses" reach just fine. Tickled with mine!
 

Coug

Well-known member
Steel Soldiers Supporter
2,850
4,081
113
Location
Olympia/WA
I'd love a rear winch, but between the Federal Military parts rear 2" receiver and associated braces, and not wanting to lose any ground clearance (I already lost departure angle due to the hitch) I doubt I will ever install one.

I've only ever used my front winch to recover other people, never myself.

For what I've done recently:
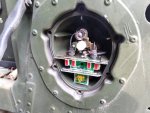
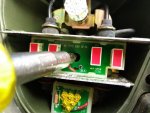
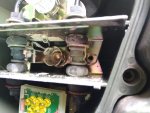
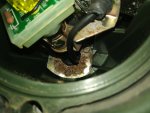
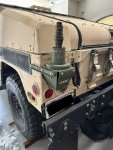
Installed the Trucklite LED tailights. Was pretty straight forward to do, but I added difficulty to it by not pulling the light buckets out of the truck first.
Also added a 24V fan to the B pillar next to my head. During summer will aim at me, during winter will aim at the windshield to try to reduce fogging. In the past I just ran the RedDot aircon aimed at it and it did a great job, but running aircon in winter kind of sucks.

Pictures related to the lights install.
Started with this. Had different brand covers on each side.
f1dee0b73038e05cca341c5611ee88d2d46d453a-8.jpg

Replaced brake light bulbs in the past with LEDs as the brake switch doesn't last that great with the incandescent loads on it, or so I've heard.
f1dee0b73038e05cca341c5611ee88d2d46d453a-7.jpg

gotta use a flathead screwdriver to remove the blackout light assembly
f1dee0b73038e05cca341c5611ee88d2d46d453a-6.jpg

That gets you access to two of the screws holding in the assembly.
IMG_20230729_181206.jpg
There are three more screws behind the bottom bulb (which isn't secure to it's base, so it kind of spins and is a pain to remove I'm just pushing it aside in this pic)
IMG_20230729_181322.jpg

All the wiring connectors are behind this cover. 2 screws up from the bottom to pull the cover, then small screws at the ends that hold cable retainers with the wires inside of them. You can see the top of the pic where all the wires go into the light bucket assembly. You have to do them one at a time, and a long screwdriver also helps to push them around, as well as some needle nosed pliers to pull them gently.
IMG_20230729_181531.jpg

Making all the connections. I did have to cut off the ground wire to the housing bucket and put a new end on it because the LED has 5 wires, the old assembly had 4 plus one wire to the ground bolt.
IMG_20230729_183647.jpg

After that was just some dielectric grease on all the connections and closing everything up. Lights work great, but stick out just slightly further than the original covers did (no pics of this)

Only issue I came across was having to take the bolts from the old covers for the new ones. They have a little wire retainer wrapped around them that had to be removed to pull the screws out. The new covers did not have screws.

Part number for the light I used is 07240
NSN: 6220-01-482-9850 Thin Lamp, Green


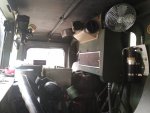
And then a picture of the fan installed. A couple holes drilled and rivnuts installed, and a couple Posi-tap connectors into the Red Dot wiring gave me a working fan. As mentioned before, either aims at my head or forward to the windshield. It's a little loud, but not worse than anything else in the truck.
16915198184445863506183486202357.jpg
I'm running out of room in the cab for storage. Everything is bolted down securely except the first aid kit soft bag and a couple little things.
 
Last edited:

Mogman

Moderator
Staff member
Moderator
Steel Soldiers Supporter
5,940
8,284
113
Location
Papalote, TX
I'd love a rear winch, but between the Federal Military parts rear 2" receiver and associated braces, and not wanting to lose any ground clearance (I already lost departure angle due to the hitch) I doubt I will ever install one.

I've only ever used my front winch to recover other people, never myself.

For what I've done recently:
Installed the Trucklite LED tailights. Was pretty straight forward to do, but I added difficulty to it by not pulling the light buckets out of the truck first.
Also added a 24V fan to the B pillar next to my head. During summer will aim at me, during winter will aim at the windshield to try to reduce fogging. In the past I just ran the RedDot aircon aimed at it and it did a great job, but running aircon in winter kind of sucks.

Pictures related to the lights install.
Started with this. Had different brand covers on each side.
View attachment 903239

Replaced brake light bulbs in the past with LEDs as the brake switch doesn't last that great with the incandescent loads on it, or so I've heard.
View attachment 903240

gotta use a flathead screwdriver to remove the blackout light assembly
View attachment 903241

That gets you access to two of the screws holding in the assembly.
View attachment 903242
There are three more screws behind the bottom bulb (which isn't secure to it's base, so it kind of spins and is a pain to remove I'm just pushing it aside in this pic)
View attachment 903243

All the wiring connectors are behind this cover. 2 screws up from the bottom to pull the cover, then small screws at the ends that hold cable retainers with the wires inside of them. You can see the top of the pic where all the wires go into the light bucket assembly. You have to do them one at a time, and a long screwdriver also helps to push them around, as well as some needle nosed pliers to pull them gently.
View attachment 903245

Making all the connections. I did have to cut off the ground wire to the housing bucket and put a new end on it because the LED has 5 wires, the old assembly had 4 plus one wire to the ground bolt.
View attachment 903244

After that was just some dielectric grease on all the connections and closing everything up. Lights work great, but stick out just slightly further than the original covers did (no pics of this)

Only issue I came across was having to take the bolts from the old covers for the new ones. They have a little wire retainer wrapped around them that had to be removed to pull the screws out. The new covers did not have screws.

Part number for the light I used is 07240
NSN: 6220-01-482-9850 Thin Lamp, Green


And then a picture of the fan installed. A couple holes drilled and rivnuts installed, and a couple Posi-tap connectors into the Red Dot wiring gave me a working fan. As mentioned before, either aims at my head or forward to the windshield. It's a little loud, but not worse than anything else in the truck.
View attachment 903246
I'm running out of room in the cab for storage. Everything is bolted down securely except the first aid kit soft bag and a couple little things.
I would be a little nervous with that drier right next to my face
 

osteo16

Well-known member
Steel Soldiers Supporter
571
570
93
Location
Evansville, IN
I'd love a rear winch, but between the Federal Military parts rear 2" receiver and associated braces, and not wanting to lose any ground clearance (I already lost departure angle due to the hitch) I doubt I will ever install one.

I've only ever used my front winch to recover other people, never myself.

For what I've done recently:
Installed the Trucklite LED tailights. Was pretty straight forward to do, but I added difficulty to it by not pulling the light buckets out of the truck first.
Also added a 24V fan to the B pillar next to my head. During summer will aim at me, during winter will aim at the windshield to try to reduce fogging. In the past I just ran the RedDot aircon aimed at it and it did a great job, but running aircon in winter kind of sucks.

Pictures related to the lights install.
Started with this. Had different brand covers on each side.
View attachment 903239

Replaced brake light bulbs in the past with LEDs as the brake switch doesn't last that great with the incandescent loads on it, or so I've heard.
View attachment 903240

gotta use a flathead screwdriver to remove the blackout light assembly
View attachment 903241

That gets you access to two of the screws holding in the assembly.
View attachment 903242
There are three more screws behind the bottom bulb (which isn't secure to it's base, so it kind of spins and is a pain to remove I'm just pushing it aside in this pic)
View attachment 903243

All the wiring connectors are behind this cover. 2 screws up from the bottom to pull the cover, then small screws at the ends that hold cable retainers with the wires inside of them. You can see the top of the pic where all the wires go into the light bucket assembly. You have to do them one at a time, and a long screwdriver also helps to push them around, as well as some needle nosed pliers to pull them gently.
View attachment 903245

Making all the connections. I did have to cut off the ground wire to the housing bucket and put a new end on it because the LED has 5 wires, the old assembly had 4 plus one wire to the ground bolt.
View attachment 903244

After that was just some dielectric grease on all the connections and closing everything up. Lights work great, but stick out just slightly further than the original covers did (no pics of this)

Only issue I came across was having to take the bolts from the old covers for the new ones. They have a little wire retainer wrapped around them that had to be removed to pull the screws out. The new covers did not have screws.

Part number for the light I used is 07240
NSN: 6220-01-482-9850 Thin Lamp, Green


And then a picture of the fan installed. A couple holes drilled and rivnuts installed, and a couple Posi-tap connectors into the Red Dot wiring gave me a working fan. As mentioned before, either aims at my head or forward to the windshield. It's a little loud, but not worse than anything else in the truck.
View attachment 903246
I'm running out of room in the cab for storage. Everything is bolted down securely except the first aid kit soft bag and a couple little things.
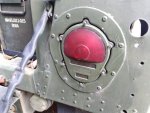
where do you sit 😂
 

lpcoating

Well-known member
Supporting Vendor
362
645
93
Location
Mansfield, PA
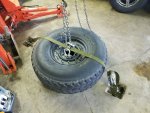
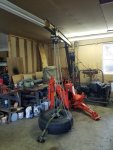
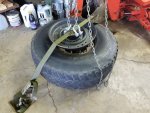
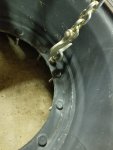
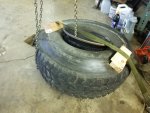
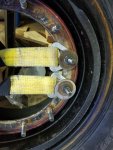
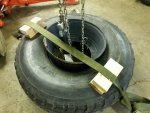
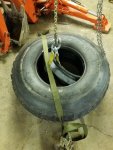
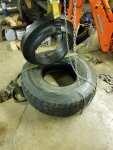
Started the process of changing tires on a spare set of wheels that I bought earlier this year. I've watched YouTube videos and read posts about the process. I was very happy with the first removal as the tie down and chain hook are captured and nothing can go flying like I've seen when the cherry picker technique is used. The run flat removal was also very controlled with the chain fall.

20230810_194433.jpg20230810_194441.jpg20230810_194656.jpg20230810_200146.jpg20230810_200323.jpg20230810_200916.jpg20230810_201211.jpg20230810_201905.jpg20230810_202046.jpg
 

Mainsail

Well-known member
Steel Soldiers Supporter
1,423
1,441
113
Location
Puget Sound, WA
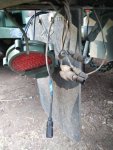
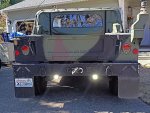
Put these backup lights in the existing holes in the bracing behind the bumper - no drilling.

They are 24v white floods and the sides are amber strobes, each controlled by a separate relay in the battery box, fused of course.

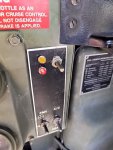
The toggle switch is ON-OFF-ON style - up for amber strobes and down for white floods.

The light next to the switch only tells switch position and serves to remind me to turn it off when I'm done.

The switch, wire, and indicator lights are all out of my hoard. The red and amber indicator lights I've had since.... wait for it.... high school in 1981. Yes, a friend had a night job in some factory and snagged a bunch of cool panel lights, 24v no less, and I still have them. No, don't make me do the math.... yeah, 41 years...

BuL1a.jpg

BuLsw.jpg
 

M1165A1

Well-known member
372
754
93
Location
The High Country, CO
Continued the winch install.

As posted above, the winch plate mounting holes were significantly oversized compared to the corresponding mounting holes on the winch itself. In the photo below, the winch is yellow so you can see clearly the disparity:

IMG_3159.jpg


Got in touch with a machinist on ebay named extsw1 who makes spacers and I spec'd out a custom adapter. Turnaround was excellent, received the parts in a jiff:

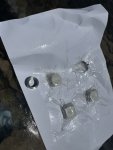
IMG_3158.jpg

The spacers filled the hole beautifully, tolerance was very tight:

IMG_3160.jpg

Spacers likewise fit perfectly on the M10 screws supplied by Sherpa, making a nice shoulder:

IMG_3161.jpg


IMG_3162.jpg

Tightened up the winch and mounting plate, so thoroughly snug:

IMG_3181.jpg


Of course it's one step forward, two back. The electrical cables supplied by Sherpa are too short to reach even the starter on the HMMWV. So I am ordering some new cables which I will run to the battery. And since I now have this longer run I will take the opportunity to add a 500 A disconnect to keep the power off the winch cables when not in use. There seems to be some difference of opinion as to whether to put the disconnect on the hot or ground side, I am leaning towards the hot side.

And: obligatory picture of sunset after a few hours work completed:

IMG_3180.jpg
 

osteo16

Well-known member
Steel Soldiers Supporter
571
570
93
Location
Evansville, IN
Started the process of changing tires on a spare set of wheels that I bought earlier this year. I've watched YouTube videos and read posts about the process. I was very happy with the first removal as the tie down and chain hook are captured and nothing can go flying like I've seen when the cherry picker technique is used. The run flat removal was also very controlled with the chain fall.

View attachment 903374View attachment 903375View attachment 903376View attachment 903377View attachment 903378View attachment 903379View attachment 903380View attachment 903381View attachment 903382
Chicken... engine hoist worked fine..
 

Autonomy_Lost

Well-known member
656
1,448
93
Location
Pennsylvania
Continued the winch install.

As posted above, the winch plate mounting holes were significantly oversized compared to the corresponding mounting holes on the winch itself. In the photo below, the winch is yellow so you can see clearly the disparity:

View attachment 903392


Got in touch with a machinist on ebay named extsw1 who makes spacers and I spec'd out a custom adapter. Turnaround was excellent, received the parts in a jiff:

View attachment 903393

The spacers filled the hole beautifully, tolerance was very tight:

View attachment 903394

Spacers likewise fit perfectly on the M10 screws supplied by Sherpa, making a nice shoulder:

View attachment 903396


View attachment 903395

Tightened up the winch and mounting plate, so thoroughly snug:

View attachment 903397


Of course it's one step forward, two back. The electrical cables supplied by Sherpa are too short to reach even the starter on the HMMWV. So I am ordering some new cables which I will run to the battery. And since I now have this longer run I will take the opportunity to add a 500 A disconnect to keep the power off the winch cables when not in use. There seems to be some difference of opinion as to whether to put the disconnect on the hot or ground side, I am leaning towards the hot side.

And: obligatory picture of sunset after a few hours work completed:

View attachment 903406
You should lift the positive side for a disconnect. If you lift the ground, the winch will likely still "find" a ground through the chassis somewhere, so it wont be fully disconnected.
 

Coug

Well-known member
Steel Soldiers Supporter
2,850
4,081
113
Location
Olympia/WA
Ground disconnect if you are killing all power to the vehicle.

Hot side disconnect if you are using it as a power switch for the item, same as any other hot electrical circuit you want to turn off.

For my winch I put a breaker on the hot side. Some people say yes, others say no when it comes to winches and breakers, but I've always put some type of thermal disconnect (fuse or breaker) on every hot wire I add to an electrical system.
 
Top
AdBlock Detected

We get it, advertisements are annoying!

Sure, ad-blocking software does a great job at blocking ads, but it also blocks useful features of our website like our supporting vendors. Their ads help keep Steel Soldiers going. Please consider disabling your ad blockers for the site. Thanks!

I've Disabled AdBlock
No Thanks