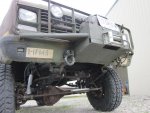
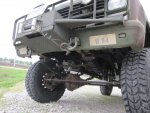
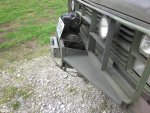
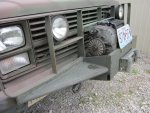
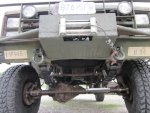
• Steel Soldiers now has a few new forums, read more about it at: New Munitions Forums!

  • Microsoft MSN, Live, Hotmail, Outlook email users may not be receiving emails. We are working to resolve this issue. Please add support@steelsoldiers.com to your trusted contacts.


Winch Mount for stock bumper/brushguard

bigdogdale

New member
33
1
0
Location
Portage des Sioux, Mo
winch bumper

Here are more pix. This time taken with a camera instead of my phone. Hopefully larger. I had 2 pieces of 8" channel iron x 12" long. cut one end of both to match contour of the brush guard bracket. Once I had them fitted, I decided that I needed an upward rake to it. So I cut each piece at matching angles, so that the bottoms were angled up. That left me with the two pieces that I just cut off. I took the one from the drivers side, and laid it on the top flange of the pass side channel., and like wise with the other side. Now in the side view you can see that not only the bottom of the bracket is slanted up the top edge is too. I fabbed the center plate that the winch bolts to out of like 1" plate, cuz that's all I had handy, overkill and excess weight, I know. Anyway, I was able to lay the brackets right against the brushguard brackets and weld them above and below the mounting bolts, so that the bolts could still be removed. On the inbaord side, I was able to weld all the way down the brushguard bracket. I figured being welded right to the plate that was through-bolted to the frame oughta be good. Then I welded in 2 pipes and some 1/8" checker plate to stand on while servicing the engine. Then another piece of checker plate underneath for a skid plate finished it off.
The 12" channel I started out with could have been a little bit longer cuz I had to cut one of the brushguard bars to get the winch in. Also, flat plate instead of channel iron would have been easier too, but again, that's all I had laying around. I hope this clarifies what I've done. :beer:
Dale
 

bigdogdale

New member
33
1
0
Location
Portage des Sioux, Mo
winch mount

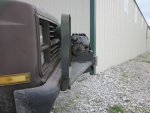
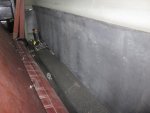
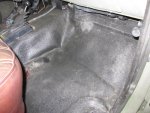
@ 86m1028, I bought the truck in mid Jan, and let it sit for about a month, till I could get it started again!! LOL! Then installed a Rough Country 6" lift and 37's. Also did the doghead relay, harmonic balancer, and manual glow plugs that WILL be restored to stock configuration when I figure out where I'm pulling air in to the fuel supply. the truck runs great, but still starts hard. I know, I've been through the threads, and one step at a time till I fix it, I guess. I also did the Quick Roof Repair sound isolation to the entire floorboard and the rear wall of the cab up to about 6" below the glass. On top of that there was felt and then a formed rubber mat by 
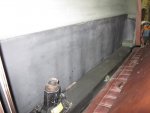
www.accmats.com. BTW, the floor mat fit very well. I also had some black insulation the same material that the black preformed pipe insulation is made of, only on a roll. It was !/2" thick x 48" wide. I used spray contact cement, and applied it to the back wall of the cab over the Quick Roof Repair. I will post a pic of that as well. The truck is now quiet enough to talk on a cell phone easily, and I don't hear well! Anyway, here's pix , and yes, I know the seat needs to be black. any input on seat covers that fit well and look good would be appreciated!!:beer:
 

Attachments

det rebel

New member
157
0
0
Location
east texas
8000 pound warn clicker its the working horse of all winches it might be slow but under full load they never stop pullin

warn 8274 is the actual numbers on them
 
Last edited:
Top
AdBlock Detected

We get it, advertisements are annoying!

Sure, ad-blocking software does a great job at blocking ads, but it also blocks useful features of our website like our supporting vendors. Their ads help keep Steel Soldiers going. Please consider disabling your ad blockers for the site. Thanks!

I've Disabled AdBlock
No Thanks