rjk
New member
- 16
- 0
- 0
- Location
- Columbus, Ohio
I know this sort of thing has been beaten to death before, but I figured I would share what I did to help others that want some ideas.
For those that would prefer to scroll through an Imgur album, click this link: http://imgur.com/a/GDJ7x (It also has more pictures - no 20 pics per post limit!)
OK, let's get started! This project is for an M923A2, which had a non-stock/non-military battery setup to begin with when it was purchased. The "6TL" military batteries that were originally specified would cost $250 each, and we need 4 of them. So I decided to use civilian "group 24" batteries, which would require a custom battery cable to be built.
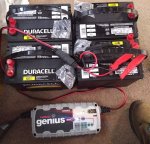 Cheap group 24 batteries from Sam's Club
First thing to do after buying the batteries is to charge them. This took several hours per battery. These batteries are the cheapest group 24 batteries that I could find from anywhere - although they say Duracell, they are actually manufactured by East Penn/Deka which is a company that makes a huge number of other battery brands and types.
These are "marine" rated batteries, so they have accessory posts as well as the usual SAE posts. You also can't get inside to refill them as easily. They are rated for 550 CCA and 90 minutes RC, and cost $60 each plus tax and core charge. (Core charge gets refunded when you bring back old batteries with your receipt.)
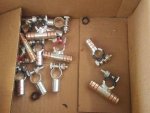 The new terminals from Del City
These things cost a fortune. The items you see in this picture alone rang up to $100. Here's the parts list:
918173 Pure Copper RoHS Battery Terminal, Straight, 2/0 ga, Neg. (Qty. 5) ($4.15 ea.)
918174 Pure Copper RoHS Battery Terminal, Straight, 2/0 ga, Pos. (Qty. 5) ($4.15 ea.)
918473 Pure Copper RoHS Battery Terminal, Flag, 2/0, Neg. (Qty. 3) ($7.25 ea.)
918474 Pure Copper RoHS Battery Terminal, Flag, 2/0, Pos. (Qty. 3) ($7.25 ea.)
237080 Copper Compression Splice, Orange, 3/0 Ga (2/0 ga stranded) (Qty. 2) ($8.67 ea.)
For future projects, I would not get the straight terminals again, but rather the elbow terminals which would make the connections nicer and cleaner. See below for a part number.
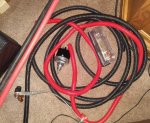 The wire and shrink tubing
The shrink tubing protects the crimp connection from corrosion by preventing ingress of moisture and air. When heated, it shrinks down to a tight fit and seals the connection with adhesive. The wire itself is 2/0 AWG battery cable with high-temperature cross-linked insulation that is the best available. (The cable was from another project, which explains the other unrelated parts in this picture)
980845 4-ft. Black Triple Wall Heat Shrink, 2 - 4/0 Ga (Qty. 1) ($22.04 ea)
980835 4-ft. Red Triple Wall Heat Shrink, 2 - 4/0 Ga (Qty. 1) ($22.04 ea)
2/0 AWG SGX from eBay, Qty. approx. 9 FT ($2.15 per foot)
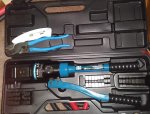 The tools required
Channellock 911 cable cutters
Lenox utility knife
TEMco TH0005 11-ton hydraulic crimp tool - 6 AWG to 600 MCM - for only $100, this thing is a sweet deal!
Not pictured: RadioShack heat gun for shrinking the tubing (a lighter or torch would work if used carefully)
 Wood for battery box floor
Sorry, I missed taking a few pictures of this part, but it's just some treated 1x6 lumber ripped down to the right size and spray painted with RustOleum black paint to help reduce swelling from moisture.
Also pictured is the East Penn battery corrosion cleaner and corrosion preventer sprays that will be used to clean up old battery corrosion and prevent issues in the future.
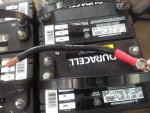 First terminal crimped and heat-shrunk
This is a 24-volt battery system, so these batteries are in series-parallel pairs. Each pair requires a link between battery 1's negative terminal and battery 2's positive terminal. This picture shows one end of one of these links after the hydraulic crimping step and the application of protective shrink tubing.
 4 links finished
Inevitably, I forgot a piece of shrink tubing on one of these. It will be wrapped in 3M Super 88 as the next best alternative.
 Paralleling link completed
The "T" shaped flag terminals are ideal for this arrangement. In future, I would use elbow terminals at the end, to prevent the weird bend that you see. Part number:
918374 Pure Copper RoHS Battery Terminal, Left Elbow, 2/0, Pos. (Qty. 1) ($5.28 ea)
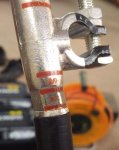 Close-up of a finished crimp
After 11 tons of crimping force with a No. 70 die, the battery cable is securely clamped and and will never come loose. Soldering is not required when a terminal is properly crimped, and soldered terminals can melt apart if they are heated too much.
 A finished flag terminal
A flag terminal from the negative link cable after crimping and application of heat-shrink tubing.
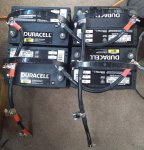 Battery cables finished
The finished cables after crimping and heat-shrinking. Note the application of electrical tape to one of the flag terminals - I forgot another piece of shrink tubing. Someone feed me some memory enhancement pills.
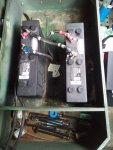 The old non-stock setup
These are some odd "3ET" type batteries that I've never seen before. Definitely not the original military setup. The terminals are somewhat corroded, but the worst part is that all the connections are made with ring terminals and wing nuts that are rather loose and unable to pass a useful amount of current.
These batteries are rated at 500 CCA and 120 minutes RC each. So they actually are less powerful in terms of CCA than each battery I'm replacing them with, and only 30 minutes greater reserve capacity. Because of the odd shape, there's no way that a bunch of these could be easily fit into this box, so I effectively get a greater CCA and greater RC per unit of volume taken up in the box by using the group 24 batteries.
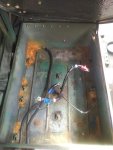 Removed old batteries
After removing the old batteries, I sprayed terminal cleaner on all the crusty corrosion from leaking acid around the box. You can see all the rust and corrosion being washed away. After this, I rinsed with water and vacuumed the sludge out with a wet-dry vac.
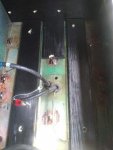 Installing the floorboards
I ran out of spray paint for the insides of the drilled holes, so hopefully there won't be too much swelling or other issues from the wood not being sealed. The holes are there to accommodate the various bolts and fasteners in the box.
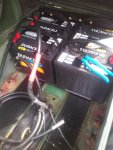 Attaching to the cables from the truck
After cutting off the original ring terminal, I extended the original cable with butt splices, crimped as usual. Unfortunately, the truck actually had smaller wire than what I was using - it said 2/0 on the jacket, but was actually closer to 1/0 in size. This forced me to use a smaller No. 50 die to make the crimp complete, since the butt splice was sized correctly for the 2/0 SGX that I was using for everything else.
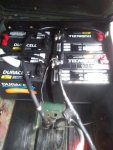 Negative rail attached
In this picture, you can see the short piece of wire that was required to connect the original battery cable from the truck to the new negative paralleling rail that I created with the flag terminals. Note that since we are only installing 4 batteries, there are 2 remaining terminals that can be used to add up to 4 more batteries in pairs.
I wrapped them in plastic and then applied electrical tape so that the adhesive from the electrical tape would not get all over the terminals and gunk them up for when I go to expand the setup in the future.
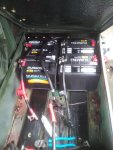 Showing expansion capability
You can see where more batteries can be added without issue. Also note the ABS negative wire is now fastened with 1/2" nuts - the second one is a jam nut to prevent vibrations from loosening it up.
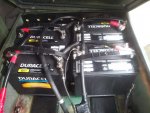 Link cables in place
The positive rail is attached and the pair links are also attached. Notice the medium thickness (probably 8 AWG) wire going to one of the intermediate link terminals - that's the blower fan low speed connection, which just uses 12v from the middle of the battery pair to get low and high speeds.
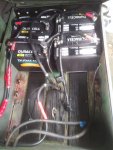 The mostly-finished battery setup
This battery redesign was done to minimize first costs while allowing expansion later to support more battery capacity. The batteries have to be quite strong to withstand the cold cranking requirements, which could be as high as 2000 amps at 24 volts DC. There's room to add up to 4 additional batteries as required, and the best part is that they only cost $60 each from Sam's Club.
Note that the slave receptacle is not hooked up, because I didn't measure correctly and the cables are too short. It's not required. Also note that the positive side of the ABS link wire is not connected here. I fixed that later by extending it and adding a new ring terminal so it would reach.
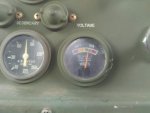 Voltage indicator bang on the right place
The old batteries were having a hard time maintaining their charge, and the voltage was constantly reading lower than it should have been, not to mention the occasional lack of cranking power to start the truck.
And that's it! Hope that helps someone in the future. Check out the imgur album for about 7 additional pictures of the process, nothing major but still useful. Cheers!
For those that would prefer to scroll through an Imgur album, click this link: http://imgur.com/a/GDJ7x (It also has more pictures - no 20 pics per post limit!)
OK, let's get started! This project is for an M923A2, which had a non-stock/non-military battery setup to begin with when it was purchased. The "6TL" military batteries that were originally specified would cost $250 each, and we need 4 of them. So I decided to use civilian "group 24" batteries, which would require a custom battery cable to be built.
 Cheap group 24 batteries from Sam's Club
First thing to do after buying the batteries is to charge them. This took several hours per battery. These batteries are the cheapest group 24 batteries that I could find from anywhere - although they say Duracell, they are actually manufactured by East Penn/Deka which is a company that makes a huge number of other battery brands and types.
These are "marine" rated batteries, so they have accessory posts as well as the usual SAE posts. You also can't get inside to refill them as easily. They are rated for 550 CCA and 90 minutes RC, and cost $60 each plus tax and core charge. (Core charge gets refunded when you bring back old batteries with your receipt.)
 The new terminals from Del City
These things cost a fortune. The items you see in this picture alone rang up to $100. Here's the parts list:
918173 Pure Copper RoHS Battery Terminal, Straight, 2/0 ga, Neg. (Qty. 5) ($4.15 ea.)
918174 Pure Copper RoHS Battery Terminal, Straight, 2/0 ga, Pos. (Qty. 5) ($4.15 ea.)
918473 Pure Copper RoHS Battery Terminal, Flag, 2/0, Neg. (Qty. 3) ($7.25 ea.)
918474 Pure Copper RoHS Battery Terminal, Flag, 2/0, Pos. (Qty. 3) ($7.25 ea.)
237080 Copper Compression Splice, Orange, 3/0 Ga (2/0 ga stranded) (Qty. 2) ($8.67 ea.)
For future projects, I would not get the straight terminals again, but rather the elbow terminals which would make the connections nicer and cleaner. See below for a part number.
 The wire and shrink tubing
The shrink tubing protects the crimp connection from corrosion by preventing ingress of moisture and air. When heated, it shrinks down to a tight fit and seals the connection with adhesive. The wire itself is 2/0 AWG battery cable with high-temperature cross-linked insulation that is the best available. (The cable was from another project, which explains the other unrelated parts in this picture)
980845 4-ft. Black Triple Wall Heat Shrink, 2 - 4/0 Ga (Qty. 1) ($22.04 ea)
980835 4-ft. Red Triple Wall Heat Shrink, 2 - 4/0 Ga (Qty. 1) ($22.04 ea)
2/0 AWG SGX from eBay, Qty. approx. 9 FT ($2.15 per foot)
 The tools required
Channellock 911 cable cutters
Lenox utility knife
TEMco TH0005 11-ton hydraulic crimp tool - 6 AWG to 600 MCM - for only $100, this thing is a sweet deal!
Not pictured: RadioShack heat gun for shrinking the tubing (a lighter or torch would work if used carefully)
 Wood for battery box floor
Sorry, I missed taking a few pictures of this part, but it's just some treated 1x6 lumber ripped down to the right size and spray painted with RustOleum black paint to help reduce swelling from moisture.
Also pictured is the East Penn battery corrosion cleaner and corrosion preventer sprays that will be used to clean up old battery corrosion and prevent issues in the future.
 First terminal crimped and heat-shrunk
This is a 24-volt battery system, so these batteries are in series-parallel pairs. Each pair requires a link between battery 1's negative terminal and battery 2's positive terminal. This picture shows one end of one of these links after the hydraulic crimping step and the application of protective shrink tubing.
 4 links finished
Inevitably, I forgot a piece of shrink tubing on one of these. It will be wrapped in 3M Super 88 as the next best alternative.
 Paralleling link completed
The "T" shaped flag terminals are ideal for this arrangement. In future, I would use elbow terminals at the end, to prevent the weird bend that you see. Part number:
918374 Pure Copper RoHS Battery Terminal, Left Elbow, 2/0, Pos. (Qty. 1) ($5.28 ea)
 Close-up of a finished crimp
After 11 tons of crimping force with a No. 70 die, the battery cable is securely clamped and and will never come loose. Soldering is not required when a terminal is properly crimped, and soldered terminals can melt apart if they are heated too much.
 A finished flag terminal
A flag terminal from the negative link cable after crimping and application of heat-shrink tubing.
 Battery cables finished
The finished cables after crimping and heat-shrinking. Note the application of electrical tape to one of the flag terminals - I forgot another piece of shrink tubing. Someone feed me some memory enhancement pills.
 The old non-stock setup
These are some odd "3ET" type batteries that I've never seen before. Definitely not the original military setup. The terminals are somewhat corroded, but the worst part is that all the connections are made with ring terminals and wing nuts that are rather loose and unable to pass a useful amount of current.
These batteries are rated at 500 CCA and 120 minutes RC each. So they actually are less powerful in terms of CCA than each battery I'm replacing them with, and only 30 minutes greater reserve capacity. Because of the odd shape, there's no way that a bunch of these could be easily fit into this box, so I effectively get a greater CCA and greater RC per unit of volume taken up in the box by using the group 24 batteries.
 Removed old batteries
After removing the old batteries, I sprayed terminal cleaner on all the crusty corrosion from leaking acid around the box. You can see all the rust and corrosion being washed away. After this, I rinsed with water and vacuumed the sludge out with a wet-dry vac.
 Installing the floorboards
I ran out of spray paint for the insides of the drilled holes, so hopefully there won't be too much swelling or other issues from the wood not being sealed. The holes are there to accommodate the various bolts and fasteners in the box.
 Attaching to the cables from the truck
After cutting off the original ring terminal, I extended the original cable with butt splices, crimped as usual. Unfortunately, the truck actually had smaller wire than what I was using - it said 2/0 on the jacket, but was actually closer to 1/0 in size. This forced me to use a smaller No. 50 die to make the crimp complete, since the butt splice was sized correctly for the 2/0 SGX that I was using for everything else.
 Negative rail attached
In this picture, you can see the short piece of wire that was required to connect the original battery cable from the truck to the new negative paralleling rail that I created with the flag terminals. Note that since we are only installing 4 batteries, there are 2 remaining terminals that can be used to add up to 4 more batteries in pairs.
I wrapped them in plastic and then applied electrical tape so that the adhesive from the electrical tape would not get all over the terminals and gunk them up for when I go to expand the setup in the future.
 Showing expansion capability
You can see where more batteries can be added without issue. Also note the ABS negative wire is now fastened with 1/2" nuts - the second one is a jam nut to prevent vibrations from loosening it up.
 Link cables in place
The positive rail is attached and the pair links are also attached. Notice the medium thickness (probably 8 AWG) wire going to one of the intermediate link terminals - that's the blower fan low speed connection, which just uses 12v from the middle of the battery pair to get low and high speeds.
 The mostly-finished battery setup
This battery redesign was done to minimize first costs while allowing expansion later to support more battery capacity. The batteries have to be quite strong to withstand the cold cranking requirements, which could be as high as 2000 amps at 24 volts DC. There's room to add up to 4 additional batteries as required, and the best part is that they only cost $60 each from Sam's Club.
Note that the slave receptacle is not hooked up, because I didn't measure correctly and the cables are too short. It's not required. Also note that the positive side of the ABS link wire is not connected here. I fixed that later by extending it and adding a new ring terminal so it would reach.
 Voltage indicator bang on the right place
The old batteries were having a hard time maintaining their charge, and the voltage was constantly reading lower than it should have been, not to mention the occasional lack of cranking power to start the truck.
And that's it! Hope that helps someone in the future. Check out the imgur album for about 7 additional pictures of the process, nothing major but still useful. Cheers!


