• Steel Soldiers now has a few new forums, read more about it at: New Munitions Forums!

  • Microsoft MSN, Live, Hotmail, Outlook email users may not be receiving emails. We are working to resolve this issue. Please add support@steelsoldiers.com to your trusted contacts.

002 teardown and rebuild

Jimc

Member
725
1
18
Location
Mullica, nj
thanks and yes your right firefighter. these generators were never finished to this level when they were brand new. they were just assembled and carc paint sprayed on everything. its much nicer when everything is individually painted, powder or ceramic coated. a level of detail can be brought to each part on it. thats not exactly what the military needs. my plan with this set was to not get real involved in it like i did my 003. just go through it and make it nice and presentable but i just cant bring myself to do it. thats just me. i take one thing apart and clean it up nice then i figure since i have that apart i might as well do this piece next to it and so on and so on. i drive myself nuts but if i didnt do everything like that i would be disappointed when i was done. this one here isnt for myself. it will be for sale when im done. its probably not for someone just looking for a generator. more for a collector of nice military vehicles and equipment.
 

Jimc

Member
725
1
18
Location
Mullica, nj
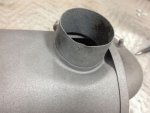
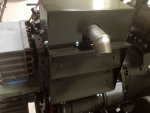
the only real damage to any of the sheetmetal was the airfilter canister.

IMG_1373.JPG

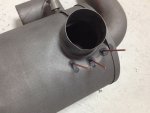
as you can see the intake tube is dented in. normally this wouldnt pose a problem but with that dented down it affects the operation of the slide mechanism for hot and cold running. i needed to pull that back up. i have what is called a stud welder. we use it in autobody to pull dents out. you weld pins to the metal with a gun then you attach a special slide hammer to the pins and you can pull the dent out. its never perfect. it will get it 80% out which in this case is just fine to make it function properly then a light skin of body filler over the area just to smooth things out and its pretty much gone.

IMG_1376.jpg

i forgot to grab a closeup of the painted and finished product but you cant even tell that was ever there.
 

Jimc

Member
725
1
18
Location
Mullica, nj
i did my normal tank cleaning. a bit of lacquer thinner in there, sloshed around to dissolve any varnish. that was dumped out. this tank was is really nice shape inside. not much rust. i poured in a 1/2 gallon of muriatic acid to dissolve the little bit of rust that was in there. tank is rinsed out with fresh water. water is dumped out then a qt of acetone is sloshed around to soak up any of the remaining moisture. acetone is dumped then the tank is blown out with some dry compressed air. basically leaves the tank perfect and brand new inside. cant get pics of the inside so you just gotta take my word for it i guess. the fuel dial was put back on and screws were replaced with stainless ones

IMG_1382.JPG

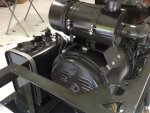
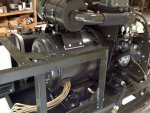
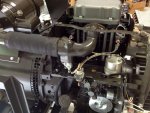
so i have just been reinstalling components. part by part putting everything back together. on this refurb i didnt bother cleaning many of the bolts and hardware. everything is basically new. all nuts, bolts and washers replaced with new gr5, 8 or stainless. i am still waiting on a few things so as far as reassembly i am about as far as i can go until i get the things i need. with this generator just like my 003 the capacitor for the battery charging system was broken as well as the fuse holder. while i am waiting for that stuff and jerry to work his magic with the injectors i will probably start going through the control box and power distribution box. those have been untouched up to this point. here are some current pics.

IMG_1388.JPGIMG_1386.jpgIMG_1385.jpgIMG_1384.JPGIMG_1383.JPG

in the first pic you can kinda see the air filter canister
 
Last edited:

ETN550

New member
457
9
0
Location
Knoxville, TN
Very nice work. Thanks for sharing. The glossy paint makes it look real nice when it is applied on the smooth surfaces. It's a nice change from the ultra flat mil paint.
 

Jimc

Member
725
1
18
Location
Mullica, nj
Yes its not a high gloss. Its flattened quite bit but i did want a sight sheen to it. Looks a little nicer and easier to clean. Wont trap dirt. I have ben out o town for a few days. Ill get back on this when i get back
 

Jimc

Member
725
1
18
Location
Mullica, nj
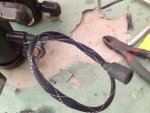
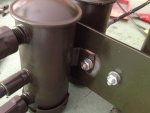
ok im back now so i'll give a little update. i havent had much time the past week or so to work on this. an hour here and there so progress has been slow. when i refurb these i like to get rid of the noise suppressors on the fuel pumps. its just something else to fail and isnt needed. i removed the weaved ground sheath over the fuel pump wire and soldered the factory connector back on then heatshrinked the connecton and put flex sleeving over the wire. once that was all done to 3 pumps i mounted them back on the bracket. these pumps ground through the case so i make sure i grind the paint away from all the mounting flanges and put a "star" type lock washer between along with using copper based antisieze. the copper stuff is electrically conductive and makes a good connection.

IMG_1389.JPGIMG_1391.JPG

i use the copper antisieze on almost every bolt on the generator when it goes back together and the star washers as well between all major components to insure the grounds are really good and stay
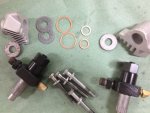
that way for years. i got my injectors back from jerry who did a great job at tuning them up. one was firing at 1100psi and the other at 1500 so he got them all set back to 1750 as they should. over the years i guess they get out of tune. i black ceramic coated the injectors and hold down bracket. as you can see in the pic everything had been glass beaded and cleaned up with all new gaskets.

IMG_1433.jpg

all assembled and installed
IMG_1434.JPG

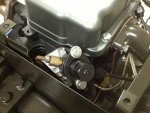
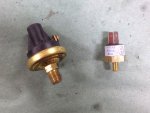
and finally i always replace the high temp cutout and low oil psi sw with brand new ones.

IMG_1436.jpg
 

Jimc

Member
725
1
18
Location
Mullica, nj
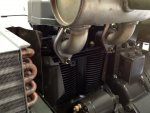
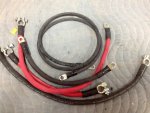
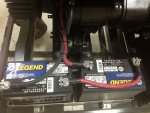
time has been pretty limited lately so i havent got much done on this. since the last post i managed to make up all my battery cables, get them installed and the exhaust louvers back on.

IMG_1442.jpgIMG_1443.JPGIMG_1444.JPGIMG_1445.JPG

when i make my cables i use 1/0 rubber jacket welding cable. its really nice stuff. there is a smaller 2ga ground cable i also run up to the ground stud/split bolt. all the ends are soldered on then a piece of glue lined heat shrink put around the connection. batteries are 51R.
 

Jimc

Member
725
1
18
Location
Mullica, nj
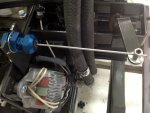
the throttle cable on this set ended up being no good. it actually worked ok but the nuts on it were completely frozen and with a little effort they just stripped out. it seems the 003 and 002 use the same cable even though the 002 is shorter. this makes the factory 002 cable kinda long so i figured if i was going to replace it i might as well go aftermarket and get or make one that fits. the style cables that are on these gens are called "vernier" cables. you can find them all over the net. i got mine shipped from the big auction site for $45. its 10ft length and a solid core unlike the original which is braided cable. its a relatively straight shot with no bends so should work nice and smooth. after searching the real kicker is the cable end. when you buy these things they are just plain cable core and no nuts or threads to hold the end in place. i did some searching and found an aircraft supply house www.aircraftspruce.com. they have all kinds of vernier cables and accessories for them. all their stuff is aircraft/faa approved and of real nice quality. i found this awesome little piece that fits the cable housing end. took a pic with the part # if anyone needs one. the cable i bought has a 3/8 outer casing size so this fits. the also have a smaller 1/4" model to fit the cables they carry. this pieces is split in half and the very end is split in quarters. when you tighten the end it squeezes down on the casing clamping it in place. the other big nut will work and fit in the same location as the factory cable.
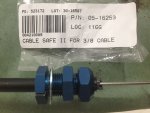
IMG_1449.jpg

now i needed a fitting for the end of the cable. they do carry an end that converts the cable to 10/32 thread then you can thread a fork on it just like the factory cable. to keep cost down on this a bit and to make it simple i went another route and order this from the same place.
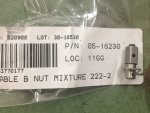
IMG_1447.jpg

this isnt one of the little cheap ends you see on your lawnmower. this thing is really nice. its all hardened steel and machined. only thing i will need to do is take a drill and make the hole slightly bigger on the governor arm on the generator so this b-nut goes in. the blue housing end ran $18.95 and the "b nut" was $7.95. shipping for the order was $7 plus the $45 for the cable shipped to my door. total i got $79 in the whole thing and i got some good well made pieces. here are some pics of the cable i got.
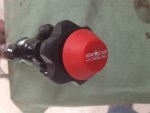
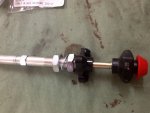
IMG_1451.jpgIMG_1450.jpg

seems like a fairly decent cable. no complaints on it. the ones aircraft spruce carries are probably quite a bit nicer but are $25-35 more. i thought it was prob unnecessary since most of us set the speed on our gens and never touch them after that.
 

Triple Jim

Well-known member
1,373
277
83
Location
North Carolina
Yes, Aircraft Spruce is a great supplier. They have a fuel-resistant grease called EZ-Turn that's made for lubricating fuel valves. It also works great on things like carb bowl gaskets as a non-hardening sealer.
 

Jimc

Member
725
1
18
Location
Mullica, nj
Does anyone have a good used voltmeter to fit the control panel? The one on this gen is shot and i prefer to use an original round style instead of the square aftermatket ones.
 
Last edited:

Jimc

Member
725
1
18
Location
Mullica, nj
got the control cable installed. works great. nice, smooth and the correct length so its a straight shot to the throttle control arm just the way it is on an 003.

IMG_1457.JPG

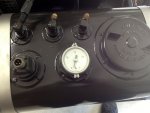
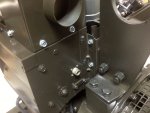
the rest of the time i had today was spent going through and disassembling the control and distribution box. i pulled all the gauges and controls out. not everything there appears to be good except for the volt meter that i mentioned earlier. not sure what im going to do there. if no one here has one avail i guess i can try saturn or delks. i need to see what their price on a good one is first i guess. i found to correct matching simpson gauge brand new, part# 08490 for about $90.

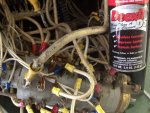
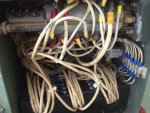
the ac control switch seemed a little tight on this unit and many of the wires were fairly loose. i pulled the switch from box the best i could without disconnecting the massive amount of wires going to that thing. i disassembled the switch enough to be able to separate each layer a little for me to spray some contact cleaner between each one. the cleaner i used is some nice suff. not just solvent, it actually dissolves the corrosion and leaves a protectant behind. i took the end apart with the switching mechanism, springs and detents. i lubed that end all up so it works freely. put everything back together, tightened up all the connections and cleaned all the other components in the dist box.

IMG_1470.jpgIMG_1469.jpg
 

johnray13

Member
121
0
16
Location
Chantilly, Va

Jim- I would bend a 90° on the end of that throttle cable where it attaches to the governor lever just for a little mechanical reassurance that it wouldn't slip out. Or if the cable is to springy to bend, some loctite 242 on the set screw after it was really torqued down tight.


Everything you have done with this 002 looks outstanding. I would say that you have set the gold standard for rebuilding these.
Although I got mine running great, it still looks like a greasy old machine. I really enjoy watching you make these things look new again.

John
 
Last edited:

Jimc

Member
725
1
18
Location
Mullica, nj
Sure no problem. I do enjoy working on these things.

Right now i am waiting on my blast media supplier to get more in.I have the control and dist box still to blast and paint. Once thats all dont i can finish puting this thing back together and get it fired up
 

Munchies

Member
417
3
18
Location
Keesler Air force base/ MS
The AC reconnection switch's love to stick into various positions and then be **** to turn. The only thing I found besides cleaning/ replacement is to whack the back of the control box DIRECTLY behind the reconnection switch assembly. Works ok if you just need to switch it into one position and leave it for a long time/ forever.
 

Jimc

Member
725
1
18
Location
Mullica, nj
ok finally after waiting 2 1/2 weeks my blasting media came in. progress basically came to a standstill because i had gone as far as i could go and i needed the control and distribution box painted. couldn't do that without blasting the junky carc paint off. i blasted the last of the parts clean, got them in the booth, epoxy primed and painted them. here is a pic before paint.

IMG_1498.JPG

tomorrow everything will be cured and i can get rolling on this again. once i mount this stuff i just have to hook in the harnesses, mount all the electronics back into the control box, double check injection timing and ill be good to fire it up. i needed a new voltage gauge as the one that was in this unit was some off brand and was no good. i sent and email to delks and they had good working used ones for $75 which i didnt think was too terrible BUT newark had brand new ones in stock for $90. simpson #08490. so do i spend the extra $15 and get new or save a few bucks and get a 20-30 year old gauge. kinda a no brainer. i have a new one on the way from newark.
 
Top
AdBlock Detected

We get it, advertisements are annoying!

Sure, ad-blocking software does a great job at blocking ads, but it also blocks useful features of our website like our supporting vendors. Their ads help keep Steel Soldiers going. Please consider disabling your ad blockers for the site. Thanks!

I've Disabled AdBlock
No Thanks