• Steel Soldiers now has a few new forums, read more about it at: New Munitions Forums!

  • Microsoft MSN, Live, Hotmail, Outlook email users may not be receiving emails. We are working to resolve this issue. Please add support@steelsoldiers.com to your trusted contacts.

M1009 Heavy Maintenance Visit

Mg84648

Member
201
6
18
Location
Cumming, Ga
Hey folks! First off I would like to thank everyone on this site for making my initial foray into prior service vehicle ownership and easy and enjoyable one. The wealth of knowledge on this site is absolutely phenomenal!

Second, I will tell you about myself and my reasons behind purchasing this vehicle. I spent 6 years in the Army as a Chinook helicopter Crew Chief and Flight Engineer and it was possibly the best time in my life.
I left the Army for greener pastures in 2000 to pursue a career in the airline industry, obviously not as glamorous as hanging out the door of a -47 doing low level N.O.E flying but the money was good I guess. Anyway, started a family and moved to Atlanta and immediately started working midnight shift. I guess I'd been going that for 14 years and felt like I was in a rut. Until suddenly I found an organization called the Army Aviation Heritage Foundation flying out of Tara Field in Hampton GA. For you guys not familiar with the south side of Atlanta its right next to the Atlanta Motor Speedway. Anyhow, I began volunteering there a few times a month especially when the winter maintenance schedule ramped up. It brought me back to my roots sort to speak. Working on old AH-1F Cobras and UH-1H Hueys was a privilege but it got me thinking "why cant I do something like this?" This is where the M1009 comes into play.

Volunteering at the Foundation is extremely rewarding but unfortunately their schedule doesn't align well with a guy who has been on rotating midnight shifts for 14 years! And also because there is no way the wife would ever let me rebuild and overhaul a CH-47D in the garage, I needed something smaller I could tinker with here at home. I began looking for HMMWV's but those are super expensive if you can find them. That's when a co-worker suggested M1009.
I found one on craigslist and bought it.

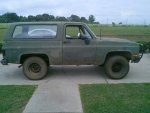
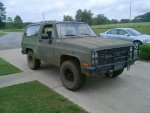
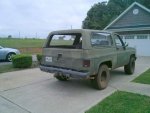
Lastly, the 1984 M1009 CUCV with 67k on the odometer.
The truck runs and drives strong. It has little "visible corrosion" I'll get into that later! And it has for the most part not been "bubba'd". The rear lift gate window and both roll-up windows were broken. The seats where heavily soiled and the Army had used a fiber glass patch to cover some floor pan rot(more on that later). The bed, lower doors and rocker panels are all free of rot but there are several areas near the door and foot wells that need attention. The exterior is dent free and motor is clean and 24v system is intact.
Essentially the vehicle looks good for 30 years old.

I've included some pics and would like to make this a build thread so mods please do not send this to the introduction section:)

More to come later,,,,,,,
 

Attachments

Last edited:
Warthog

Moderator
Super Moderator
Steel Soldiers Supporter
13,774
232
63
Location
OKC, OK
Welcome to the Steel Soldiers Looney Bin. Sit back, bucket up and enjoy the ride.

If you can handle a Chinook, you can handle the M1009. The 12v/24v system takes a minute or two to understand.
 

Mg84648

Member
201
6
18
Location
Cumming, Ga
Thanks for the welcome fella's. The build is actually well underway so I'll be updating the thread frequently in the coming days. The floor pans have already been purchased and delivered from RockAuto. I should be getting to that next week:-D
 

Mg84648

Member
201
6
18
Location
Cumming, Ga
It was an Honor CARNAC, thank you as well!

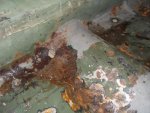
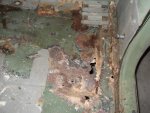
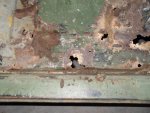
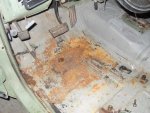
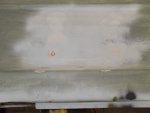
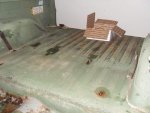
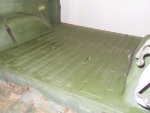
Ok, so lets get started. The first thing I did to the truck once I got it home was remove the topper, lift gate and doors to facilitate pressure washing. It had been a mud truck for the last year so it was caked with sand and Georgia red clay. I also removed the seats so I could gain access to the entire floor pan area and remove the vinyl floor covering and fiber glass repair area installed by the boys in green.

This is what I found
 

Attachments

Last edited:
Mg84648

Member
201
6
18
Location
Cumming, Ga
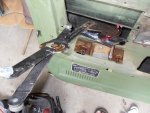
Now of course the pictures above look dismal for sure but most of it is surface corrosion and only 6 areas of rot will require cutting and patching. The largest of which measures 12 inches by 24 inches if I include the 3 areas in picture 3 in one repair. The 3 floor pan sections I received from RockAuto will be enough materiel for me to remove and repair as needed.

The vinyl covering was the worst thing the Army ever did to this vehicle. It only served to trap water and encourage corrosion. The fiber glass repair on the other hand actually seemed to do a good job of keeping water out and preventing further damage. Not that I would ever recommend that type of repair but just a interesting observation I made.

The next few posts will revolve around the overhaul of the doors and lift gate. Stay tuned:-D
 
Last edited:
Recovry4x4

LLM/Member 785
Super Moderator
Steel Soldiers Supporter
34,012
1,808
113
Location
GA Mountains
Welcome to Steel Soldiers and congrats on rescuing the retiree. Should be a fun ride.
 

ODFever

Madness Takes Its Toll...
Steel Soldiers Supporter
2,011
73
48
Location
Orlando, FL
Welcome to the Green Iron Laughing Academy! :jumpin::cookoo:[thumbzup] You have joined a prestigious (in my opinion) community of fellow OD addicts. You've already contracted a serious case of OD Fever, and I regret to say that there is no cure and no 12 step program. There is no end to how many pieces of linen stamped with the faces of dead presidents that this illness can consume. aua

I am so sorry to see all of the cancer your CUCV has. :-( You have a great project on your hands, and I get the impression you're not afraid of a little cutting, grinding, and welding. Keep us up to date with your progress!
 

Mg84648

Member
201
6
18
Location
Cumming, Ga
Thanks for the warm welcome Gents,

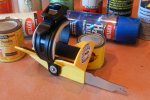
Ok so this afternoon we have a 90% completed liftgate. The first thing was to patch the license plate screw holes on the exterior. That was just a typical Bondo repair, sanded down and sprayed with Rust-Oleum filler primer and sanded again to remove any surface imperfections. Now I should have prefaced this section with the fact that I do not claim to be a "Body" guy so some of my techniques or consumables I use may be off, so feel free to add suggestions for sure!

Next was a new back glass which was broken and stowed away in the bottom of the tail gate. I acquired it from a gentleman in Carrollton. Fortunately it came with the sash still intact and in relatively good shape. I removed any loose corrosion and applied Rust-Oleum rust converter and a bead of 3M Windo-Weld urethane on each side of the glass/sash seem to seal out and reinforce the two. The 3M product is pretty impressive stuff, I was skeptical at first but it proved to do an excellent job of matting glass to metal.

Next I installed the window, new interior and exterior scraper seals purchased from LMC and painted the plastic window guides flat black. Lubed the regulator and gave the interior a coat of Rapco 383. I can see the issue some have with these cans but all I can say is shake them. Shake them before you start, shake them during spraying, shake them after spraying, shake them in the middle of the night when you cant sleep,,,,,,, whatever you do just shake them!

Next was a new tail gate seal from LMC and here is the finished product minus exterior color and new screws for the regulator cover.
 

Attachments

Warthog

Moderator
Super Moderator
Steel Soldiers Supporter
13,774
232
63
Location
OKC, OK
To help with the shaking of the paint cans, use a sawzall. Attach the can to a long blade (tape, strap, clamp, etc) and have at it for a few minutes. A few companies even sell a shaker attchment

sawzall.jpgmixkwik.png
 

Mg84648

Member
201
6
18
Location
Cumming, Ga
Ok, so this morning I have a short update. The bed was in really good shape so it was an easy item to knock out.
There was surface corrosion on the raised ribs of the bed from sliding cargo in and out. That was sanded to bare metal, treated and primed. The original jack stowage placards on the right of the bed were masked and two coats of Rapco 363 put down.

So far that makes everything aft aft the cab good to go with the exception of a blackout light which needs replacing.
The second pic was after the last coat so its wet. The finish evened out after drying.
 

Attachments

Last edited:
Ackevor

Member
107
-1
16
Location
Fairview, PA
Im liking the work and the updates. Keep em coming!! I should probably start a similar thread with all the work ill be doing on my 08
 

Mg84648

Member
201
6
18
Location
Cumming, Ga
Thanks man. Ive actually had the vehicle for a month so these updates are sort of retroactive. As a matter of fact today i had to disassemble my completed driver side door to replace a window regulator that was bugging me. Ill post pics in the AM.
Im liking the work and the updates. Keep em coming!! I should probably start a similar thread with all the work ill be doing on my 08
 

Mg84648

Member
201
6
18
Location
Cumming, Ga
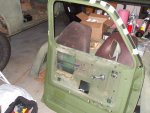
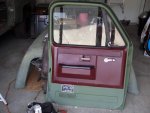
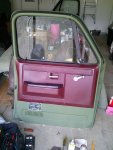
So today we have a completed driver side door. I originally finished the door last week only to take it apart last night to replace a window regulator which my OCD would NOT let go:???:

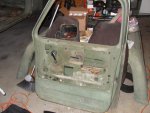
First off I stripped the door of its main components, door panel, vent window etc so I could change all the rubber. The biggest challenge was the vent wondow seal. Removing it was no problem but installing intact (with out cutting it) it was going to be a problem. I drilled out the rivets holding the window frame to the H channel and sepperated the two because it was going to be near impossible to get the top of the seal far enough up into the V. I used some dawn dish soap to lube up the seal and wedged it into place. I did have to make two cuts to properly seat the seal. One at the bottom window pivot point and one at the top window pivot. The seal was fitted and the cuts sealed with black RTV.
I then cleco'd the parts back in place and stepped up the 1/8 in holes to 3/16 and pop riveted them back together.

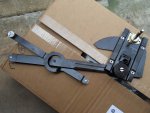
Next was the installation of the window. Since both my driver side and pax windows were broken I acquired them at two local junk yards. I removed the window sash and chiseled out the remaining filler, adhesive and glass chips. I then filled the sash channel with 3M Glass-Weld urethane and seated the glass. This stuff is really good, when its originally applied it has the consistency of room temperature caramel so its pretty hard to run a small bead so cut your nozzle extra wide. When it sets up its solid but flexible sort of like an eraser type feel.

I then put down two coats of Rapco 363 on the perimeter of the door interior. The regulator was replaced, window inserted into door. The vent window assembly installed and then the exterior window sweep installed. I recommend installing the window sweeps last since it gives you extra wiggle room to install the window glass.

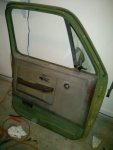
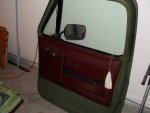
The door liner was next. It had 30 years of sun damage and had faded to a light gray. I could see that the back side was the standard burgundy color so I went to Summit Racing down here in McDonough and got two cans of SEM Burgundy vinyl and plastic dye. I sanded the existing scratches and scuffs and cleaned with acetone. I put down a light first coat of the SEM dye then followed with heavier applications till satisfied.

I popped on the door liner and cleaned the window and here is the finished product.
 

Attachments

Last edited:
Top
AdBlock Detected

We get it, advertisements are annoying!

Sure, ad-blocking software does a great job at blocking ads, but it also blocks useful features of our website like our supporting vendors. Their ads help keep Steel Soldiers going. Please consider disabling your ad blockers for the site. Thanks!

I've Disabled AdBlock
No Thanks