• Steel Soldiers now has a few new forums, read more about it at: New Munitions Forums!

  • Microsoft MSN, Live, Hotmail, Outlook email users may not be receiving emails. We are working to resolve this issue. Please add support@steelsoldiers.com to your trusted contacts.

riggermedic's M1009

riggermedic

Active member
175
31
28
Location
Phoenix AZ
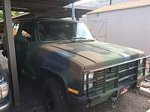
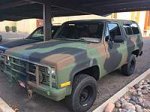
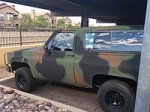
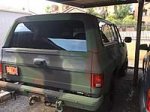
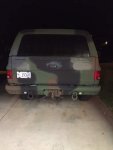
Hello all, in June 2015 I bought a 1986 M1009 with 65k miles. As far as I can tell it is in close to perfect original condition. There are no screw holes, repairs, welds, and very minimal rust.
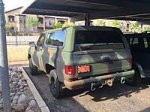
cucv6.jpgcucv4.jpgcucv3.jpgcucv2.jpgcucv1.jpg
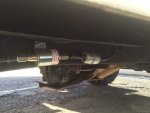
The guy before me just had a lot of work done including 5 new tires, a new steering gear box, tinted windows (a must in AZ), slide back rear windows, an electric fuel pump, and removed the stock fuel filter, but replaced it with a tiny one along the frame rail.
IMG_0045.jpgIMG_00010.jpg
The concerns I had was the lack of a real fuel filter, that strange wire just hanging out above where the fuel filter was, and the rear pinion seal was leaking.
I found all the info I needed and a bit of a debate on how to change the pinion seal, I opted to do the thread counting nut marking method. 3k miles later and no issues. First repair done (sorry no pics).:cry:
The last owner replaced the ignition key, but not the rest and the passenger door lock was broken, so once again I consulted the forum found many pics and readable instructions on how to change the lock cylinders, I did all four and in the process of changing the rear window crank lock discovered that the previous owner had recently replaced the entire guts to the back window. SCORE (sorry no pics).:cry:
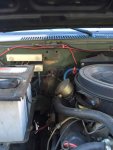
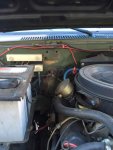
a little bit of searching and I found more info on the 24 to 12 volt resistor bypass that was apparently done. no worries about a dangling red wire (to be removed at my convenience)
Coming soon: tiny tach, spin on fuel filter, back up lights, front grill light bar, new battery cables, and a super duper special ammo can center console with enclosed stereo, scanner, and SSB CB with all detachable bulkhead connectors, inverter, and roof rack eventually.:-D
 

riggermedic

Active member
175
31
28
Location
Phoenix AZ
Tiny Tach

I did a tiny tach install and the doghead relay modification at the same time. The doghead relay was simple and had nice pics in the CUCV sticky notes.
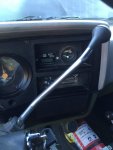
The tiny tach was also very easy, 2 wires to the engine thru the speedometer cable grommet, and another power and ground to the fuse panel. On the CUCV sticky notes it shows the fuse panel with the add on slots for spade terminals for the positive connection.
If you mount this where I did it is a tight fit. In other write-ups for the tiny tach, I don’t recall anybody mentioning the semicircular piece of metal spot welded behind the 24 volt gauge. This needs to be ground off. The power supply wires will not reach the fuse panel from this mount site and will need to be extended.
IMG_0010.jpg
Everything was going perfect until it came time to re-assemble the dash. I didn’t know which light was the wait light and which the water in fuel light was. I had the brilliant idea to reconnect the battery cables and turn on the ignition to identify the wait light so I could then plug it into the proper place… anyone see where this is going? If not FYI the 24 volt power gauge has a stud in back that is always powered. The plastic dash cover fits into a grounded metal dash. Needless to say there was some 24 volt welding going on. Back to the sticky notes to find the fuse that I blew (10 amp on the bottom center of the panel). I got it all reassembled and everything works great. The only question I had was when I started the truck it took a solid 2 seconds for the 24 volt gauge to start reading again. Since then it reads fine. After this mod I upgraded from a blackberry to an I-phone so moving forward I will have lots of pics.:-D
 

riggermedic

Active member
175
31
28
Location
Phoenix AZ
Spin on fuel filter

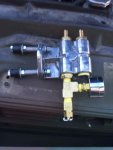
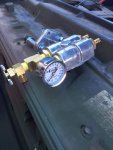
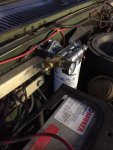
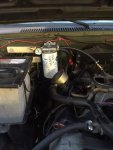
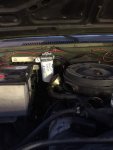
I read probably 15 threads on this subject and pretty much copied one design, I forget whose it was. I did however learn from all that reading that there is such a thing as fuel grade Teflon tape and how to wind it in the direction of tightening (am I saying that right) My M1009 was missing the fuel filter bracket and I noticed in many other pics the 2 top holes that people were using, but mine were just holes, no inner nuts. I went to ACE hardware and started fitting pieces together.
IMG_00010.jpg
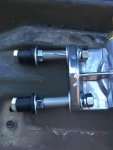
It started with the rubber nutcerts, I’m not sure if that is the proper name. I am familiar with them as they are used on the humvee’s for the soft top bows to connect to the a, b, and c pillar. I ended up feeding a 3” long bolt thru the nutcert backward then a washer and a nut to expand the nutcert. Then the spacer as the other posts recommended and finally washer and nut for the filter base.
All the brass fittings were just fitted at the store and really kinda pricy. The person that removed the old fuel filter had a blue hose bypassing it and already did the labor of changing the ½ inch fitting to 3/8 inch. For those that don’t know the line coming from the mechanical fuel pump and into the fuel filter is 3/8. The line coming out and going to the injector pump is ½ inch. I have 3/8 in, 3/8 out then downsize to ½ behind the air filter.
IMG_0013.jpgIMG_0011.jpgIMG_0012.jpg
It all looked great until I compared it to the holes I was planning on mounting it to. First they were too small for my chosen size of nutcert, second they were too wide apart. In the process of making bigger holes (by 2 or 3 steps of a step drill) the inner distance closed a bit and the base fit in nicely.
Things I learned: orient the hose clamps first, notice the rear hose clamp is facing backward? New fuel line on new barbs is easy to slide on and near impossible to pull back off.
IMG_0017.jpg
Match your filter to the base. On the forum there are 2 similar bases, one with 1 input and 1 output which takes a 1-12 thread and the one I got that takes 1-14 thread, saves a trip to Napa.
IMG_0014.jpgIMG_0016.jpg
When I was done I had thought that the extra electric fuel pump would do all my priming to and thru the filter for me, but this was not so. Does the mechanical pump not allow fuel thru it?
Once again a quick search for priming instructions, pulled the pink wire on the injector pump, had a friend crank while I opened the petcock, bled all the air out, plugged the pink back in and she started right up
 

riggermedic

Active member
175
31
28
Location
Phoenix AZ
Rear white light/ accessory reverse lights

I searched the forum for this and mostly found posts about deuce and 5 tons adding back up lights. Kind of surprised me that there wasn’t much stuff about adding additional back up lights.
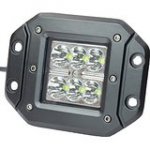
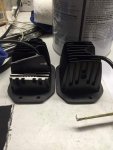
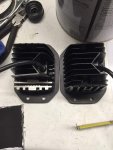
I have been wanting to do this for a while but I don’t have a roof rack to add them to and I didn’t want to mount below the bumper for clearance issues so I found flush mount LED lights. I think they are fit to a Toyota Tacoma to replace the front fog lights.
51W-sE83uRL._AC_UL160_SR160,160_.jpg
Other than the tiny tach install I have not cut or done any permanent damage to my 1009 so this was kind of a big decision for me as this truck is in such great original condition.
They require a 3x3.5 inch square cut out and did not come with a template. They need 3 inches of backspace so I measured from the top and back. It appeared that they would just fit and the lateral side of the light would not interfere with outer bumper mount.
IMG_0018.jpgIMG_0037.jpgIMG_0038.jpgIMG_0028.jpg
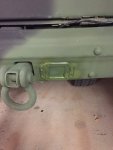
After cutting a square chunk out of my bumper imagine my dismay to realize the angled outer bumper mount has less backspace the lower you go. The lights wouldn’t fit and now I had an ugly gaping hole in my bumper.
IMG_0029.jpg
So it was on to Plan B… cut part of the heat sink on the light to fit. This worked out surprisingly well. I have not wired them up yet, but will do so with 2 relays and an accessory switch on the dash so they will come on with either that switch or when I put it in reverse.
IMG_0035.jpgIMG_0036.jpgIMG_0040.jpgIMG_0042.jpg
 

riggermedic

Active member
175
31
28
Location
Phoenix AZ
AZ Registration

When I bought my M1009 and took it to get registered the MVD here in Phoenix AZ said I needed an emissions test and said I could only register it for one year as I would need annual emissions. The other option would be to get collectors insurance which would make it no emissions needed.:-(
I went to the emissions place and guy number 1 looked under the hood and did a double take, then called over guy number 2 who expertly pointed to something under the hood, then cocked his head sideways and looked really confused. He came back to me and said “you don’t have any emissions equipment in your truck” I wasn’t sure if it was a question or an accusation. I informed him it was a military truck and that is how they came. By this time person number 3 came over and looked at the undercarriage with a mirror and had a huddle. They brought out some contraption that looked like 2 dinner plates spaced about a foot apart and attached to a broomstick. Person 1 started it up and proceeded to floor it. I have no idea how fast they got it up to but I thought the engine was going to explode. The dinner plate contraption was placed near the exhaust and apparently measures how opaque the exhaust is. They did this for both sides and handed me a slip saying I passed. The reading was 19.2 and the allowable limit was "---"
:lost:
I really was not looking forward to doing this every year. A week ago I checked my e-mail junk and found a notice from the MVD stating my registration was due to expire March 15[SUP]th[/SUP] and that I could renew online. AZ actually has a pretty good system online. On this same notice it said “No Emissions Needed” and did I want to register for 1, 2, or 5 years. $190 later I got my sticker stating MAR 2021.HAHA no take backs. rofl
$125 of the $190 was for 5 years of the veteran plate so that comes to $13 bucks a year for tax and registration [thumbzup]
 
Last edited:

MarcusOReallyus

Well-known member
4,524
816
113
Location
Virginia
I searched the forum for this and mostly found posts about deuce and 5 tons adding back up lights. Kind of surprised me that there wasn’t much stuff about adding additional back up lights.
I have been wanting to do this for a while but I don’t have a roof rack to add them to and I didn’t want to mount below the bumper for clearance issues so I found flush mount LED lights. I think they are fit to a Toyota Tacoma to replace the front fog lights.

Very nice! [thumbzup]


Where did you find those beasties?
 

nyoffroad

Well-known member
942
690
93
Location
Rochester NY
Nice looking truck. In the 1st post with all the pics it looks like the electric fuel pump is mounted before the inline filter, the filter (or a filter) should be UPSTREAM of the pump. You could just add another in their or just move the one you have, wouldn't hurt to tie it down either. Other than that I can't come up with anything else to nit-pic!
 

riggermedic

Active member
175
31
28
Location
Phoenix AZ
the fuel filter comes before the pump, the PO had this done. the rubber line does a 180 in the frame rail, goes rearward thru the filter then pump then does another 180 and reconnects forward. the truck still has the mechanical pump too. the PO said it was dogging down so he had the "extra" pump added and had the stock filter removed.
when I tried priming the spin on fuel filter that I added the electric pump wouldn't push fuel thru the mechanical pump, had to pull the pink wire and crank. I'm not sure what the PO was thinking by keeping both, I thought it was a one or the other but not both modification:?:
 

riggermedic

Active member
175
31
28
Location
Phoenix AZ
Lights and Relays

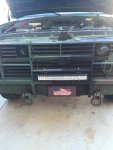
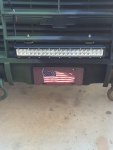
few more pics to add, I mounted a front LED bar, was originally looking for 2 smaller ones to fit left and right, but I only had 11.5 inches of space and the ones I wanted all required 12 or 12.5 inches. I settled on a 20 inch for the center
IMG_0006.jpgIMG_0007.jpg
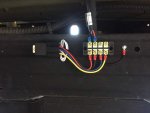
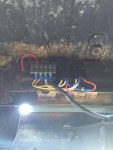
I set up the wiring and relay under the radiator
I just got my dash bracket and plan on hooking up a switch panel to it among many other things, but have not run the power or switch wires yet.
The rear white lights have 2 relays, 1 triggered by the backup lights and a second triggered by a switch. these are mounted in the rear passenger side above the bumper.
IMG_0067.jpgIMG_0068.jpg
pay no attention to the wire colors, they were made in china and I think they are purposely messing with my head. power to turn on the relay is yellow and ground is red:shrugs: power into the switch is black :cookoo:
(85 yellow, 86 red, 87 blue, 87a white, 30 black) aua
once I get the power wires and switches wired I'll clean it all up and update some more pics
 
Top
AdBlock Detected

We get it, advertisements are annoying!

Sure, ad-blocking software does a great job at blocking ads, but it also blocks useful features of our website like our supporting vendors. Their ads help keep Steel Soldiers going. Please consider disabling your ad blockers for the site. Thanks!

I've Disabled AdBlock
No Thanks