• Steel Soldiers now has a few new forums, read more about it at: New Munitions Forums!

  • Microsoft MSN, Live, Hotmail, Outlook email users may not be receiving emails. We are working to resolve this issue. Please add support@steelsoldiers.com to your trusted contacts.

Another Aussie goat rescued

Aussiecowboy

Member
163
4
18
Location
Echuca VIC, Australia
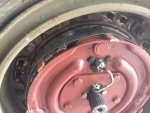
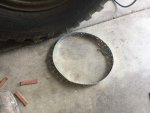
Well, progress at last. I found some proper silicone brake fluid and bought half a gallon, after a week or so recovering from the shock of the price, I set about getting the brakes working. I didn't like the idea of trying to bleed them through the hole in the drum so I welded up some rings out of builders strapping and slipped them over the shoes, then used some small timbers to pack them up a bit. This allowed the brakes to be bled and tested without drums installed. Bleeding went much better than expected but with the drums back on it has a bit more pedal travel than I was expecting, goes between half and two thirds of the way down before going really firm, is this normal?

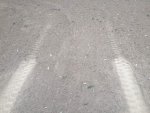
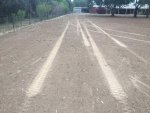
As a preliminary test I got up to about 15 or 20mph on some really soft dusty ground, braked hard and examined the marks on the ground. It showed the front axle not doing much, the middle locking up and the rear somewhere in between, I get the feeling it will take a while to get all 6 brakes adjusted well. Point is though, I have functional brakes, a big milestone.

New transfer case is still on the way, US Customs inspected the container and decided I was exporting important military hardware, the shipment was delayed by 3 weeks while it was sorted out, should be here soon though. Next on the list, sorting out the earth faults that are making the back lights act strange.
 

Attachments

m38inmaine

Well-known member
Steel Soldiers Supporter
2,118
67
48
Location
Maine USA
I had the same experience when I bled my brakes. I strapped them like you did to do the initial bleeding, I wanted to see if anything was leaking before I put the drum on. I then put the drum on, adjusted the brake shoes, then re bled them through the hole in the drum. I used a Craftsman socket set call maxacess, the sockets, extension and ratchet are all hollow so you can run your bleed hose right out through to your recovery jar, start with the wheel furthest away from the master cylinder and work your way to the closest one. Adjusting the shoes will take a few tries to get them all even, good job.
 

Another Ahab

Well-known member
17,999
4,556
113
Location
Alexandria, VA
I had the same experience when I bled my brakes. I strapped them like you did to do the initial bleeding, I wanted to see if anything was leaking before I put the drum on. I then put the drum on, adjusted the brake shoes, then re bled them through the hole in the drum. I used a Craftsman socket set call maxacess, the sockets, extension and ratchet are all hollow so you can run your bleed hose right out through to your recovery jar, start with the wheel furthest away from the master cylinder and work your way to the closest one. Adjusting the shoes will take a few tries to get them all even, good job.
That's pretty slick.

I kind of gave up on Craftsman a long time ago (the quality all went south), but they do have a few tools still that you just can't find anywhere else.
 
150
12
18
Location
BNE, Oz
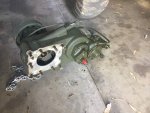
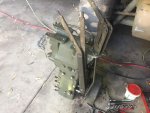
That looks suspiciously like a transfer case... Any markings on it, wouldn't mind doing a bit of a hunt to see if I can work out who made them and what model. In case I need to rebuild mine.....
Have heard two stories so far, one that they are English from M series Bedfords, and the other that they are some sort of Allison, which doesn't seem to gel with what I recall of the changes from XM to M series.
 

Aussiecowboy

Member
163
4
18
Location
Echuca VIC, Australia
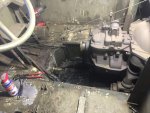
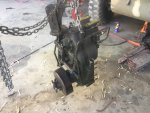
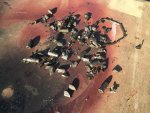
Finally a job on the goat that has turned out considerably easier than planned, so far anyway. From start finish about 3 hours to remove. Now I just need to clean out the half inch or so of crap in bottom of the hull. The new transfer is all dressed and ready to drop in. No wonder the old box is noisy, look what I pulled out of the bottom of it, there is an empty spot somewhere in the box that used to contain a bearing. Getting closer to the road.
 

Attachments

Aussie Bloke

Well-known member
725
373
63
Location
Lost, out bush in OZ
G'day everyone,.....


No wonder the old box is noisy, look what I pulled out of the bottom of it, there is an empty spot somewhere in the box that used to contain a bearing. Getting closer to the road.

Dear God!

That looks like more than a bearing came apart,...
That must have been making more noise than the engine!


Aussie.
 

Aussiecowboy

Member
163
4
18
Location
Echuca VIC, Australia
Strange thing is the transfer drove and functioned perfectly, it was quiet enough under acceleration but under engine brakes it howled like a police siren. As the old transfer is useless now, I'm going to have to tear it to bits just to see how bad it is.
 

combat32

Well-known member
1,639
106
63
Location
Booneville AR.
If you search t-case replacement on gamma goat here, a member here went thru the whole process a few years back with pics. If i recall correctley he used rtv in place of the gasket. But cutting out a paper one should be fairly easy.
 

Aussiecowboy

Member
163
4
18
Location
Echuca VIC, Australia
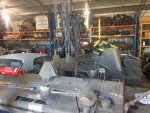
I must have angered the goat gods by saying that everything was going smoothly, the installation didn't so much. Suspended the new box and slotted it into place ok, got the studs started but it just wouldn't slide forward into place, and wasn't hanging up in the spline. I had heeded the advice in the thread m38inmaine posted above and given the holes in the hull a quick file, but obviously not enough. I pulled the box again and drove a spare stud through all the holes with a hammer, dropped the box back in and it slid easily and readily into place. All this took about 4 hours but problems aside I thoroughly enjoyed the job. Just need to add some oil now and test drive, stay tuned......
 
Top